In this post I’ll explain how to set up Google Search Console tools (formerly known as Google Webmaster Tools) for a website. It will be in the form of a step-by-step instructions. Since you are interested in this topic, I suppose you could find another article I wrote useful, one that explains how to do SEO for a website.
1. What is this tool used for?
Just as Google Analytics helps keep track of website statistics, Google Search Console helps keep track of website’s “visibility” to Google (and other search engines). If there are any problems with search engine crawling the website, or indexing some pages – you’ll be notified by this tool – either by e-mail, or within its control panel (or both, depending on how you set it up).
2. Creating a Google Search Console account
Create a Gmail account, or log into one if you have it. Then go to: https://www.google.com/webmasters/.
There you will get to enter your domain (or “property” as Google calls it).
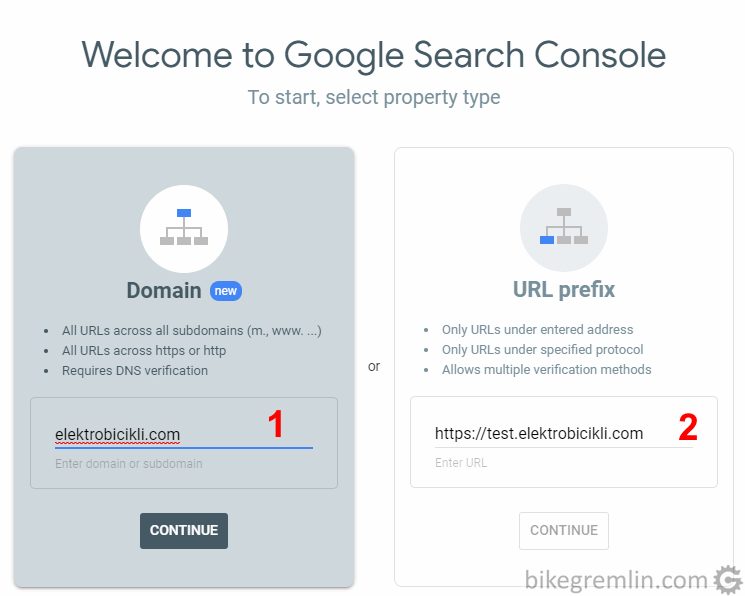
Or a specific URL (2) – such as www.mydomain.com, subdomain.mydomain.com etc.
Picture 1
2.1. Adding the entire domain as a property
For adding the whole domain, elektrobicikli.com in this example, click “CONTINUE” on the left hand side (below the “Domain”). Then you will get verification code that you should copy.
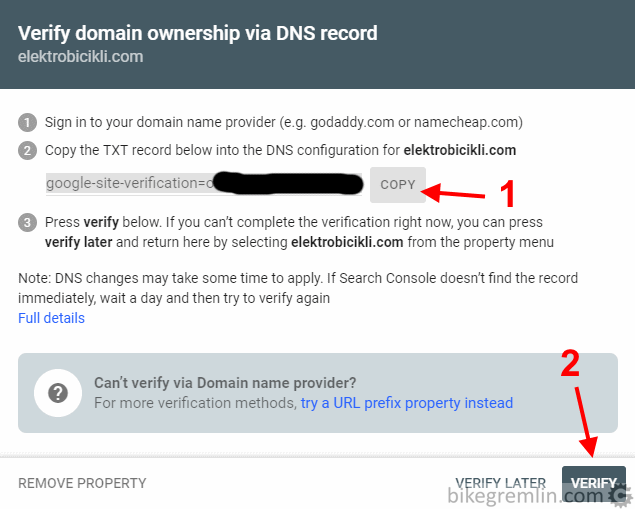
DON’T click “VERIFY” (2) until you finish the steps explained below.
Picture 2
Log into the website’s cPanel and click on “Zone Editor”. If you are using Cloudflare, this is done in its DNS menu, not in cPanel.
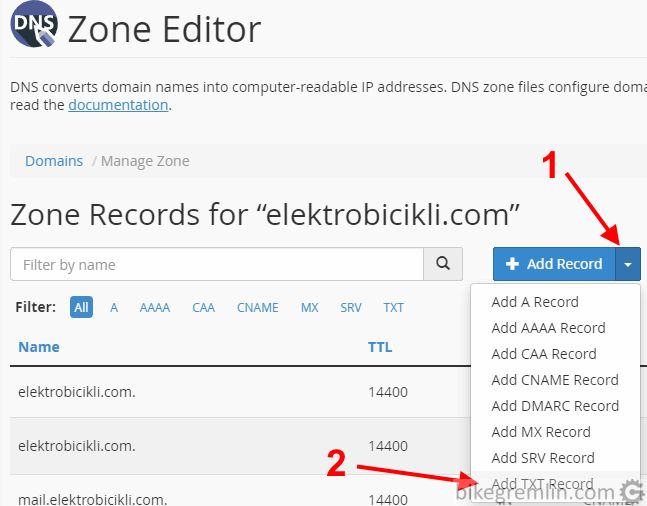
Select “Add TXT Record (2)
Picture 3
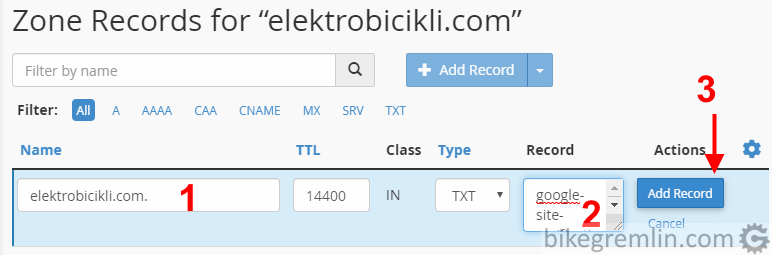
Copy/paste the verification code (2)
Click on “Add Record” (3)
Picture 4
It might take some time for this DNS change to propagate, but once it is done, clicking “VERIFY” – (2) in picture 2 – will give a notification that it’s all OK.
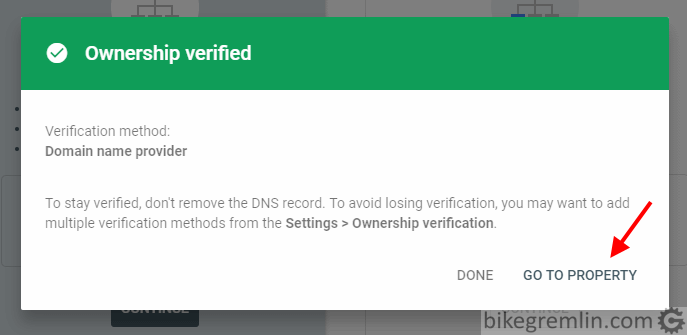
Click “GO TO PROPERTY”
Picture 5
2.2. Adding a particular subdomain as a property
If you want to set a separate tracking for www.my-website.com, and a different one for sub-domain.my-website.com, then choose option (2) in picture 1, or, if you already have a Search Console account with a website, click ” + Add property “.
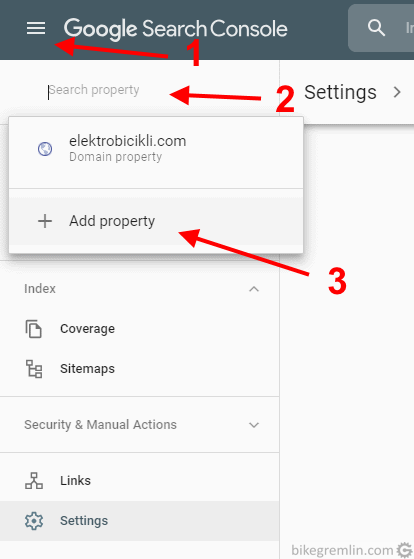
Select drop-down menu for properties (2)
Click “+ Add property” (3)
Picture 6
You will again get the menu as shown in picture 1. But now you should choose the right hand side option (2) in picture 1.
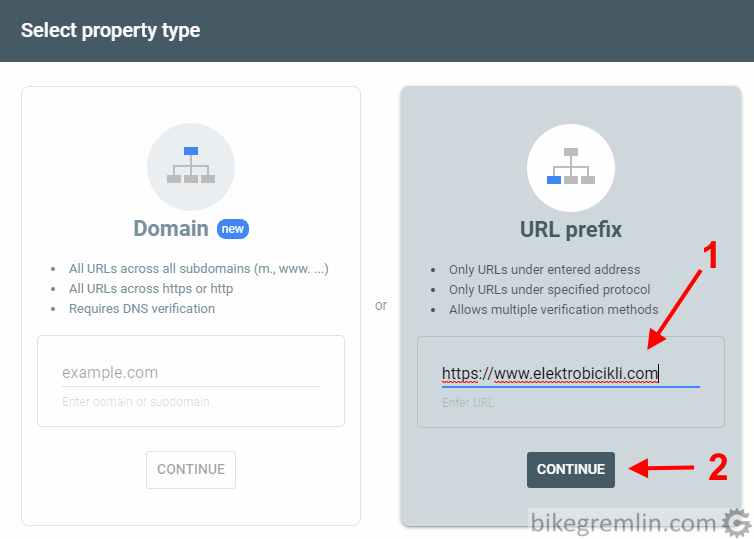
Click “CONTINUE” (2)
Picture 7
In this example we chose www. website version, but it could also have been a subdomain, or a “naked” domain version.
Clicking “CONTINUE” opens a menu for property verification. For this you have several methods available.

Downloading a file and uploading it to your website’s root directory (1)
Adding a DNS record, like explained in chapter 2.1. (2)
AFTER you have implemented the verification code, click “VERIFY” (3)
Picture 8
If you decide to use method (1), the file should be uploaded using FTP to the property’s root directory – usually public_html if it’s the “main” domain.
Method (2) is already explained in chapter 2.1.
Whichever method you opt for, after clicking “VERIFY”, if everything was done correctly, you’ll get a notification like the one shown in picture 5.
3. Conclusion
Google Search Console is a very useful webmaster tool. It allows you to add sitemaps, to request indexing updates for changed, or newly added pages etc. I won’t be explaining how it is used here – though the interface is pretty intuitive, you shouldn’t have any problems.
With one note: adding a sitemap for a newly added website (“property”), or for a newly created website, can sometimes cause problems. Giving a “Couldn’t fetch” error, even if the sitemap file is properly created and accessible. The solution is to just wait, for a few days, up to a week, or two, then try again. It will work.
I wrote about this problem in support.google.com.
Last updated:
Originally published: