In this post I’ll explain, step-by-step, how to set up WordPress to send e-mails using a SMTP server.
1. Introduction
WordPress, by default, sends e-mails using an in-built PHP function. This method is not the most reliable. To use SMTP protocol and server, WordPress needs to be set up for it. Easiest way to do it is using a plugin. For this explanation I’ll use Easy WP SMTP, though the principle is similar for most other plugins. You could of course use child theme and some PHP to configure this “by hand”, with all the pros and cons of such solution.
It is understood that everything from the post E-mail setup in cPanel and DNS has been done and is known. So, the SMTP server information is known for the following items:
- E-mail account username.
- Account password.
- Name and port of the incoming mail server.
- Name and port of the outgoing mail server.
Short reminder, for details see the mentioned post about e-mail setup:
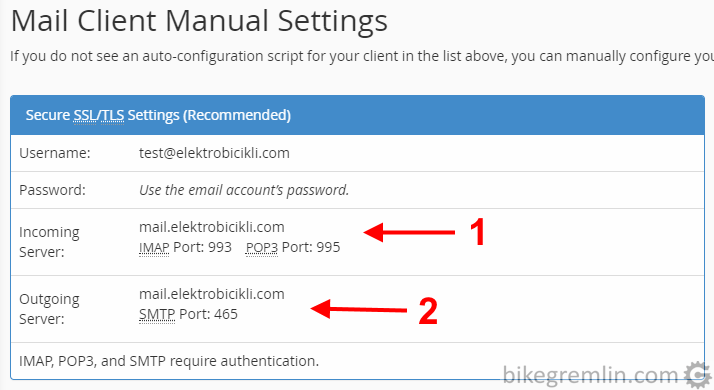
Incoming server name and ports (1)
Outgoing server name and ports (2)
Picture 1
2. Installing SMTP e-mail sending plugin
If SMTP mail sending is implemented using a plugin, it needs to be installed first, of course. From WordPress’s backend, go to “Plugins”, then “Add New”, then search for the plugin of your choice (“Easy WP SMTP” in this example).
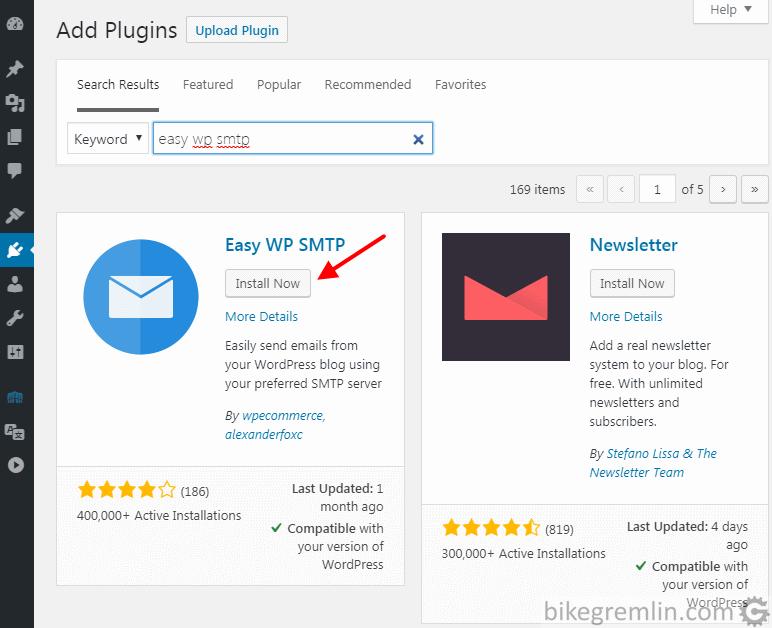
Picture 2
3. Configuring Easy WP SMTP
Go to “Settings” -> “Easy WP SMTP” and set up the fields according to the previously written down info for your SMTP server:
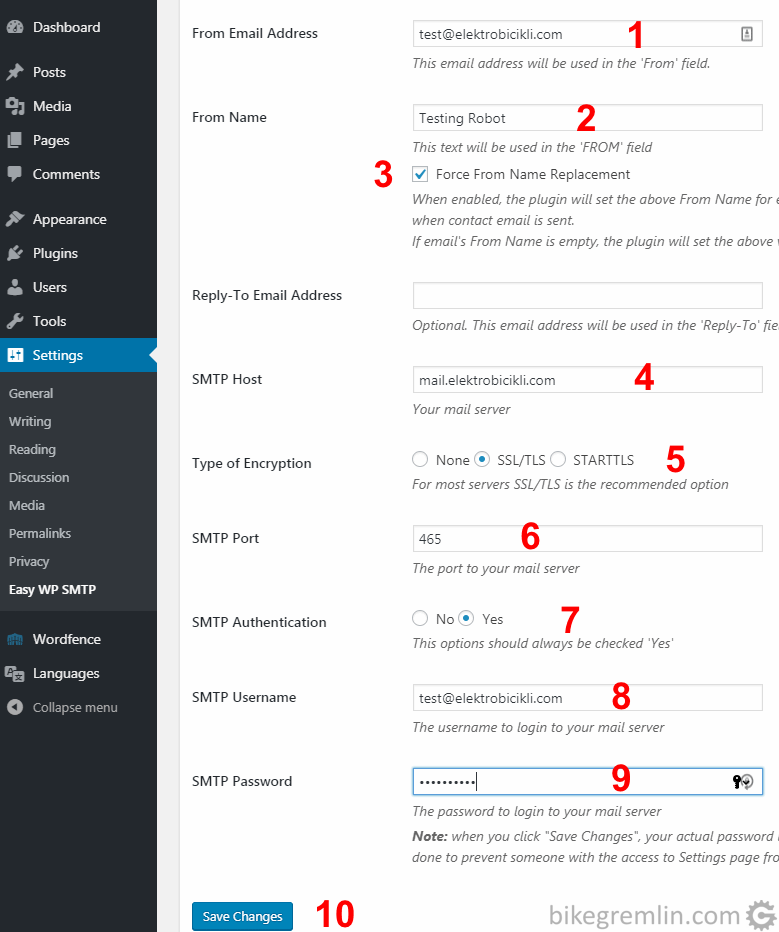
Picture 3
After clicking “Save Changes”, go to “Additional Settings” (near the top).
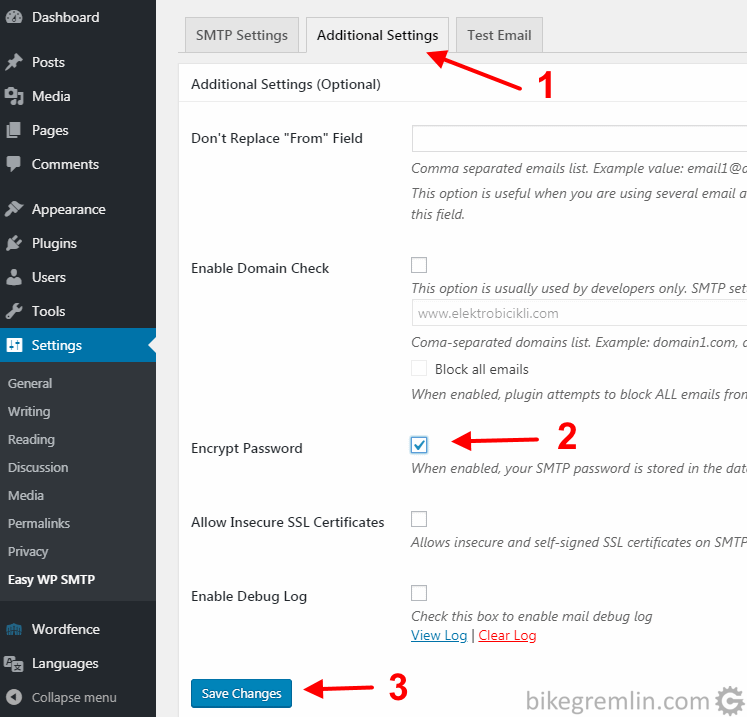
Picture 4
Here it is set to store the e-mail account password in the encrypted form on the server – which is important for security.
4. Testing
Choose the “Test Email” option from Easy WP SMTP menu. In a new browser tab, open mail-tester.com.
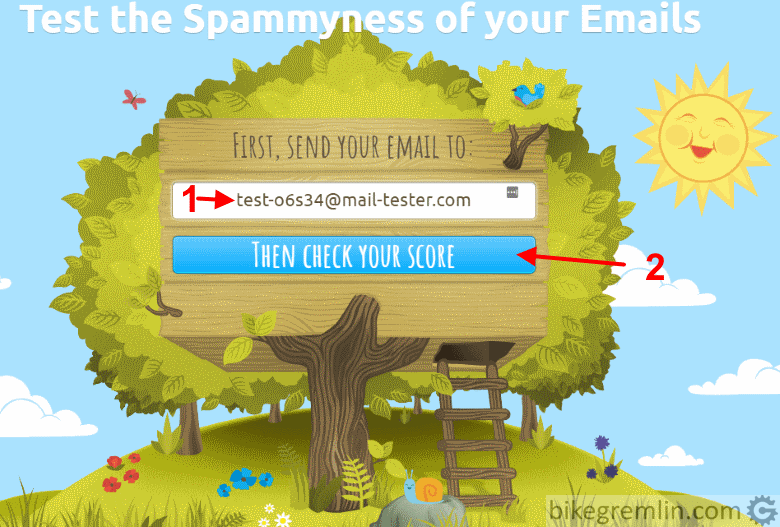
AFTER having sent the test e-mail, wait a few minutes, then click “Then Check Your Score” (2)
Picture 5
Copy/paste the given recipient e-mail address to Easy WP SMTP:
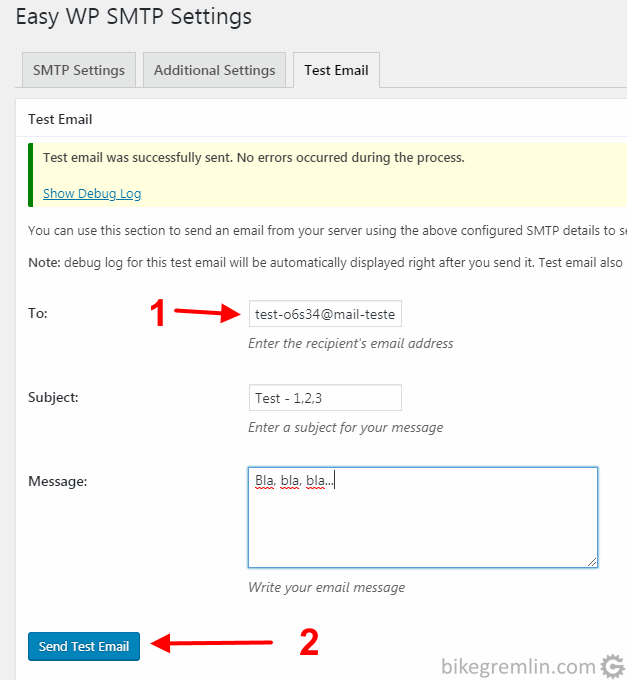
Click “Send Test Email” (2)
Picture 6
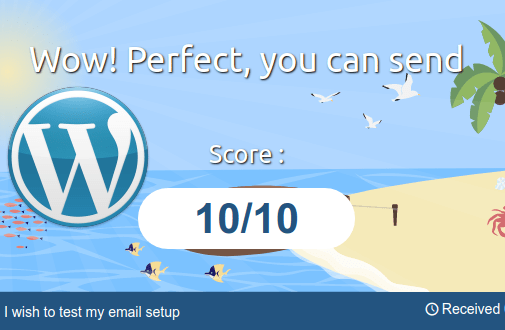
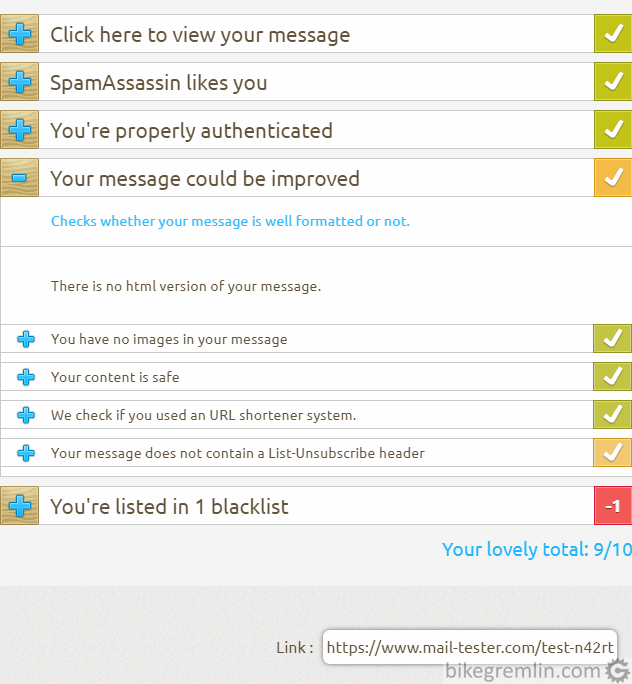
Wait a few minutes, then check the result on mail-tester.com – option (2) in picture 5.
Picture 7
As I already explained in the post about e-mail account setup:
First yellow checker explains there is no “Unsubscribe” option for unsubscribing from e-mail lists. If you are sending mailing lists, this should be implemented. For “ordinary” e-mails, it is not necessary.
The red “-1” field says that the IP address of the SMTP server I’m sending the e-mail from is listed in at least one blacklist. Which means that someone has been sending spam from that address. If you are on a shared hosting server, then it’s the hosting provider’s job to prevent the sending of spam and to get the server’s IP address off the black lists. If you have your own, dedicated IP address, then it’s your fault and your job to fix it.
Various e-mail sending services, such as SendGrid, charge extra for a dedicated IP address. If using the free IP option, it will most likely be on at least a few blacklists, since many spamers use such services. You could also use a hosted email service (pros and cons explained in detail).
Last updated:
Originally published:

