This post is about website backup. A WordPress site was used for example, but principle is the same for websites made in any other tool (and CMS). I’ll explain how to do backups, how often to backup and how to save backup data. Basics are explained here, while a separate post explains automated (scheduled) website backups. With another post explaining cloud (backup) storage options. Creating a backup is also the first step in (WordPress) website migration.
Note:
- Terms “folder” and “directory” are synonyms and will be used as such, interchangeably, in the remainder of this article.
- All the usernames, passwords and addresses shown in pictures and used in examples are just for demonstration purposes – use your own, correct and existing data instead of these.
- After creating a backup, test if restoring from the backup works. First in a test, then in your production environment. Only after successfully confirming that the restoration process works can you rely on the created backups. Very educational experience on the topic: Postmortem of database failure at GitLabs.
Contents:
- What to backup
- Files backup
2.1. WordPress website files backup using a plugin
2.2. Backup using cPanel’s File Manager
2.3. Backup using automated backup tools - Database(s) backup
3.1. Backup of a WordPress site database using a plugin
3.2. Database backup using phpMyAdmin
3.3. Database backup using automated tools - How often should backups be made?
- How to save and store backups
1. What to backup
Websites are generally made of files and database. “Ordinary” (“static”) sites are made of files only (.html files and images mostly), while “modern” websites usually rely on a database as well i.e. content shown to visitors is dynamically generated.
Here I’ll explain the procedure for websites using database. Of course, for static (.html) websites, the parts about database backup can simply be skipped – they’re not needed.
So, it is needed to backup:
- All the files, directories (“folders”), pictures – everything.
- Database (or databases, if there are several).
2. Files backup
Backup can be done using several tools Here I’ll explain the free options that have worked for me. First for WordPress, then for all the websites in general. There are million other ways to backup, the most common is using a FTP client (slow and not practical unless all the files are zip-packed first), but, as I said, here I’ll explain the methods that I find most convenient:
- 2.1. WordPress website files backup using a plugin
- 2.2. Backup using cPanel’s File Manager
- 2.3. Backup using automated backup tools
2.1. WordPress website files backup using a plugin
For WordPress websites, plugin BackWPup can be used. In the free version, it allows full backups of all the files and database to be made. It can be set to place the entire backup within one zipped file and store that file on a hosting server directory that you choose/make and/or send the file to DropBox (affiliate link).
Downside of this plugin is that it places a lot of load on the server while making backups, while the free version doesn’t allow scheduling backups to start at a certain time (when the website traffic is low). Also, if you use shared, or reseller hosting, it is possible that the hosting provider will set the server to “kill” applications that overload the server, so the plugin might not work. In that case, you might have to see with the provider’s technical support how exactly to configure the plugin and if an exception can be made.
Besides this one, there are many other backup plugins, but I didn’t like the way any of them worked in the free version – and I wasn’t willing to pay for a backup plugin if I can make backups for free. If you have many websites and need many backups (and made often), your priorities and choices may differ, of course.
I won’t go into details of how to install a plugin, nor how to set up any particular backup plugin – that calls for a separate post, for each plugin. It’s usually not complicated and plugin authors offer good tutorials. An example of BackWPup manuals on the plugin author’s website.
Plugins can also be used for WordPress website database backup, as I mentioned in chapter 3.1.
2.2. Backup using cPanel’s File Manager
For all I know, cPanel is now a hosting industry standard. In other words: over 90% of hosting providers will set up users with a cPanel (while users who set up and manage their own servers probably know a lot more than I do and don’t need to read this backup manual). Here I’ll explain how to do backups using cPanel’s File Manager.
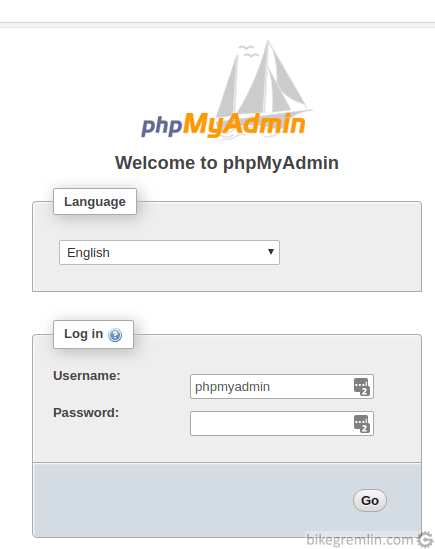
First login to your cPanel. Either using hosting provider’s website, or, if it is set up that way, using: cpanel.your-website-domain (less secure solution in my opinion).

Picture 1
Then choose “File Manager” from cPanel’s main menu (picture 2).
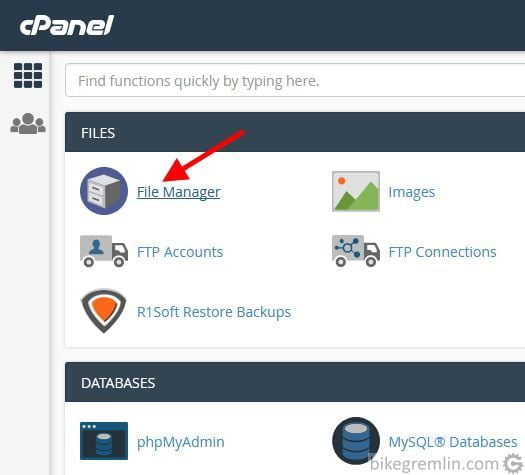
Picture 2
And enter the brave new world of cPanel’s file manager. 🙂 You will get a list of all the files within your account. Next step is explained below in text and with picture 3:
- Click on public_html directory (1a in picture 3), or on the home directory (1b). First option is for the website files, while the second option (1b) selects all the account files – choose whichever you prefer, though 1a is enough for backing up the website.
- Click “Select All” button (2) to select all the files under the selected directory.
- Then click “Compress” (3).
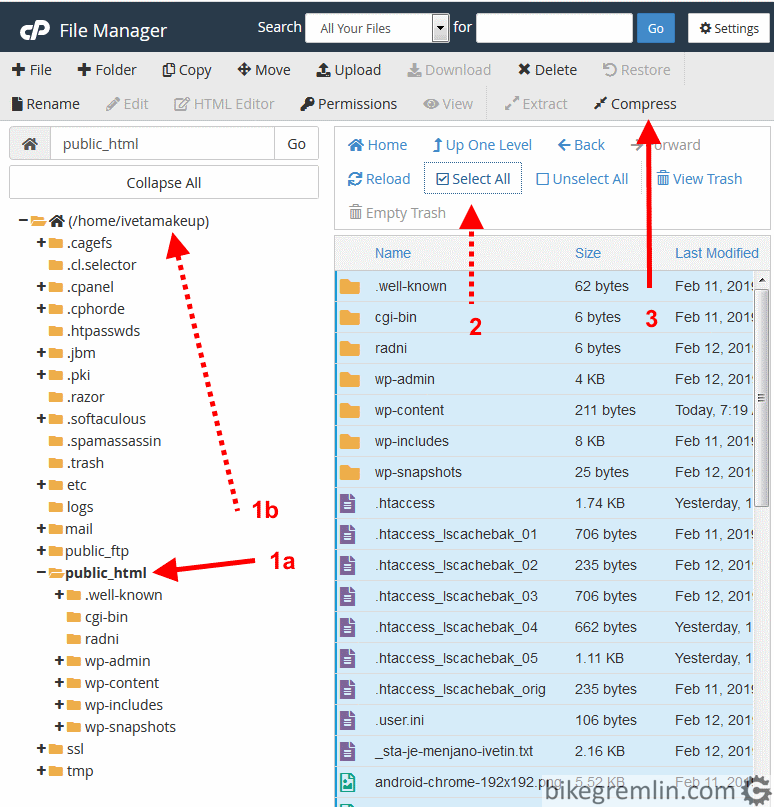
Picture 3
Next thing to do is choose compression method (1 in picture 4) and then scroll down to select archive location and name (2):
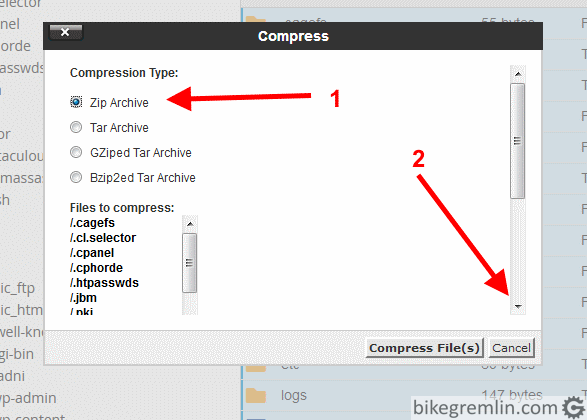
Picture 4
In this example we are placing the archive inside the public_html directory and naming it backup-2019-02-15.zip (1 in picture 5). Mind the leading slashes ( “/” ). Then click “Compress File(s)” (2):

Picture 5
When the compression is finished, a report will be shown – close it. Picture 6:
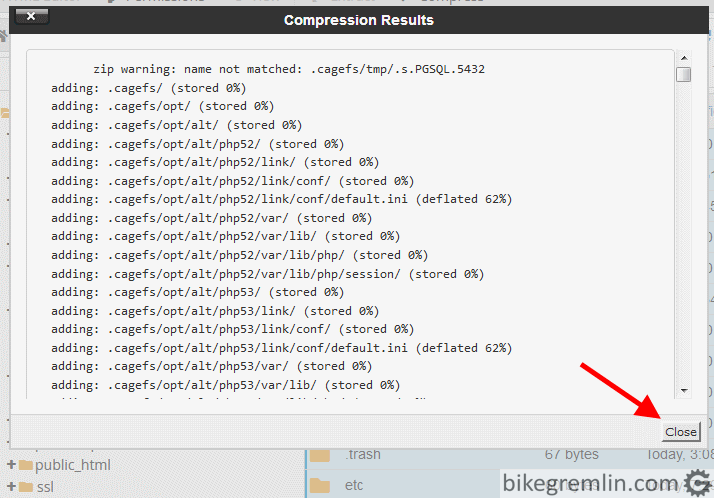
Picture 6
Now select the directory where you chose to save the compressed file in the previous step (1 in picture 7), find and click on the compressed file (2) and click “Download” (3):
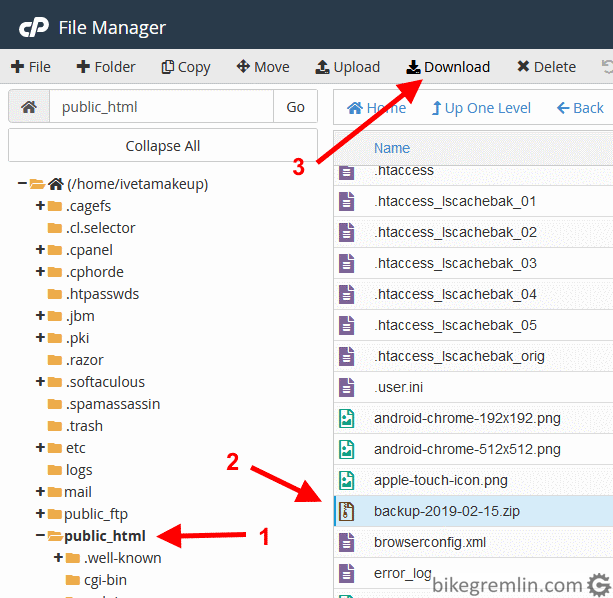
Picture 7
You will get a pop-up same as for downloading any other file from the Internet (unless your browser is set to always save .zip files to a previously given directory) – picture 8:
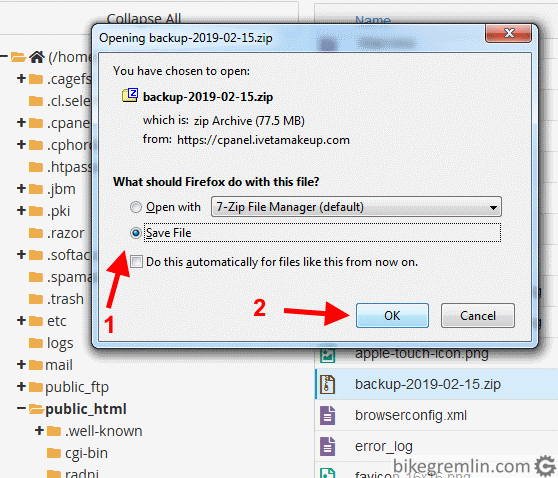
Picture 8
All that’s left now is to wait for the download to finish, copy the file to an external disc (second copy), and upload it to DropBox, or similar service (third copy on the “cloud”).
2.3. Backup using automated backup tools
There are numerous automated backup tools. Most allow backup scheduling at a certain interval (daily, weekly, monthly…), at a certain time (3 AM when there’s little website traffic, for example), saving backups directly to a cloud storage etc. These tools usually cost money (let me know if there’s a good free one in the comment section below).
cPanel offers a decent solution for downloading backups from the panel. I write more about it in the remainder of this chapter. In a separate post, I wrote about DirectAdmin control panel backup setup – a very good option for making automated backups and uploading them to cloud storage. Similar automation can be achieved in cPanel using WHMeasyBackup, or using its free open-source alternative WHM Backup Solutions (link to my article with step-by-step instructions).
Good hosting providers usually offer some sort of backup tools. These tools usually don’t allow scheduled backups and you usually have to download the files to your computer (there’s not sending a copy directly to “the cloud”), but it’s still more practical than using cPanel (as explained in chapter 2.2.).
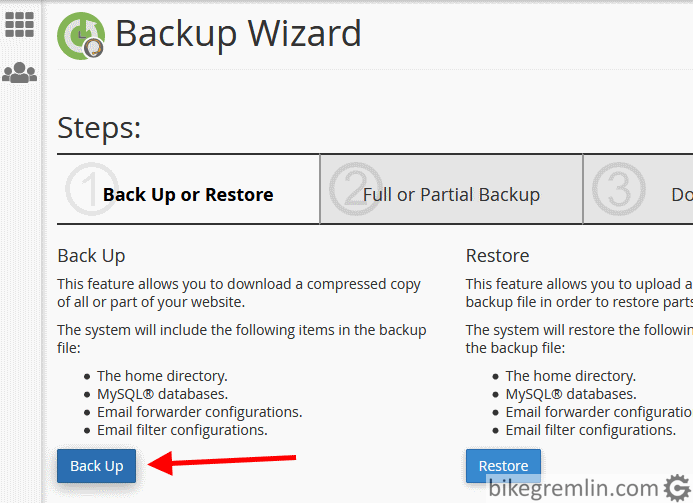
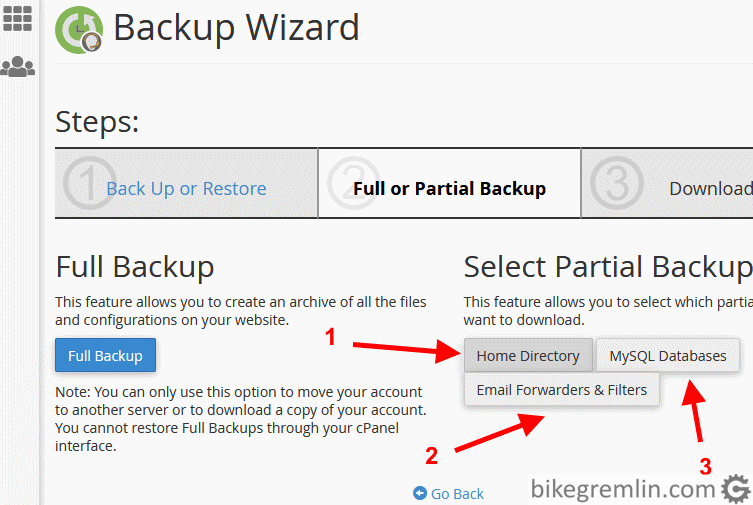
Pictures below show the use of “Backup Wizzard” that my current hosting provider (Veerotech) has set up. If you read the previous chapter (2.2.) you won’t need any explanation and pictures will be clear.
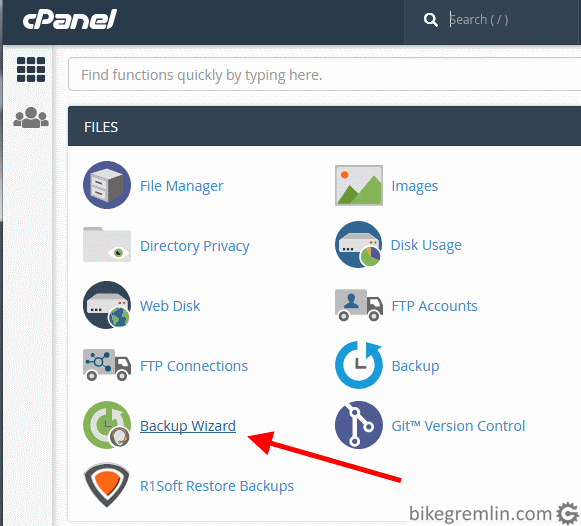
Picture 9
Picture 10
Picture 11
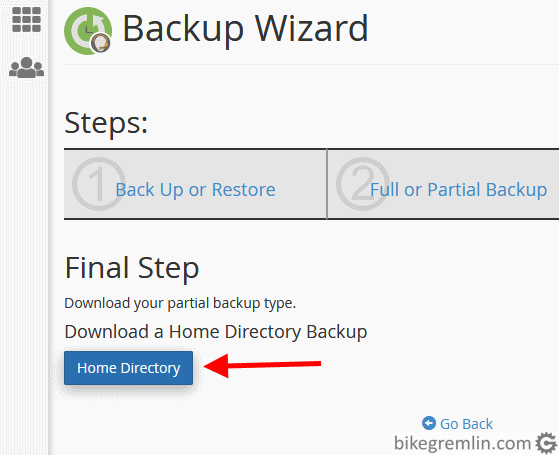
Picture 12
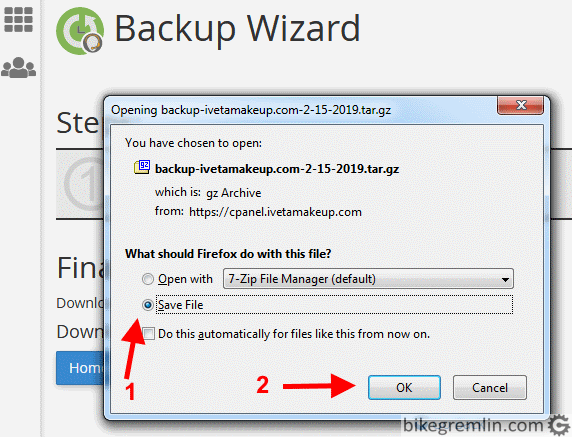
Picture 13
3. Database(s) backup
Besides backing up all the files, for websites that use a database, it is needed to back up the database too (or databases, if there are several). This can be done in different ways, here I’ll explain a few that I find most convenient:
- 3.1. Backup of a WordPress site database using a plugin
- 3.2. Database backup using phpMyAdmin
- 3.3. Database backup using automated tools
3.1. Backup of a WordPress site database using a plugin
Practically all the backup plugins allow database backup. I already wrote about backup plugins in chapter 2.1. and there’s not much to add – just select database backup as well, when choosing backup options from a plugin setup menu.
3.2. Database backup using phpMyAdmin
PhpMyAdmin is a good tool for database exporting (and backup) and importing.
It is usually installed and set up within the cPanel. If that’s not the case, it can be installed from cPanel (especially if there is a Softaculous installer set up). Other option is to download phpMyAdmin installation from the official website, upload to the hosting server using FTP (or cPanel “File Manager”) and set it up. Instructions for installing and configuring phpMyAdmin calls for a separate post, I will not deal with it here, but will just explain how to do a database export and backup using the tool. Let’s start.
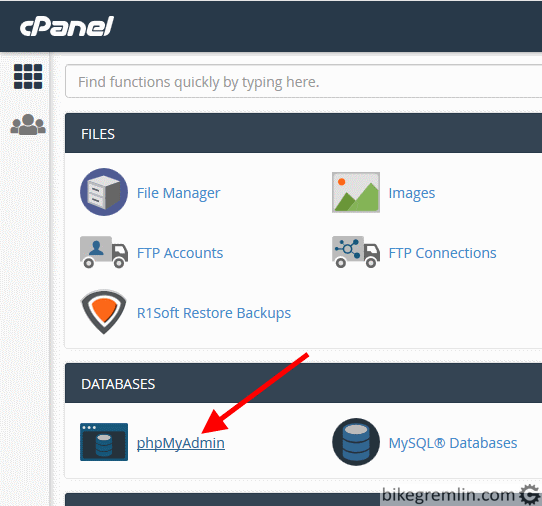
Picture 14
If phpMyAdmin is installed within the domain, or a sub-domain, type the appropriate address and enter database username and password to log in.
PhpMyAdmin menu will list all the databases that exist within the account. Click on a database you wish to export, then click on “Export” – as shown in picture 15:
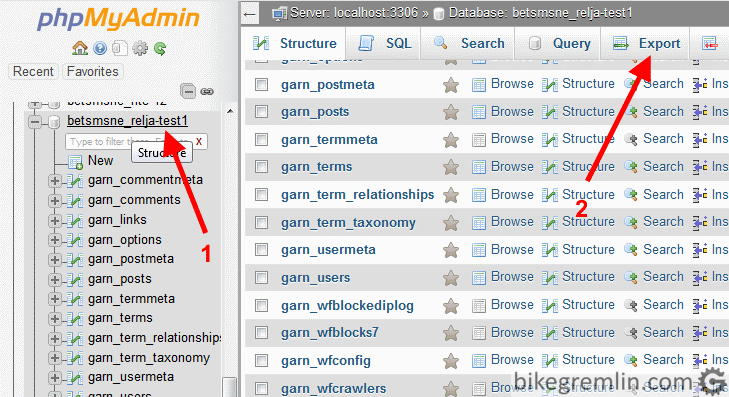
Picture 15
In the menu that is then presented, it is usually fine to just leave all the options as default, and just press “Go” – picture 16. Though there are custom options to export the database to a directory on the server, zip-pack it etc.
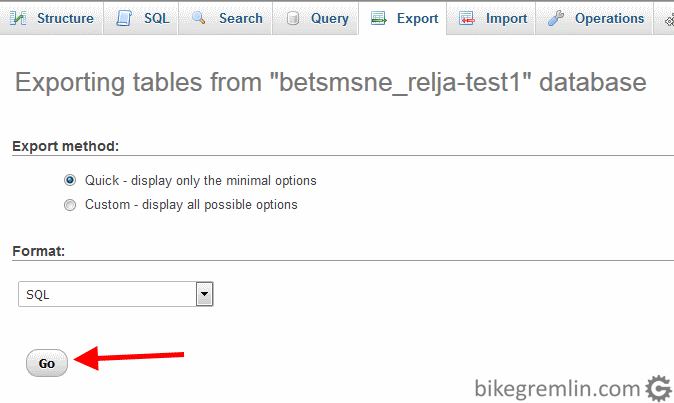
Picture 16
Then database export can be saved like any other download from the Internet.
3.3. Database backup using automated tools
Basically, it is the same story as with file backup – see chapter 2.3. If using software like the one from that example, the only difference is you should choose option 3 in the menu shown in picture 11. Beside that, entire procedure is exactly the same – from start to finish.
Many hosting providers offer daily backups, with keeping the copies of the previous fifteen days, or so. That is very nice and good – seriously. But don’t rely on that! Have your own backups at the ready and safe (educational experience of very good hosting company MDDhosting) – and do read the next two short chapters.
4. How often should backups be made?
The only real answer to this question is: “At time intervals that you are comfortable with loosing data”. That is: failure will happen just before the next planned backup. If you make backups weekly, you can expect that in case of a problem, you might loose the previous 6 days of work.
I make backups after each published post.
5. How to save and store backups
There is a probability of each backup media to be damaged/lost/stolen/corrupt… Let us say that the probability of that happening is 1%. Not very high, but hardly impossible. 10 days in a 1,000.
If we take that probability of one backup’s malfunction is 1%, then the probability of two separate backups being lost at the same time is 1% of 1%, that is 0.01%.
What is the probability if there are three backups? 1% of 0.01% = 0.0001%. That is one day in a million. Better? Now imagine using good quality backup mediums and methods so that the probability of one backup filing gets much lower than 1%.
This is an (over)simplified story used just to demonstrate the principle: everything that is backed up with only one backup is (practically) not backed up!
Proper backup looks like this:
- Original version – at a working server, regularly checked if functioning.
- Reserve copy hosting server doesn’t harm definitely.
- Copy on your computer’s hard disk.
- Copy on an external medium (external HDD, or DVD) – see how to refresh data on HDD and SSD.
- Copy on an external medium stored in a remote place (so not all the backups burn in case of a fire for example).
- Cloud based copy – DropBox, Google Drive… – post on cloud storage solutions.
On top of all that, it is good to have at least two previous backup versions. In case anything is done wrongly on the website, there should be backups taken at the time before the “deadly changes saving”.
Safest policy being keeping backup of the latest edit/update, plus one monthly backup from previous months (up to one year at least) – in case a website problem (hack, infection etc.) is not noticed immediately, so at least some work is saved.
This is definitely precious content. I am glad I’ve found this website after reading “The SEO Framework” debate on Reddit and your posts about it. Thanks.
Hi Victor,
Thanks. 🙂
I’m not a professional developer, but here I keep all the info needed for smoothly running my cycling website.
Handy, all in one place. 🙂
Relja
Hey Relja, thanks for the reply. I am a brazilian web developer currently migrating from CodeIgniter to WordPress on building websites. I’m also kind of newbie about SEO.
I liked your approach on the TSF vs Yoast analysis (specially about your fairness on the test mistake and changing your mind) and went through to explore your website. I tend to prefer for minimalist and simple approaches, and the way you communicate and explain things is pleasant.
You’ve helped me defining my default SEO WP plugin (TSF). Now, in the next few days, from what I’ve briefly read from your articles, I believe that your website will also help me defining my default caching, optimization, redirecting and security procedures for WordPress (I have yet to read and discover whether you use a plugin or not).
With that I think I may have the basics to proceed forward on developing using WordPress (we built like 5 WP websites already, but there’s still a lot to learn).
Even though this is just your “personal archive” I thank you very much for making it available publicly. Cheers!