
I’ve already mentioned Backblaze in the post about cloud storage options. Here I’ll explain how to setup Backblaze B2 Cloud Storage for storing files (i.e. uploading backups).
First, of course, if you don’t have an account already, go to Backblaze website (affiliate link) and create an account – I won’t explain that part. For backups I use their “B2 Cloud Storage”. Then log into your B2 Cloud Storage account and follow the instructions.
1. Creating a storage container (“Bucket”)
First you should create a storage container, Backblaze calls this a “Bucket”.
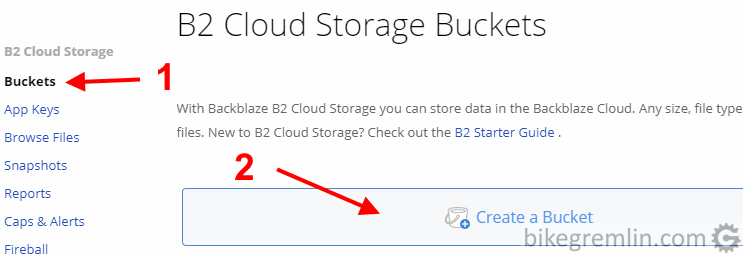
Picture 1
When creating it, a bucket can be set to be public. This allows file downloads without an authorization token. If you don’t want to enable this, choose “private”. Uploads, listing files and deleting them always requires an authorization token, no matter whether a bucket is public, or private.
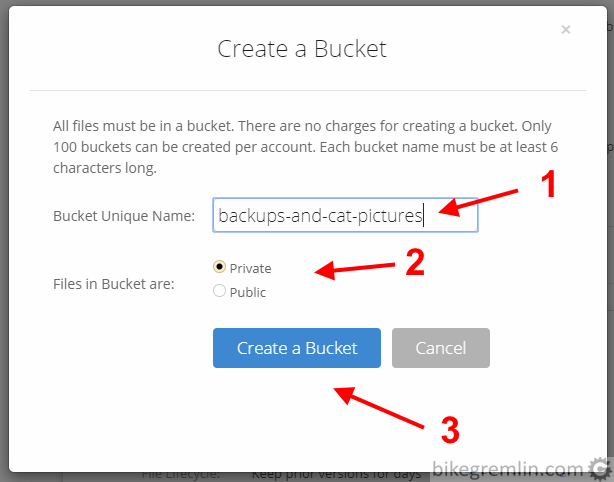
Choose private, or public bucket type (2)
Click “Create a Bucket” (3)
Picture 2
Then you can create a directory structure, upload files from your computer, or whatever you like. I’ll make one example.
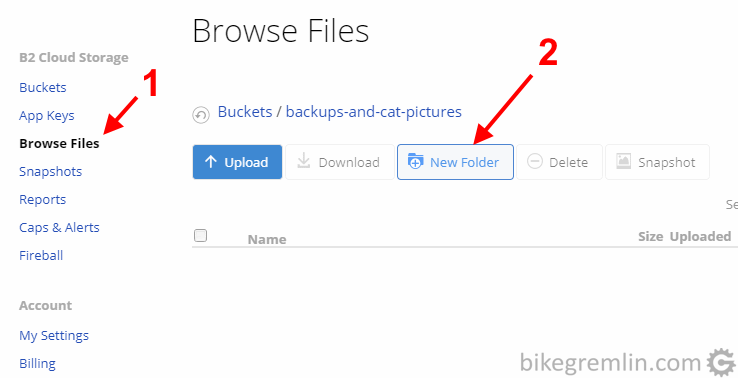
Picture 3
In a menu that is open now, enter desired directory name and click “Add Folder”.
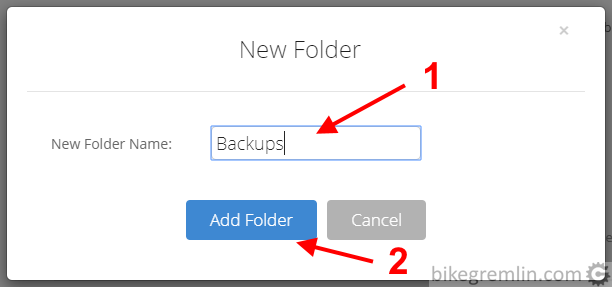
Click “Add Folder” (2)
Picture 4
Picture 3 clearly shows options for file upload, deleting etc. I don’t think this needs any further explaining.
2. Setup for automated backup uploads
Manually uploading files is far from a convenient option, especially when (regular) backup uploads are considered. In order to automatically access a bucket using an application, access rights and keys are required – which I’ll explain in this chapter.
For this click on the “App Key” in the left hand side menu, then “Add a New Application Key”, to create a key for the newly created bucket.

Click “Add a New Application Key” (2)
Picture 5
Now choose options as you like, an example is given in picture 6:
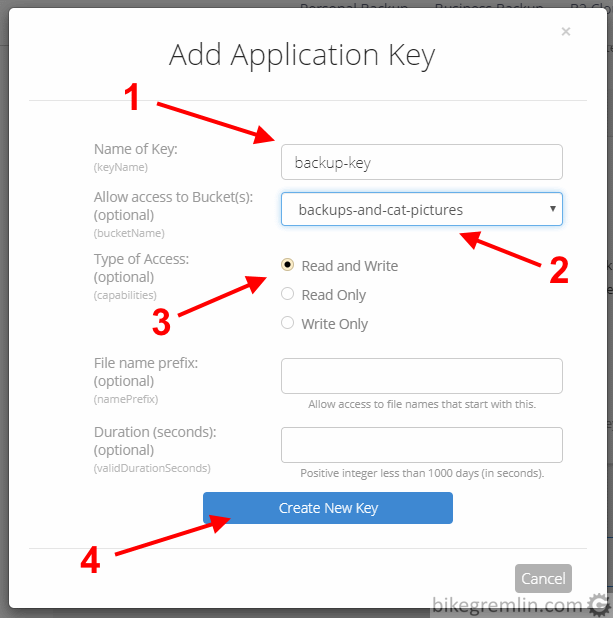
Choose which bucket it has access rights for (2)
Chose what king of access rights it has (3)
Click “Create New Key” (4)
Picture 6
Write down in a safe place and keep (KeePass) what is shown on the screen after clicking on “Create New Key”.
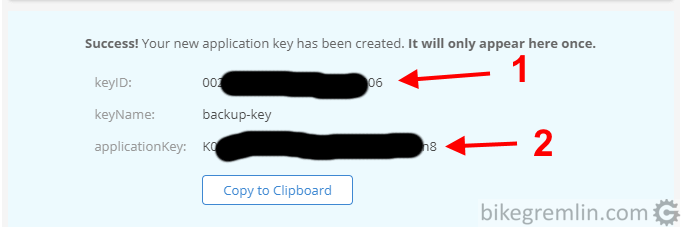
and the key value (2)
WRITE THEM DOWN.
Picture 7
3. Summary – conclusion
In this example we have:
- Created a bucket named: “backups-and-cat-pictures”.
- Crated a directory named “Backups” inside that bucket.
- Made an application key called “backup-key” and gave it full access rights (read and write/delete) to the newly created bucket.
- Written down (this is not shown in the pictures of course) the key ID (“keyID”) and the key (password) itself (“applicationKey”).
Our bucket is now ready for automated backup uploading.
Last updated:
Originally published: