
I’ve been using, moderating and administrating forums since they emerged after BBS and Usenet era (Wiki links). At the time of writing, XenForo (the official website link) is the best the-least-bad forum software in the world (at least in my opinion and for my use-case). This article is basically my notes on my XenForo installation and configuration – so I can get help and advice from people who actually know what they’re doing. 🙂
Oh, you can check out the BikeGremlin Forum here. 🙂
xenForo 2.3 version specifics and update/upgrade
Why I built the BikeGremlin forum
1. Installation
This procedure is very simple and straightforward – nicely explained on XenForo’s website in an article called Installing XenForo (what else? 🙂 ).
Note: you must create a database, a database user, and set the user’s password, before you run the installation. The procedure is basically identical to WordPress installation procedure.
Recommended PHP version and extensions:
PHP version 8.0
Update, February 2024:
The latest XenForo version v2.2.15 comes with PHP 8.2 recommended
Update, July 2024:
For xenForo 2.3:
Minimum PHP is 7.2, recommended is 8.3;
Minimum MySQL 5.7, recommended is 8.0;
Extensions:
- imagick
- intl
- exif
- phar (for Gzip support)
- mbstring
- gmp
- zip
Your admin dashboard may show:
“Suhosin enabled: No”
That’s OK. As far as I know, Suhosin (link to the project’s page) makes more problems than it solves (I suppose that info is shown for tech. support & troubleshooting purposes).
You could make a “php-info.php” file (simple text file, but with a .php instead of the .txt extension), with this code:
<?php phpinfo(); ?>Code language: HTML, XML (xml)Upload it to you’r forum’s directory, and go to: “yourdomain.com/php-info.php” to see if you have all the needed extensions enabled (and general PHP info like version etc.). Make sure to not leave that file though – delete it after testing, just for increased security.
2. Security
The first thing I did was edit the .htaccess file by adding this at its beginning:
# BEGIN BikeGremlin edit

<IfModule mod_rewrite.c>
RewriteEngine On
RewriteRule ^.well-known - [L]

# directory listing protection
Options -Indexes

# clickjacking attack protection
Header always append X-Frame-Options SAMEORIGIN

# MIME sniffing protection
Header set X-Content-Type-Options nosniff

# XSS protection
Header set X-XSS-Protection "1; mode=block"

# redirect from naked to www and https:
RewriteEngine on
RewriteCond %{HTTPS} !on [OR]
RewriteCond %{HTTP_HOST} !^www\.
RewriteRule (.*) https://www.bikegremlin.net%{REQUEST_URI} [L,R=301]

</IfModule>

# END BikeGremlin editCode language: PHP (php)
XenForo forum user “digitalpoint” wrote an awesome guide with some tips on securing the forum using Cloudflare’s Zero Trust, here’s a link to that guide:
Cloudflare optimizations for XenForo
I’ve protected /install and admin-related paths with CloudFlare zero trust. To do this I just added a new “Application” for the forum (see my Cloudflare Zero Trust setup tutorial for details).
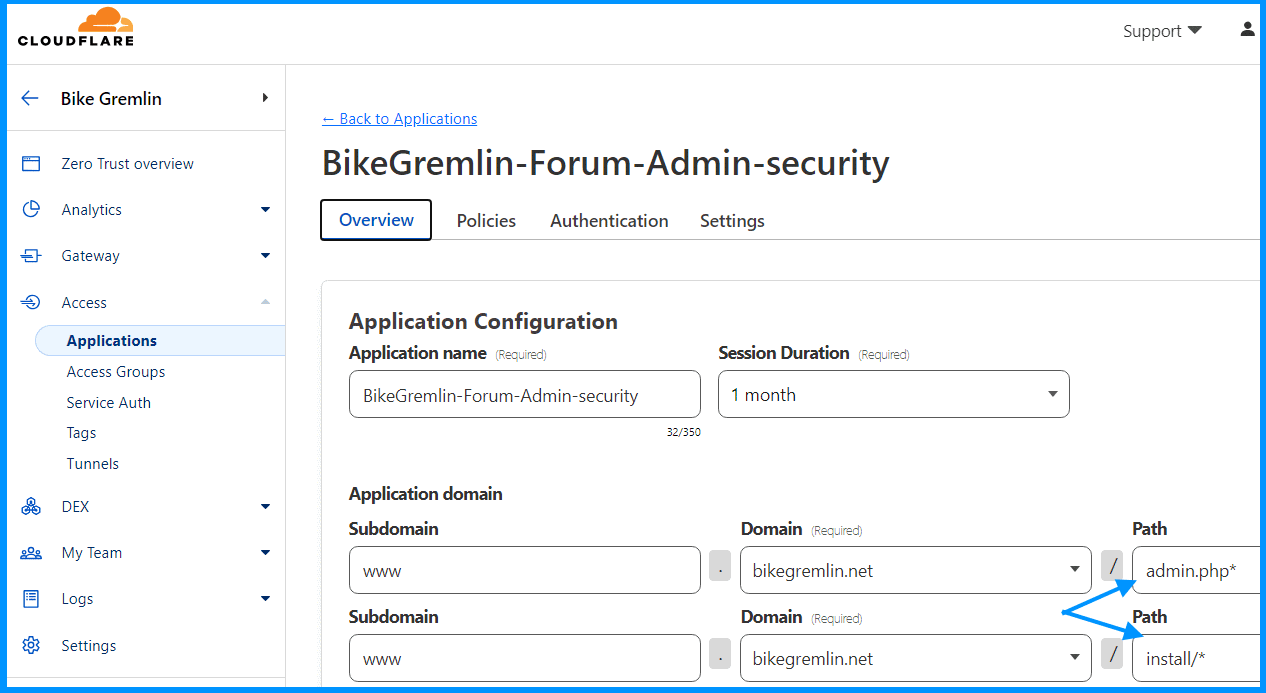
For better or for worse, I’ve decided to configure and implement Cloudflare Turnstile spam protection (it should work like a non-intrusive reCaptcha). XenForo offers a good integration for that:
Setup -> Options -> Basic Options -> Enable CAPTCHA for guests -> Use Cloudflare Turnstile
There, I could follow the Cloudflare Turnstile link with a simple guide for configuration.
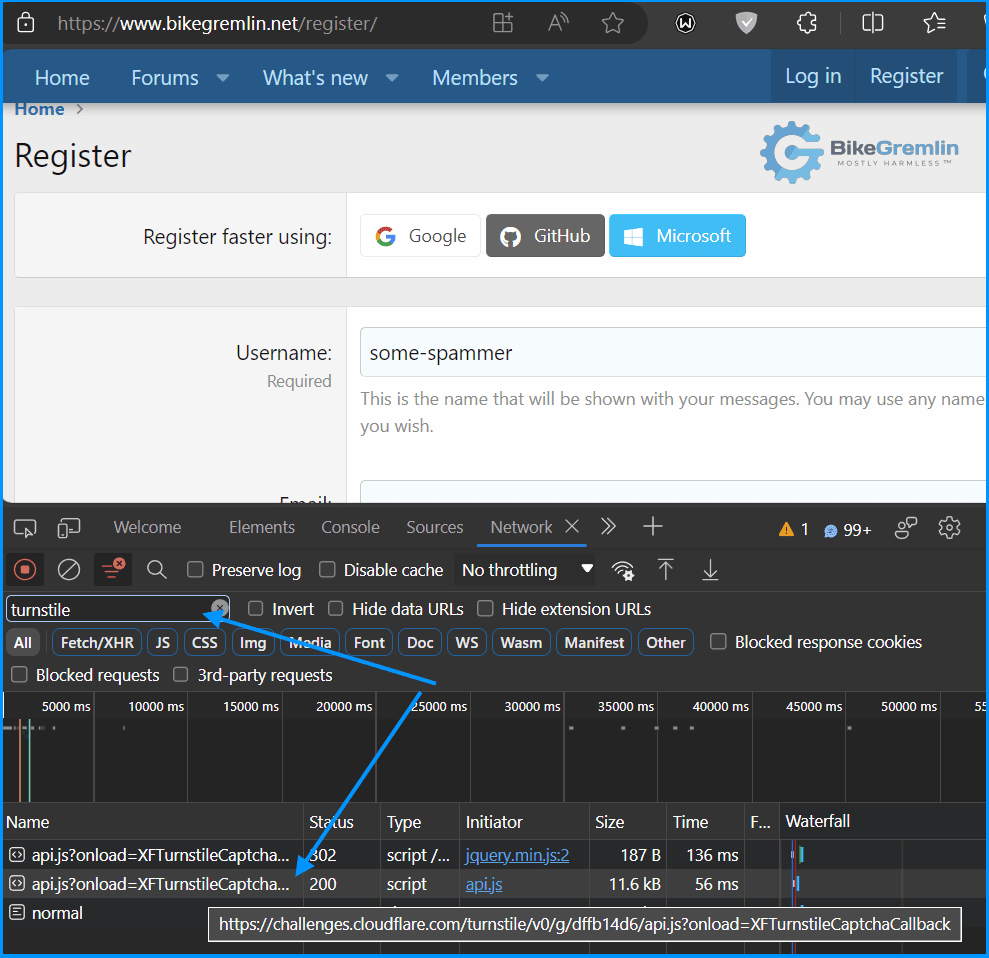
Click on the image to see it full-sized
2.1. SPAM prevention
Cloudflare is good, but it is probably a good idea to set up a few more spam-protection layers (why security is best done in layers). XenForo offers easy to set up integrations with following (free) services:
Setup -> Options -> Spam management
- StopForumSpam
- DNSBL
- Akismet
- Cloudflare Turnstile
3. Forum setup and configuration
3.1. Emails
The first thing I did was go to:
Setup -> Options -> Email options
and configure the forum to send emails using my MXroute server.
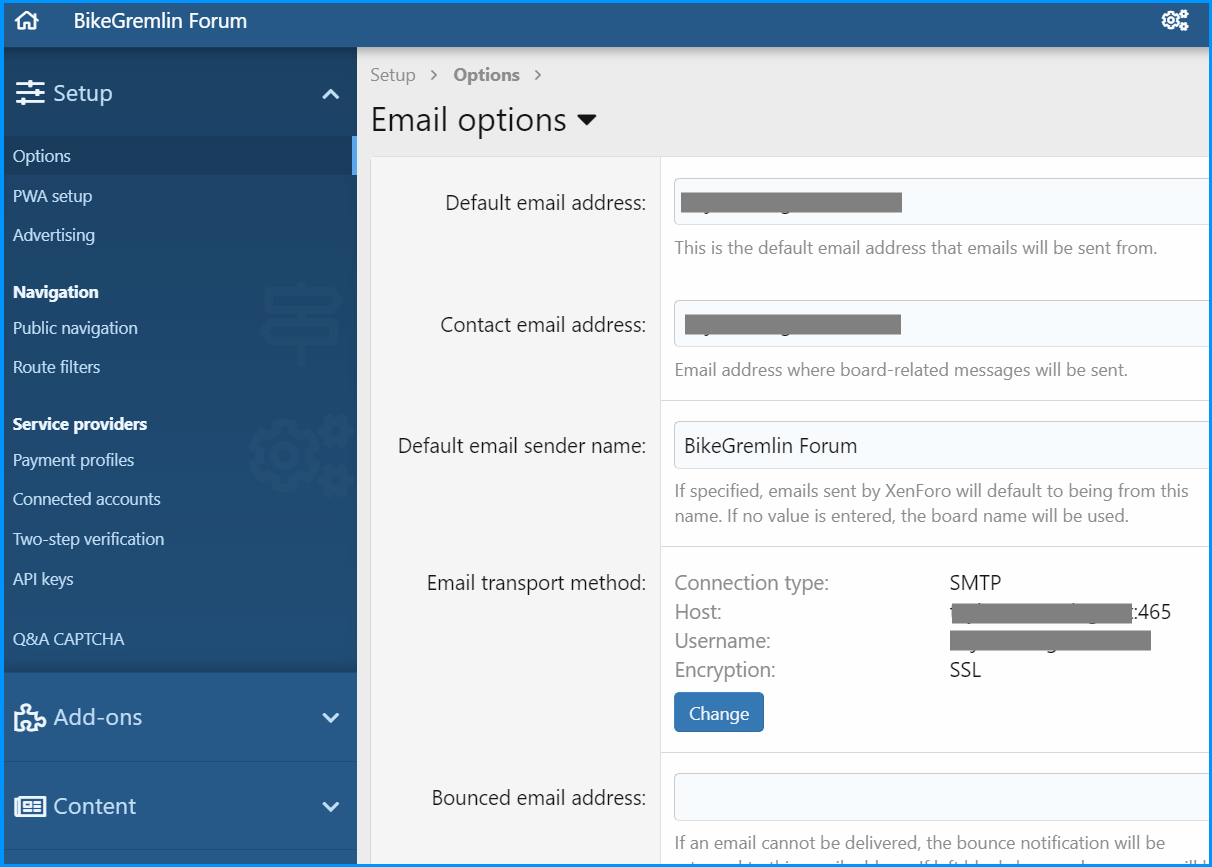
Click on the image to see it full-sized
Tools -> Test outbound email
lets you test and confirm if you’ve configured it all properly.
Now, my MXroute account is limited to 300 outbound emails per hour. That’s not huge, not for a big forum.
In that same menu, there is an option called:
“Automated bounced email handler”
Enable it, to prevent sending emails that get nowhere.
I’ve created two separate additional email addresses. One for bounced, and another one for unsubscribe emails.
3.2. Languages
Next up was the language setup:
Appearance -> Languages & phrases -> Languages -> + Add language;
Where I added Serbian language (Serbocroatian).
Now was the time to make the post and page addresses look neatly:
Setup -> Options -> Basic options
Then checking the checkboxes under:
“Use full friendly URLs” and
“Romanize titles in URLs”
Every option has a nice, simple explanation of what it does – neat.
Setup -> Options -> Appearance
lets you select the default language (which will be active until users choose a different one).
This seems quite awkward. Apparently, I’m required to translate all the strings and phrases myself. I also find the computer-related terms in my native to be confusing (habit, probably). That would make offering support more difficult (if a user refers to something using the translation – as I never use interfaces in my native – LOL 🙂 ). So, I’ve decided to ditch the idea of a bilingual interface, for better or for worse.
3.3. Style and push notifications (PWA)
I’ve created a new style (called it “BikeGremlin Style,” yes 🙂 ), to save all the edits in it. Setting it to inherit everything from the “Default style” and then customizing.
This part is important for the PWA setup:
Appearance -> Style -> Style properties -> Basic options
There, I uploaded all the icons.
In the Page setup of the same menu, I set the Max. page width to 1250 px, and wide response break point at 1100 px.
Once all the icons are uploaded and configured properly, you can go to the PWA settings and enable the option for push notifications (some users like having that option).
Browser push notifications are a different thing.
They feel distracting, so I’ve disabled them:
Setup -> Options -> User alerts and notifications
Uncheck: “Enable push notifications”.
3.4. General settings
Setup -> Options -> Node & forum list
Here, I’ve checked the option to “Create pages for categories” – which means clicking on a forum category will open a page listing its subcategories. Otherwise, clicking a category only scrolls the screen to show that category on top.
3.5. Connected account providers
This might help with visitor registration by providing registration with Facebook and similar.
Linkedin login support seems to be botched – Sign in with LinkedIn deprecated (XenForo forum bug report link).
Facebook API seems to require a registered business.
So, apart from registering and logging in with an email and a password, I’ve managed to configure the following alternative (easier, probably more convenient) sign in options:
- Google account
- GitHub account
- Microsoft account
Microsoft only allows a time-limited API (max. 2 years). And I’m not a huge fan. So I ditched that integration, after having confirmed that it works. 🙂
3.6. Editing terms, privacy policy, and footer (copyright)
To edit these, I had to go to:
Appearance -> Phrases
and then find the things I wanted to customize, notably:
- terms_rules_text
- privacy_policy_text
It’s all basic HTML, and here are a couple of nice, free, online HTML editors:
I have also tried editing the footer, using this code, editing the template for:
extra_copyright
Note:
I paid for the XenForo license that allows for removing their default footer copyrigh (with a rel=”sponsored” link), but I wanted my footer to link and advertise what I consider to be the best the least bad (what?! I’m a pessimist, OK? 🙂 ) forum software in the world – that’s why I’ve included XenForo and Giphy links in the footer’s “final” version.
This is a basic version which is completely static:
<p>© 2015 - 2023 <a title="BikeGremlin" href="https://www.bikegremlin.com/" target="_blank"><strong>BikeGremlin</strong></a> • Powered by bacon, electricity & <a title="XenForo" href="https://xenforo.com/" target="_blank"><strong>XenForo</strong></a></p>
Code language: HTML, XML (xml)Using this PHP code for the current year didn’t seem to be working:
// NOT WORKING:

<?php echo date("Y"); ?>

// NOR THIS:

<?php strftime("%Y"); ?>Code language: PHP (php)
Gox suggested I should try JavaScript – and that worked. Here’s the current date (year in this case) script that works with XenForo:
<script>document.write(/\d{4}/.exec(Date())[0])</script>Code language: HTML, XML (xml)That allowed me to make the footer so I never have to update it for the current year, it should auto-update.
Here is the full code of my XenForo forum’s footer (see after this, below, for the improved code):
<p>© 2023 - <script>document.write(/\d{4}/.exec(Date())[0])</script> <a title="BikeGremlin" href="https://www.bikegremlin.com/" target="_blank"><strong>BikeGremlin</strong></a> • Powered by bacon, <a title="XenForo" href="https://xenforo.com/" target="_blank"><strong>XenForo</strong></a> & <a title="GIPHY" href="https://giphy.com/" target="_blank"><strong>GIPHY</strong></a></p>Code language: HTML, XML (xml)What actually worked
Update October 2024:
This code should be more performant than using “document.write”:
<p>© 2023 - <span id="currentYear"></span>
<a title="BikeGremlin" href="https://www.bikegremlin.com/" target="_blank"><strong>BikeGremlin</strong></a>
• Powered by bacon,
<a title="XenForo" href="https://xenforo.com/" target="_blank" rel="noreferrer noopener nofollow"><strong>XenForo</strong></a>
&
<a title="GIPHY" href="https://giphy.com/" target="_blank" rel="noreferrer noopener nofollow"><strong>GIPHY</strong></a>
<script>document.getElementById("currentYear").textContent = new Date().getFullYear();</script>
</p>
Code language: HTML, XML (xml)Patreon and Ko-fi support call-to-action in the footer
On top of (i.e. above) the above-listed code (in the same “window”), I also added Patreon support call to action:
<!-- BEGIN Relja Patreon + Ko-fi support /5/ -->

<style>
  #header-message {
    background:#f1f1f1;
    color:#222;
    padding:10px 15px;
    text-align:center;
    border-bottom:1px solid #ccc;
    font-size:16px;
  }
  #header-message a {
    color:#003366;
  }

  @media (prefers-color-scheme: dark) {
    #header-message {
      background:#332c27;  /* warm dark tint, no glow */
      color:#e0e0e0;       /* readable text */
      border-bottom:1px solid #444;
    }
    #header-message a {
      color:#7db2ff; /* readable blue on dark theme */
    }
  }
</style>

<div id="header-message">
  🙌 Found this helpful? Consider
  <a href="https://www.patreon.com/cw/bikegremlin" target="_blank" rel="noopener noreferrer"><strong>supporting on Patreon</strong></a>
  or
  <a href="https://ko-fi.com/bikegremlin" target="_blank" rel="noopener noreferrer"><strong>buying me a coffee</strong></a> – it helps a lot.
</div>

<!-- END Relja Patreon + Ko-fi support /5/ -->Code language: HTML, XML (xml)
3.7. Connecting Google Analytics
No need for any custom coding or extensions and similar (unlike WordPress).
Setup -> Options -> Search engine optimization (SEO)
And just copy/paste your Google Analytics tracking ID (“Google Analytics web property ID”).
On Google Analytics dashboard:
Admin -> Property settings -> Data collection and modification -> Data streams ->
click on the active stream, and copy the “Measurement Id”.
Update:
I switched to using custom code – simpler and more reliable.
Appearance -> Styles -> BikeGremlin-US-Style -> Templates ->
PAGE_CONTAINER ->
right before the tag, add:
<script async src="https://www.googletagmanager.com/gtag/js?id=G-DQ9VJYRLG6"></script>
    <script>
      window.dataLayer = window.dataLayer || [];
      function gtag(){dataLayer.push(arguments);}
      gtag('js', new Date());
      gtag('config', 'G-DQ9VJYRLG6');
    </script>Code language: HTML, XML (xml)
On my forum, analytics is used only for non-logged in users. Here is how I did that for analytics and adsense ads:
3.7.1. Google Analytics and AdSense for non-logged in users only
I switched to using custom code – simpler and more reliable.
Appearance -> Styles -> BikeGremlin-US-Style -> Templates ->
PAGE_CONTAINER ->
right before the tag, add:
<!-- BEGIN Relja for not-logged-in-users-only code -->

<xf:if is="!$xf.visitor.user_id">

<!-- BEGIN Relja Google Analytics code -->
    <script async src="https://www.googletagmanager.com/gtag/js?id=G-XXXXXXXXXX"></script>
    <script>
      window.dataLayer = window.dataLayer || [];
      function gtag(){dataLayer.push(arguments);}
      gtag('js', new Date());
      gtag('config', 'G-XXXXXXXXXX');
    </script>
<!-- END Relja Google Analytics code -->

<!-- BEGIN Relja AdSense code -->

<script async src="https://pagead2.googlesyndication.com/pagead/js/adsbygoogle.js?client=ca-pub-XXXXXXXXXXXX"
     crossorigin="anonymous"></script>

<!-- END Relja AdSense code -->

</xf:if>

<!-- END Relja for not-logged-in-users-only code -->Code language: HTML, XML (xml)
Replace the XXXXX stuff with your Analytics and AdSense tracking code, of course.
3.8. Adding Google Custom (“programmable”) search
Google does search a lot better – and it doesn’t put stress on the forum hosting server. That’s why I wanted to include that option to my forum.
In a separate (WordPress-related) article, I’ve explained the procedure of opening and configuring a Google Custom Search account.
But how do I add my Google custom search (now called Google Programmable search) code to my forum?
Appearance -> Styles -> Templates
find the “search_form” template and add your code at the end (or at the start if you want it to be shown first):
<xf:comment>BEGIN Google Programmable Search Form</xf:comment>
<div class="block-container">
  <div class="block-body block-row">
    <h1 class="p-title-value">Forum search by Google</h1>

    <script async src="https://cse.google.com/cse.js?cx=<strong>YOUR-GCSE-CODE-HERE</strong>"></script>
    <div class="gcse-search"></div>

    <div>
      <gcse:searchresults>
      </gcse:searchresults>
    </div>

    <!-- BEGIN Link to full-site search -->
 	<div style="margin-top: 20px; text-align: center;">
      <p style="font-size: 1.2em; font-weight: bold;">
        Not finding what you're looking for?<br>
        <a href="https://www.bikegremlin.com/search_gcse-full-en/"
           target="_blank"
           rel="noopener noreferrer">
          🔎 Search all BikeGremlin websites
        </a>
      </p>
    </div>
    <!-- END Link to full-site search -->

  </div>
</div>
<xf:comment>END Google Programmable Search Form</xf:comment>Code language: HTML, XML (xml)
Update:
I’ve also created a separate search page. Why? Well, for several reasons:
- It can work even if I disable the forum’s built-in search option. This will reduce any extra server load in case of very high demand & traffic – I like building things that can easily scale, right from the start.
- I can make it clearly visible when visitors are watching all the topics (I aim to encourage people to use the search and find the info they need).
- The page views of the search page are counted, so I can see if people are using the search without any additional visitor trackers or similar (more privacy is good).
Here’s what that looks like at the time of writing:
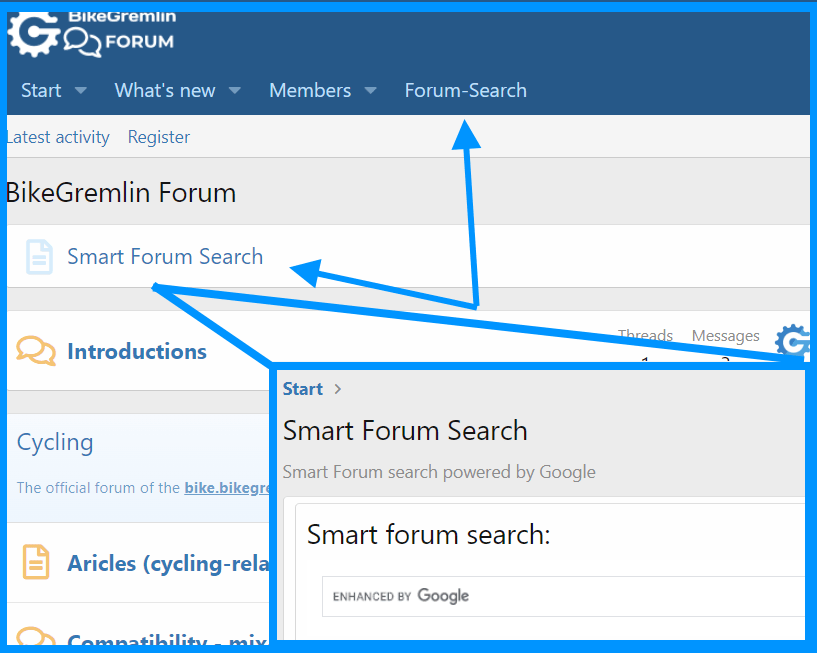
How I made that extra menu option is explained in section 7.1 (just disregard the “admin-only” stuff if you want it to be visible to all the visitors, of course).
For the page itself, I did:
Forums -> Nodes -> + Add node
and then chose the “Page” option.
Then I just copy/pasted the above listed code, and checked the “Log and count visits to this page” option. Of course, I gave it a Title (“Smart Forum Search”) and “URL portion” (“bg_search”), so the link to my search page is:
https://www.bikegremlin.net/pages/bg_search/
I could then easily make a custom menu navigation (section 7.1) item that leads to that link.
I suppose that I could still edit the “search_form” to show only my Google custom search (instead of completely removing that option for visitors), but I will leave the option of using the normal search bee for now.
3.9. No GIFs – no party!
Animated GIFs can be pretty cool when added to posts (even when “fashionably overdone” as it happens with LES Black Friday deal threads). But they take up a lot of storage space, compared to static images.
Fortunately, XenForo offers a neat, out-of-the box integration with GIPHY. Giphy’s API is awesome – it lets you integrate GIFs stored and served from their servers. Awesome! 🙂

3.10. section customization – Favicon setup
According to the latest Google’s doccumentation, it is no longer enough to just upload a favicon to your website’s root folder.
Now, you must place an invisible link to your favicon’s .ico file in your home page’s header. Here’s an example of what that link looks like for this website:
<link rel="icon" href="https://io.bikegremlin.com/favicon.ico">Code language: HTML, XML (xml)The path to the favicon file can be either absolute or relative. Here’s an example of a relative path, with the favicon file named “favicon.ico” and placed in the website’s root directory:
<link rel="icon" href="/favicon.ico">Code language: HTML, XML (xml)Google article explaining the new favicon policy:
https://developers.google.com/search/docs/appearance/favicon-in-search
For more details on the needed code and favicon formats (and resolution), see my article:
How to add favicon link to the WordPress header?
How to edit the <head> … </head> section for Xenforo?
Appearance -> Styles -> Your Theme(s) -> Template ->
PAGE_CONTAINER
There, you can add your code. Find the </head>, make a new line break above it, and add this (before the </head> line):
<!-- BEGIN BikeGremlin invisible favicon links -->
<link rel="icon" href="/favicon.ico">
<link rel="apple-touch-icon" sizes="180x180" href="/apple-touch-icon.png">
<link rel="icon" type="image/png" sizes="32x32" href="/favicon-32x32.png">
<link rel="icon" type="image/png" sizes="16x16" href="/favicon-16x16.png">
<link rel="manifest" href="/site.webmanifest">
<!-- END BikeGremlin invisible favicon links -->Code language: HTML, XML (xml)
This method is good for adding the Google AdSense code too, as discussed in chapter 8 (with code and implementation shown in chapter 3.7.1).
3.11. robots.txt file
The robots.txt file contains instructions for crawlers. This is done manually. You need to create and upload the “robots.txt” file. I’ve created one that blocks most SEO tools’ robots, and directories (including my custom search page “/pages/bg_search/”) that no crawler should be wasting its time on visiting or indexing.
You should place the “robots.txt” file in your (sub)domain’s root directory.
The file also contains a link to my forum’s sitemap (this can be either an .xml or a sitemap.php file).
User-agent: PetalBot
User-agent: AspiegelBot
User-agent: AhrefsBot
User-agent: SemrushBot
User-agent: SemRush
User-agent: DotBot
User-agent: MauiBot
User-agent: MJ12bot
Disallow: /

User-agent: Amazonbot
Disallow: /threads/*/reply

User-agent: *
Disallow: /pages/bg_search/
Disallow: /search/
Disallow: /whats-new/
Disallow: /find-threads/
Disallow: /watched/
Disallow: /account/
Disallow: /members/
Disallow: /goto/
Disallow: /posts/
Disallow: /login/
Disallow: /admin.php
Allow: /

Sitemap: https://www.bikegremlin.net/sitemap.xmlCode language: HTTP (http)
4. User groups and permissions
XenForo has this sorted out pretty neatly by default.
I added a group called “Registered-confirmed.” Users from that group can post comments without prior moderators’ approval.
Groups & permissions -> User group promotions
menu let me configure conditions when users are automatically promoted from “Registered” to “Registered-confirmed” group.
A stupidity on my part:
By default, unregistered visitors (guests) are not allowed to view attachments.
Hence, when I wrote and published a tutorial on how to register and post a comment on my forum, guests could only see the small 150-pixel thumbnails of the screenshots in the tutorial. After Googling (apparently the wrong terms) and searching the forum, I posted a question on the XenForo support forum.
Apparently, my keyboard was faster than my brain – and I did not take my own advice related to tech. support. A minute after having written the problem down and posted it on the support forum, I remembered the user permissions about the attachments (that’s how XenForo calls any attachments, including the images).
Yes, allowing the guest users (“Unregistered / Unconfirmed”) to view the attachments has solved the problem:
Groups & permissions -> User group permissions -> Unregistered / Unconfirmed
-> Forum permissions -> View attachments to posts (set to “Yes”)
4.1. User registration process
I wrote two brief tutorials for new members, because today, there are millions of people who’ve never ever used forums (and don’t even konw what a forum is). I published those as articles on my forum.
- English:
How to register and post a comment/question on BikeGremlin forum? - Serbocroatian:
Kako se registrovati i postaviti pitanje/komentar na BikeGremlin forumu?
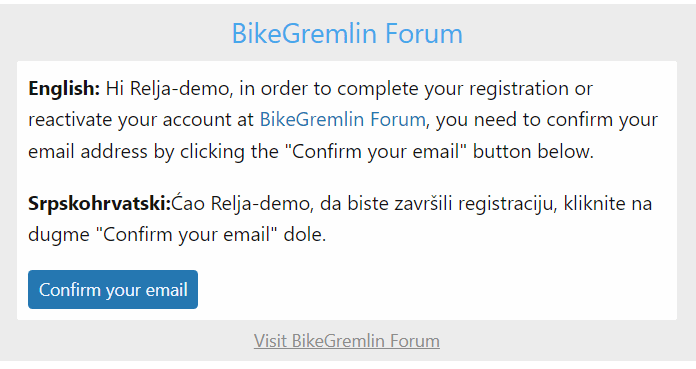
Then, I made a short HTML code that includes the email confirmation explanation in my native as well as in english, and added it here:
Appearance -> LanguagesEnglish (US) -> Phrases -> Edit phrase:
user_email_confirmation_body_html
<p><strong>English:</strong> Hi {username}, in order to complete your registration or reactivate your account at {board}, you need to confirm your email address by clicking the "Confirm your email" button below.</p>

<p><strong>Srpskohrvatski:</strong> Ćao {username}, da biste završili registraciju, kliknite na dugme "Confirm your email" dole.</p>Code language: HTML, XML (xml)
Here is what that looks like (in the mean time, I added a space before “Ćao” in the Serbocroatian section 🙂 ):
I also created a welcome e-mail with the basic instructions (how to post on a forum, yes, some people needed help):
Setup -> Options -> User Registration -> New User Welcome (section)
Checked the “Send welcome email on registration,” chose the HTML format option, and added this (text and links to my above-linked tutorial articles):
<p><strong>English: </strong>Welcome to the BikeGremlin forum. :)</p>
<p>Your account has been approved.</p>
<p>A brief tutorial (you can <strong>skip the section 1</strong>, since you've already done that :) ):<br /><a title="How to register and post a question/comment on the BikeGremlin forum" href="https://www.bikegremlin.net/threads/how-to-register-and-post-a-comment-question-on-bikegremlin-forum.24/" target="_blank"><strong>How to finish your registration and post a question or a comment</strong></a></p>
<p><strong>Srpskohrvatski: </strong>Dobrodošli na BikeGremlin forum. :)</p>
<p>Vaš nalog je odobren.</p>
<p>Kratko uputstvo (možete <strong>preskočiti sekciju 1</strong>, jer ste to već obavili :) ):<br /><a title="Kako se registrovati i postaviti pitanje/komentar na BikeGremlin forumu" href="https://www.bikegremlin.net/threads/kako-se-registrovati-i-postaviti-pitanje-komentar-na-bikegremlin-forumu.25/" target="_blank"><strong>Kako da završite registraciju i postavite pitanje ili komentar</strong></a></p>
<p>Relja Novović</p>Code language: HTML, XML (xml)
4.2. Cookies
For XenForo custom Cloudflare rules and similar, I needed this info.
Login attempt visitor gets this cookie even if the login is not finished (or even attempted, just a click on the login link from Chrome):
- xf_session
Logged in users have:
- xf_session
- xf_lscxf_logged_in
Logged in users that have checked the “remember me” box have:
- xf_session
- xf_lscxf_logged_in
- xf_user
5. Performance – LiteSpeed vs Redis cache
My server is LiteSpeed and that has been awesome for WordPress caching. Apparently, there is also a LiteSpeed XenForo add-on (link to its website).
It appears that the add-on is no longer maintained, according to the XenForo’s Resource section:
https://xenforo.com/community/resources/litespeed-cache-for-xf2-community.6248/
Redis cache add-on, on the other hand, seems to be still maintained:
https://xenforo.com/community/resources/redis-cache-by-xon.5562/
However, the last update date for the LiteSpeed plugin is just days before the latest XenForo version publish date (at the time of writing this). Perhaps the LiteSpeed folks just didn’t have any bugs to fix in the meantime?
What is the difference between LiteSpeed and Redis anyway?
LiteSpeed can cache any page that is created on the forum (this includes a forum page with a list of posts). It does that extremely well with WordPress and I can only assume (hope?) it is similar with XenForo.
Redis, on the other hand, can also cache any database querries. If one user searches for “best bicycle bearing grease,” the results of that forum search will be cached for the next user who does that search (oversimplified, but that’s roughly how it works).
Now, with WordPress, LiteSpeed cache plugin can use Redis for caching objects (as explained in the previous paragraph). It can “integrate” it, if Redis is present and properly configured on the server (as is the case with MDDHosting shared & reseller hosting servers). I couldn’t find any info on Redis in the LiteSpeed for XenForo installation manual.
At the time of writing, BikeGremlin Forum is running on PHP 8.0 and XenForo v2.2.13. As far as I know, a minor patch or two will be coming up in a few months, and a major update to version 2.3 is also in the making (and beta-testing). With a major change to 3.0 in sight.
From what I could gather, extensions don’t always work properly right away with a new version of forum software – especially in case of any major overhauls.
For these reasons, I’ve decided to keep running the “vanilla” forum version – with minimal changes. It’s running very smoothly now. When more people join the forum and if I notice any performance issues, I’ll see how to solve them – “crossing that bridge when I reach it” as the Americans say.
5.1. Implementing cache
My forum is slowly growing, so I decided to start looking into some caching optimizations. I started with the XenForo’s cache docummentation.
These are the Redis setup instructions (MDDHosting offers Redis object cache even in shared hosting environments! 🙂 ) – to be added to the src/config.php file:
$config['cache']['enabled'] = true;
$config['cache']['provider'] = 'Redis';
$config['cache']['config'] = [
    'host' => '127.0.0.1',
    'password' => 'password'
];Code language: PHP (php)
In my case, that would be (no password):
Update – configure only socket, not the port, especially with XenForo 2.3.x (the code has the port config commented out using “//” , but I added the strike-over just to make it more clear – XenForo 2.2.x seems to have just disregarded the port configuration since it’s not using it – you live and lear 🙂 ).
//BEGIN BikeGremlin Redis
$config['cache']['enabled'] = true;
$config['cache']['provider'] = 'Redis';
$config['cache']['config'] = [
    'host' => '/home/my_cpanel_username/redis.sock',
//   <s> 'port' => 6379</s>
];
//END BikeGremlin RedisCode language: PHP (php)
I decided to give it a test with LiteSpeed addon as well, just to see how and if it works. These are the LiteSpeed for XenForo installation instructions.
Update, August 2024:
Check if the LiteSpeed cache works with your XenForo version. These are my up-to-date notes on that for the XenForo 2.3.x:
https://io.bikegremlin.com/34518/xenforo-2-3-specifics-and-upgrade/#2.1
To install from a zipped archive, you must first add this line to the src/config.php file:
//BEGIN BikeGremlin allow install from archives
$config['enableAddOnArchiveInstaller'] = true;
//END BikeGremlin allow install from archivesCode language: PHP (php)
After you’ve run the installation, to have the LiteSpeed work, the following must be added to the .htaccess file in the root directory of your XenForo forum installation:
#BEGIN BikeGremlin LiteSpeed addon
# LiteSpeed XenForo cache
<IfModule litespeed>
CacheLookup public on
RewriteEngine On
# cache
RewriteCond %{HTTP_COOKIE} !(xf_lscxf_logged_in|xf_user|xf_session_admin) [NC]
RewriteCond %{REQUEST_URI} !/install/ [NC]
RewriteRule .* - [E=Cache-Control:max-age=360,E="cache-vary:xf_style_id,xf_language_id"]
# no cache
RewriteCond %{HTTP_COOKIE} (xf_lscxf_logged_in|xf_user|xf_session_admin) [NC]
RewriteRule .* - [E=Cache-Control:vary=loggedin,E=Cache-Control:no-cache]
</IfModule>
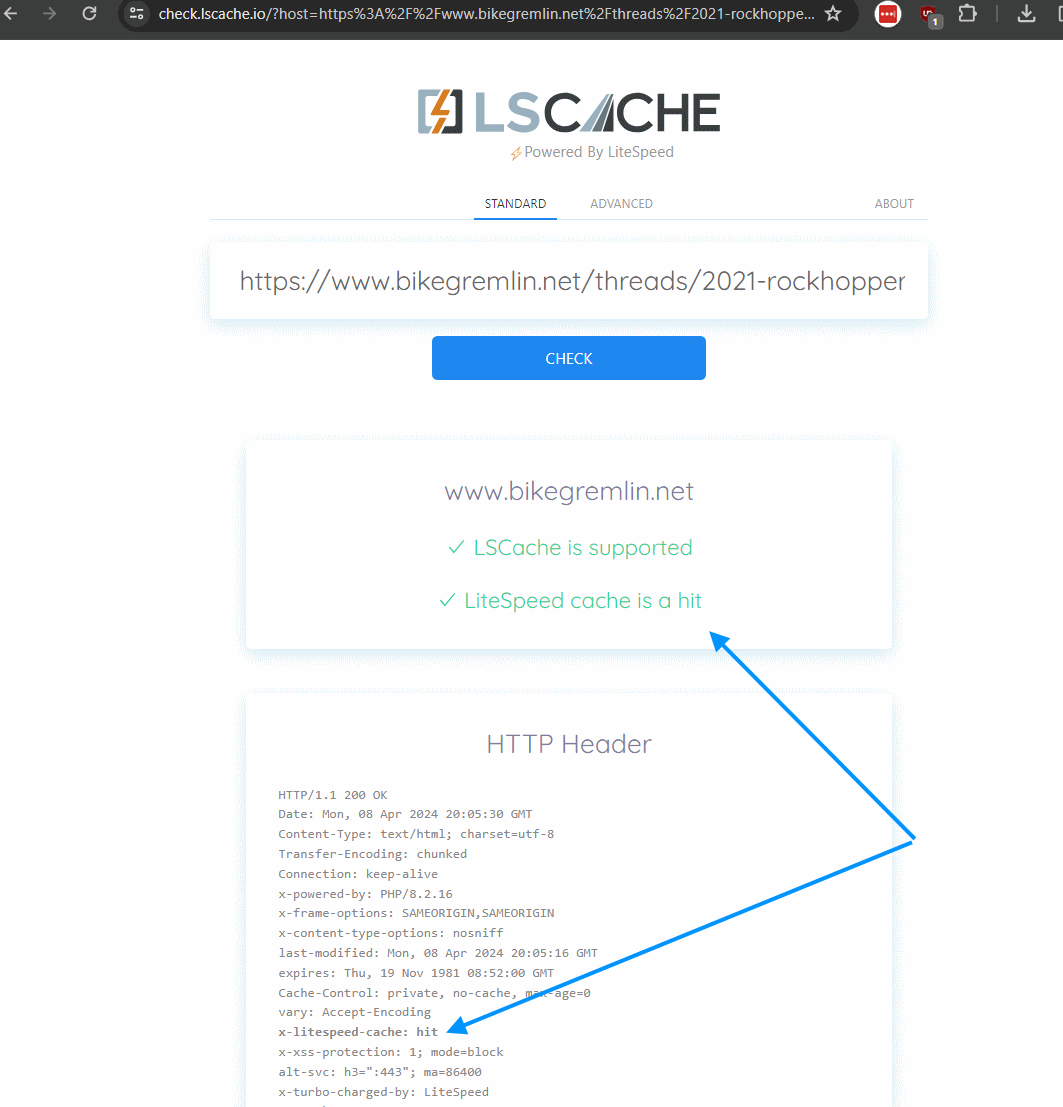
#END BikeGremlin LiteSpeed addonCode language: PHP (php)Now, you can use this need LiteSpeed’s tool to easily check if your LiteSpeed cache is working:
https://check.lscache.io/
5.2. Test if Redis cache works
Make a testing.php file with the following code and access it (yourforum.com/testing.php if you saved it in the root directory) – delete the file after you’ve confirmed it works:
<?php
header('Content-Type: text/plain');

if (!class_exists('Redis')) {
    die("Error: The Redis PHP extension is not enabled.\nGo to cPanel -> 'Select PHP Version' -> 'Extensions' and tick 'redis'.");
}

$redis = new Redis();
try {
    // Connect directly to your account's Unix socket
    $redis->connect('/home/bgforum/redis.sock');
    echo "Success: Connected to the Redis socket!\n";

    // Test a write and read operation
    $redis->set('xf_test_key', 'Working perfectly!');
    $value = $redis->get('xf_test_key');

    echo "Test Write/Read: " . ($value === 'Working perfectly!' ? "PASS" : "FAIL") . "\n";

    // Clean up
    $redis->del('xf_test_key');
    echo "Result: Redis is fully operational for PHP on your account.";
} catch (Exception $e) {
    echo "Connection failed: " . $e->getMessage() . "\n";
}Code language: PHP (php)
It should give you output like this:
Success: Connected to the Redis socket!
Test Write/Read: PASS
Result: Redis is fully operational for PHP on your account.
6. Why, God, WHY?!
Forums are awesome. While WordPress sucks when it comes to handling comments – especially questions and response types of comments.
XenForo setup and configuration are pretty simple compared to most other forum software I’ve played with. But that is not all (I sound like a salesman now – LOL 🙂 ):
- Practically every setting is clearly explained within the menu itself.
- XenForo docummentation is good and well-written.
- There’s an awesome support forum.
- Most settings are pretty well configured out-of-the-box (i.e. by default).
So far so good (says a man falling from a 10-storey building)… 🙂
On my cycling website, I wrote in more details about why I thought building a forum is a jolly good idea.
On my forum, I wrote in a lot more detail about why I chose XenForo vs its alternatives.
7. Custom stuff
7.1. Custom navigation and admin/mod only visible menu
To make a menu visible to only admins, or mods, go to:
Setup -> Public navigation
Add Navigation (top-right corner button), and set the display condition:
Admins only:
$xf.visitor.is_adminCode language: PHP (php)Moderators only (and admins, of course):
$xf.visitor.is_moderatorCode language: PHP (php)Logged in users only (no guests):
$xf.visitor.user_idCode language: PHP (php)Here’s an example:

Dark mode option – for every logged in user
In a similar way, I added a menu option to switch light/dark theme:

Removing forum lists from the home page categories
Update – I have restructured my forum so that this is no longer needed, but keeping it as a reminder in case it gets handy again.
By default, XenForo lists all the forums under each category on the home page. For my forum, that resulted with a wall of text (with cycling, IT, misc, and my home-lanugage forum version – it adds up). So, I added some custom code:
Appearance -> Styles -> my-BikeGremlinUS-style) -> Templates -> extra.less
Added this at the end:
/* Relja hide child forums on the main index, but show them inside categories */
body[data-template="forum_list"] .node--forum.node--depth2 {
    display: none;
}Code language: CSS (css)
7.2. List users with unconfirmed emails
I wanted to quickly list users with unconfirmed emails – so I can check and delete those who’ve been unconfirmed for month(s), or try emailing them first to see what the problem is.
After some playing with the member searh options, I figured out that this code will list users with unconfirmed emails, sorted by their registration dates:
https://<strong>www.example.com</strong>/admin.php?users/list&criteria[user_state][0]=email_confirm&order=register_dateCode language: HTML, XML (xml)Replace the “https://www.example.com” with your domain & forum path.
I combined this with the custom menu described in section 7.1.
This way, any moderators (and admins) can quickly check it out.
How to figure this out (the query parameters)?
I went to user search:
Users -> Search for users
There, I set the search parameters. If the search returns more than one result, then you can click on the option “Sort by: Username” at the top of the search results. Whichever option you choose (even if you use the Username), your browser’s address bar will show the link along with all the search results.
If a search has only one, or no results, then you won’t get the “Sort by:” option, and won’t get to see the search query used.
Here is the code to list “Discouraged users:”
https://<strong>www.example.com</strong>/admin.php?users/list&criteria[Option][is_discouraged]=1&order=last_activityCode language: HTML, XML (xml)
7.3. Custom CSS
After having updated to XenForo 2.3.X version, I didn’t like the way Google search box text looks like when using the dark mode.
So, to try and fix that, I went to:
Appearance -> Styles -> My_Style -> Templates
There, I searched for the “extra.less” template (that one should be used for custom CSS as far as I know), and added this code:
/* Customizing the search input text colour */
input.gsc-input {
    color: #000000;
}Code language: CSS (css)
I also wanted to change the search suggestions font colour (the ones that pop below when you start typing). This is the code I used for that:
/* Customizing the suggestions text colour */
.gssb_c .gssb_e {
    color: #000000;
}

/* Customizing the suggestions hover colour */
.gssb_c .gssb_e:hover {
    color: #00000F;
}Code language: CSS (css)
I also wanted to customize the widget font sizes:
/* Customizing widget font size */

.p-body-sidebar .block-footer,
.p-body-sidebar .block-minorHeader {
    font-size: 16px; /* Adjust as optimal */
	font-weight: bold; /* Make the title stand out */
}

.p-body-sidebar .block-container ul {
    font-size: 14px; /* Adjust as optimal */
}

.p-body-sidebar .contentRow-main--close > div:last-child {
    font-size: 14px; /* Adjust as optimal */
}Code language: CSS (css)
Heading (H2, H3, and H4) styles customization
Update November 2025:
I edited heading styling to resemble my latest website styling redesign:
Note: XenForo’s post editor shows H2, H3, and H4 as “Heading 1,” “Heading 2,” and “Heading 3” respectivelly.
/* === BEGIN BikeGremlin Heading Style Overrides === */

.message-body h2,
.block-body h2 {
  /* color: #111111; */
  /* background-color: #fff7f2; */  /* very pale orange tint */
  /* color and background version that work better with dark mode switch enabled */
  color: var(--xf-textColor);
  background-color: var(--xf-blockBg);
  border-left: 4px solid #ff8c42;
  padding: 0.4em 0.6em;
  margin-top: 1.8em;
  margin-bottom: 0.8em;
  font-weight: 700;
}

.message-body h3,
.block-body h3 {
  color: #9b2fc9;
}

.message-body h4,
.block-body h4 {
  color: #c66a2b;
  font-weight: 500;
  margin-top: 1.2em;
  margin-bottom: 0.4em;
  font-style: italic;
}

/* === END BikeGremlin Heading Style Overrides === */Code language: CSS (css)
I wanted more space above each heading:
/* Larger spacing above H2–H5 in posts */
.bbWrapper h2.bbHeading,
.bbWrapper h3.bbHeading,
.bbWrapper h4.bbHeading,
.bbWrapper h5.bbHeading {
    margin-top: 1.8em;   /* Adjust: 1.6em–2em works well */
}Code language: CSS (css)
7.4. Scroll progress bar on top
After having made a visible article scroll progress bar on WordPress, I decided to do the same for my XenForo forum. 🙂
In the XenForo admin panel, I went to
Appearance -> Templates
extra.less
/* BEGIN BikeGremlin custom scroll progress bar */

#scrollProgressBar {
  position: fixed;
  top: 0;
  left: 0;
  width: 0%;
  height: 7px;
  background-color: #9b2fc9; /* Purple color */
  z-index: 99999;
}

/* END BikeGremlin custom scroll progress bar */Code language: CSS (css)
Then, I edited the PAGE_CONTAINER template. Added the following code just after the opening “<body” tag:
<!-- BEGIN BikeGremlin custom scroll progress bar 1/2 -->

<div id="scrollProgressBar"></div>

<!-- END BikeGremlin custom scroll progress bar 1/2 -->Code language: HTML, XML (xml)
NOTE / digression:
XenForo recommends using this format for adding comments to your code:
<xf:comment>BikeGremlin's comment here</xf:comment>

<!-- However, for easier readability
 (when using syntax highlighting),
 I prefer using the standard HTML comments,
 as shown in this very comment. -->Code language: HTML, XML (xml)
Let’s move on. In that same template, I added this before the closing “</body” tag:
<!-- BEGIN BikeGremlin custom scroll progress bar 2/2 -->

<script>
  document.addEventListener("scroll", function() {
    var scrollTop = window.pageYOffset || document.documentElement.scrollTop || document.body.scrollTop || 0;
    var docHeight = document.documentElement.scrollHeight - document.documentElement.clientHeight;
    var scrollPercent = (scrollTop / docHeight) * 100;

    document.getElementById("scrollProgressBar").style.width = scrollPercent + "%";
  });
</script>

<!-- END BikeGremlin custom scroll progress bar 2/2 -->Code language: HTML, XML (xml)
You can check it out, here: 🙂
https://www.bikegremlin.net/
Patreon and Ko-fi support call-to-action in the header
<!-- BEGIN Relja Patreon support /0/ -->

<style>
  #header-message-top {
    background:#f9f9f9;
    color:#222;
    padding:10px 15px;
    text-align:center;
    border-bottom:1px solid #ccc;
    font-size:16px;
  }

  #header-message-top a {
    color:#003366;
  }

  @media (prefers-color-scheme: dark) {
    #header-message-top {
      background:#332c27;   /* warm dark tint, no glow */
      color:#e0e0e0;
      border-bottom:1px solid #444;
    }

    #header-message-top a {
      color:#7db2ff;        /* readable blue on dark theme */
    }
  }
</style>

<div id="header-message-top">
  💡 Like BikeGremlin?
  <a href="https://www.patreon.com/cw/bikegremlin" target="_blank" rel="noopener noreferrer"><strong>Support me on Patreon</strong></a> or
  <a href="https://ko-fi.com/bikegremlin" target="_blank" rel="noopener noreferrer"><strong>buy me a coffee</strong></a>
</div>

<!-- END Relja Patreon support /0/ -->Code language: HTML, XML (xml)
7.5. Registration form custom text
I wanted to add some text discouraging users from registering with a throwaway email. I went to:
Appearance -> Templates
register_form
There, I found the email section, and added my custom code:
<xf:macro id="register_macros::email_row"
				arg-fieldName="{{ $regForm.getFieldName('email') }}"
				arg-value="{$fields.email}" />

<!-- BEGIN BikeGremlin custom email notification -->

<!-- Adding a brief explanation about email privacy and usage. -->
<xf:formrow>
    <span>
        Your email address is kept private and will not be used for spam.
        We only use it to contact you if necessary or to help you reset your password.
        Please provide a valid email.
        <a href="https://www.bikegremlin.net/threads/forum-rules-and-faq.382/#post-1651" target="_blank">More info</a>.
    </span>
</xf:formrow>

<!-- END BikeGremlin custom email notification -->

			<xf:comment>Spam catcher field</xf:comment>
			<xf:if is="{{ rand(0, 2) == 1 }}">
				<xf:textboxrow name="email" value="" type="email" autocomplete="off" rowclass="formRow--limited"
					maxlength="{{ max_length($xf.visitor, 'email') }}"
					label="{{ phrase('email') }}"
					explain="{{ phrase('please_leave_this_field_blank') }}" />
			</xf:if>Code language: HTML, XML (xml)
I used “span” instead of a new paragraph (“p”) to avoid having a huge spacing/gap. It worked OK. 🙂
If you wish to have the text look like the other explanatory text on that page (not stand out), you could use the same, already defined, CSS styling, like this:
<!-- BEGIN BikeGremlin custom email notification -->

<!-- Adding a brief explanation about email privacy and usage. -->
<xf:formrow>
    <div class="formRow-explain">
        Your email address is kept private and will not be used for spam.
        We only use it to contact you if necessary or to help you reset your password.
        Please provide a valid email.
        <a href="https://www.bikegremlin.net/threads/forum-rules-and-faq.382/#post-1651" target="_blank">More info</a>.
    </div>
</xf:formrow>

<!-- END BikeGremlin custom email notification -->Code language: HTML, XML (xml)
7.6. Custom styling sections
How I made this:
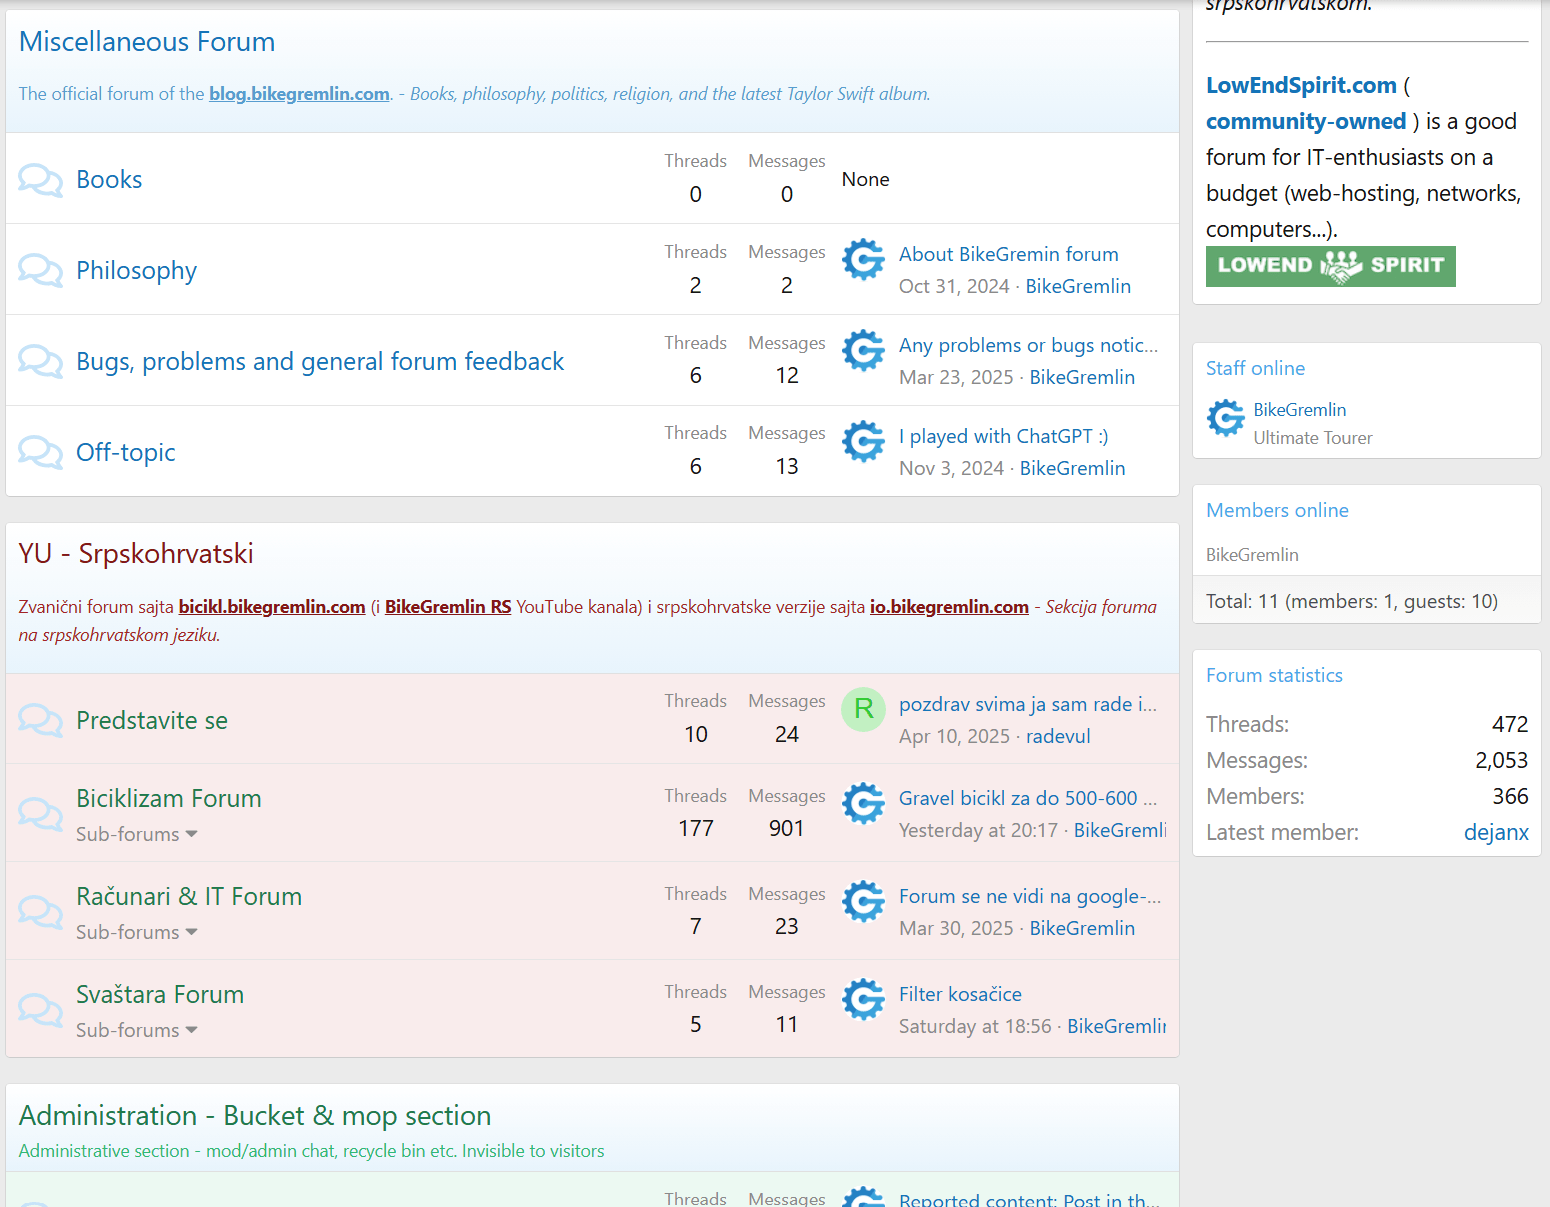
Update December 2025:
Current colours are a bit darker, to fit better with the dark theme option (while still being easily distinguished and readable in the light theme).
I first made the sections have distinct colour on the starting page (so that the section in my native, Serbocroatian, “YUgoslavia” section would be red, and admin section green).
I did this by some custom CSS (targeting the sections as they are on my forum), that I added to:
Appearance -> Styles -> BikeGremlin-US-Style (my default theme) -> Templates
extra.less
/* BEGIN RS Section Style */
/* YU section container styling */
.block--category7 .block-container {
  background-color: hsl(0, 25%, 20%);  /* dark muted red – works in both modes */
}

/* YU section header title */
.block--category7 .block-header a {
  color: hsl(0, 65%, 78%) !important;  /* soft light red */
}

/* YU section description */
.block--category7 .block-header .block-desc {
  color: hsl(0, 40%, 70%);             /* muted warm tone */
}

/* Subforum titles */
.block--category7 .node-title a {
  color: hsl(150, 50%, 70%) !important; /* soft green, readable but not neon */
}
/* END RS Section Style */

/* BEGIN Admin Section Style */
/* Admin section container styling */
.block--category29 .block-container {
  background-color: hsl(150, 20%, 20%); /* dark muted green */
}

/* Admin section header title */
.block--category29 .block-header a {
  color: hsl(150, 55%, 78%) !important; /* soft light green */
}

/* Admin section description */
.block--category29 .block-header .block-desc {
  color: hsl(150, 40%, 70%);            /* muted greenish tone */
}

/* Subforum titles */
.block--category29 .node-title a {
  color: hsl(0, 60%, 70%) !important;   /* soft red */
}
/* END Admin Section Style */

/* BEGIN bold text in dark theme colour change */
/* Make bold text more visible in dark mode */
html[data-color-scheme="dark"] .bbWrapper b,
html[data-color-scheme="dark"] .bbWrapper strong {
    color: #8aff80 !important;  /* your Obsidian green */
    font-weight: 700 !important;
}
/* END bold text in dark theme colour change */Code language: CSS (css)
Then, I created two custom themes:
Appearance -> Styles -> [Add style]
and chose “Parrent style” to be my BikeGremlin-US-Style (default theme).
I de-checked the “Enable variations” option for all my styles (too much hassle working with separate styling for the dark theme – sorry all the dark theme fans).
Update, December 2025: dark theme is now allowed.
And I de-checked the “Allow user selection” option for the new sub-styles.
Then, I edited the
Style properties -> Color palette
options for each of the newly created styles, to make them stand out.
Finally, I went to:
Forums -> Nodes
clicked on the highest hierarchy node that I want the change to apply (like YU section top node, or Admin section top node),
checked the “Override user style choice” and selected the desired style (BikeGremlin-RS-Style, or BikeGremlin-Admin-Style).
7.7. Showing tags
I wanted to see tags when viewing thead lists – not just when I open a given thread.
Appearance -> Styles -> Templates -> thread_list_macros
Then, around line 148, I added <my custom code> between
div class=”structItem-title” closing div and
<my custom code>
div class=”structItem-minor” opening div
<my custom code>
<!-- BEGIN RELJA TAG SHOW EDIT -->
<xf:if is="$thread.tags">
    <div class="structItem-minor relja-thread-tags" style="margin-top: 2px;">
        <ul class="listInline listInline--bullet">
            <xf:foreach loop="$thread.tags" value="$tag">
                <li>
                    <a href="{{ link('tags', $tag) }}" class="tagItem" dir="auto" style="font-size: 85%; opacity: 0.7;">
                    {$tag.tag}</a>
                </li>
            </xf:foreach>
        </ul>
    </div>
</xf:if>
<!-- END RELJA TAG SHOW EDIT -->Code language: HTML, XML (xml)
To make that stand out, with different colour per tag type:
b- (for bicycles)
it- (computer-related stuff)
tools- (physical tool related stuff – not software tools)
misc- (phylosophy, meta, books etc.)
Appearance -> Styles -> my-BikeGremlinUS-style) -> Templates -> extra.less
/* BEGIN RELJA-EDIT: Color-coded tags by prefix */
/* Cycling (b-) - Blue */
.relja-thread-tags a[href*="/tags/b-"] {
    color: #2980b9;
}

/* IT (it-) - Green */
.relja-thread-tags a[href*="/tags/it-"] {
    color: #27ae60;
}

/* Tools (tools-) - "Safety" gold/yellow for physical hardware */
.relja-thread-tags a[href*="/tags/tools-"] {
    color: #f39c12;
}

/* Miscellaneous (misc-) - Neutral grey */
.relja-thread-tags a[href*="/tags/misc-"] {
    color: #7f8c8d;
}

/* Make them stand out just a bit more on hover */
.relja-thread-tags a:hover {
    opacity: 1 !important;
    text-decoration: underline;
}
/* END RELJA-EDIT: Color-coded tags by prefix */Code language: CSS (css)
8. Google AdSense and GDPR
Here is the relevant XenForo community discussion on GDPR & cookies.
Here are my notes on this – still unconfirmed as I’m waiting for my XenForo domain to be approved for AdSense.
Update, December 2023:
BikeGremlin forum has been approved for AdSense, and I can confirm that the below-described stuff actually works. 🙂
You can (and should) enable AutoAds for your XenForo domain. Then, you can use Google’s own cookie consent service – so you don’t have to pay for a separate service just for that.
My article about WordPress AdSense integration explains how to enable AdSense Auto ads (in section/chapter 3), and how to enable AdSense GDPR & cookie consent popups (section 4).
You can disable any other Auto ads options if you wish to, so you can manually place ads where you wish, and just harness the AdSense cookie consent options.
To add Auto ads code to your forum – use the same method as for adding favicon code to the header, explained in chapter 3.10.
The below-explained method also works, but technically it doesn’t add the code to the <head> section.
- Alternative method BEGIN
Setup -> Advertising -> + Add advertisement
Choose the option “Container header” for the position and copy/paste your AdSense auto ads code there:
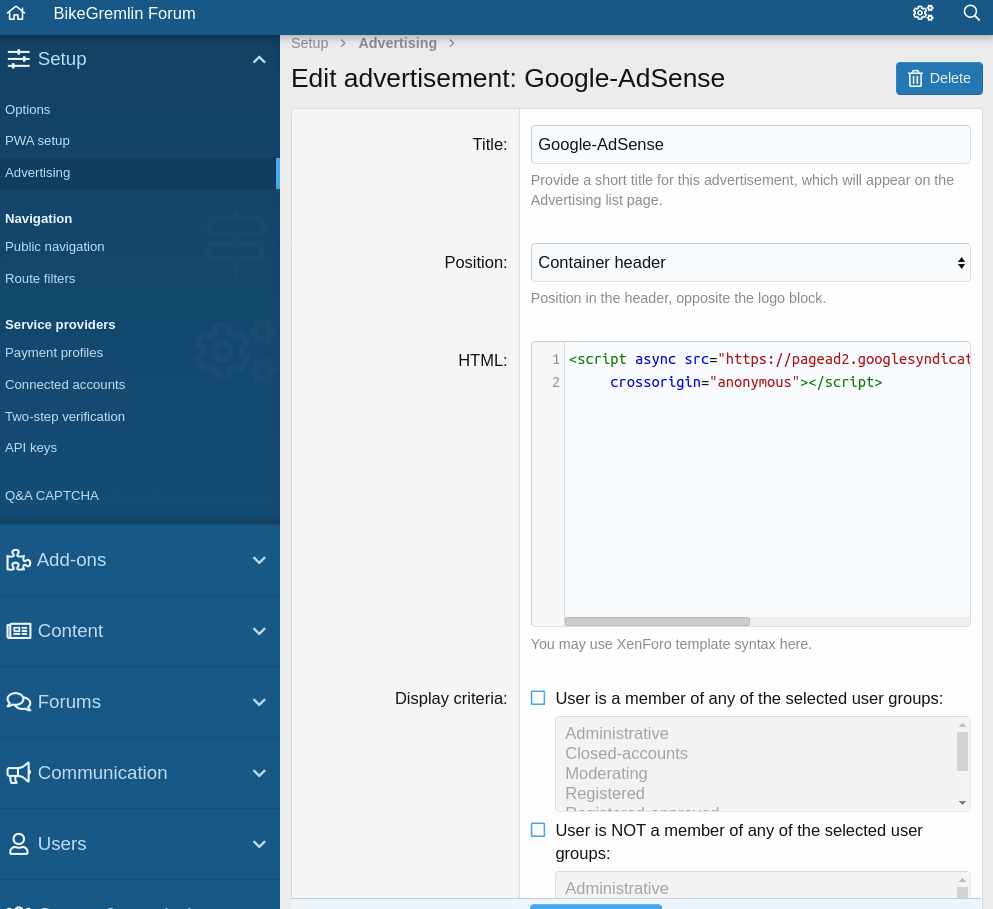
The code example (replace the “XXXXXX” with your AdSense publisher number for it to work on your forum):
<script async src="https://pagead2.googlesyndication.com/pagead/js/adsbygoogle.js?client=ca-pub-XXXXXXXXXXXXX"
     crossorigin="anonymous"></script>Code language: HTML, XML (xml)
The display criteria lets you configure the auto ads to be removed for any logged in members, or for the members of certain user groups (haven’t tested this either, still waiting for AdSense approval).
- Alternative method END
Now, here is the code for the AdSense GDPR cookie revocation, which should be on your privacy policy page:
<a href=”javascript:googlefc.callbackQueue.push(googlefc.showRevocationMessage)”>Click here to revoke your choice</a>.Code language: HTML, XML (xml)Yet to figure out and test a CPRA cookie revocation link/code.
Manual ad placement
To place the ads manually, what I did was:
Created an AdSense ad format and copied its code for manual placement (how to create AdSense units and get the code for manual placement).
Then, in the XenForo admin:
Appearance -> Widgets -> + Add widget
Copy/pasting the code in the “Template” section of the new widget (which I named “Adverts”).
Here is the example from my forum, containing a link to my patreon support, a list of forums I recommend, a header that says “Adverts” and the AdSense code for a vertical manually placed advert (replace the “XXXXXXX” and “NNNNN” with your AdSense code to make it work for your forum, of course):
<hr />
<p>
<a title="BikeGremlin Patreon support" href="https://www.patreon.com/bikegremlin" target="_blank">
<strong>Help BikeGremlin stay online</strong></a> with a Patreon donation:
<br />
<form action="https://www.patreon.com/bikegremlin"><input type="submit" value="Support BikeGremlin" /></form>
</p>

<hr />
<p>
<a title="Bike Forums .net" href="https://www.bikeforums.net/" target="_blank"> <strong>BikeForums.net</strong></a> is the best cycling-related forum in the world!
<br />
<img src="https://www.bikegremlin.net/bg-images/bikeforums-net-200x79.png" alt="Bike Forums .net" width="200" height="79" />
<br />
<em><a title="2Bike.rs Forum" href="https://www.2bike.rs/forum/" target="_blank">
<strong>2bike.rs</strong></a> je najbolji biciklistički forum na srpskohrvatskom</em>
</p>

<hr />
<p>
<a title="LowEndSpirit .com" href="https://lowendspirit.com/" target="_blank"> <strong>LowEndSpirit.com</strong></a> is a good forum for IT-enthusiasts on a budget (web-hosting, networks, computers...).
<br />
<img src="https://www.bikegremlin.net/bg-images/lowendspirit-com-200x33.png" alt="LowEndSpirit .com" width="200" height="33" />
</p>

<hr />

<h3 class="block-minorHeader">Adverts</h3>

<!-- io-text-display-vertical -->
<ins class="adsbygoogle"
     style="display:block"
     data-ad-client="ca-pub-XXXXXXXXXXXXX"
     data-ad-slot="NNNNNNNN"
     data-ad-format="auto"
     data-full-width-responsive="true"></ins>
<script>
     (adsbygoogle = window.adsbygoogle || []).push({});
</script>

<hr />Code language: HTML, XML (xml)
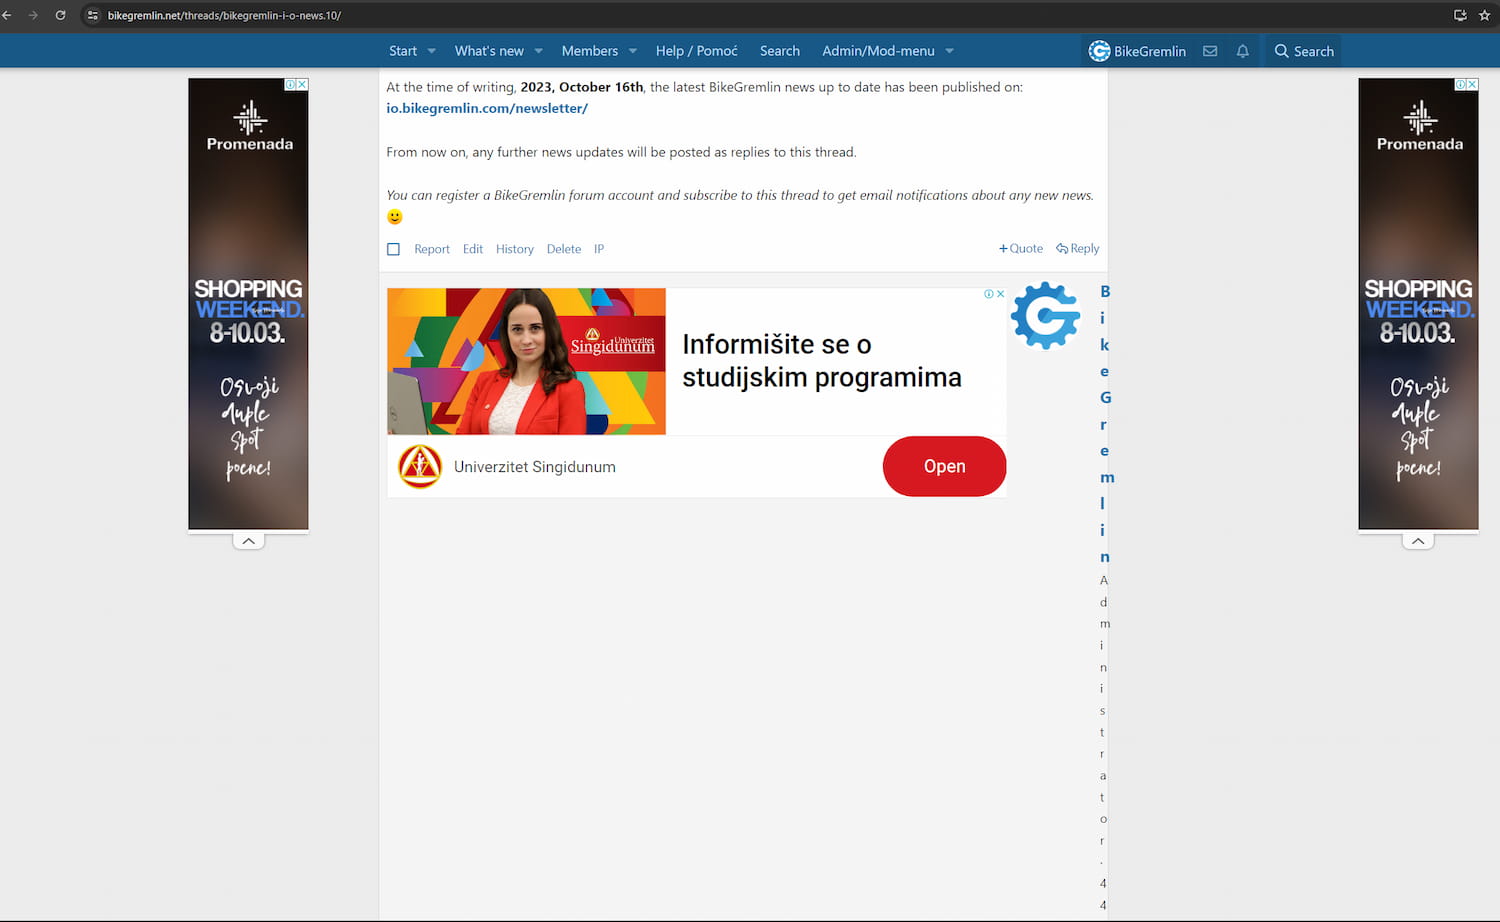
8.1. AdSense breaking layout fix
8.1.1. In-article ad problems
Update:
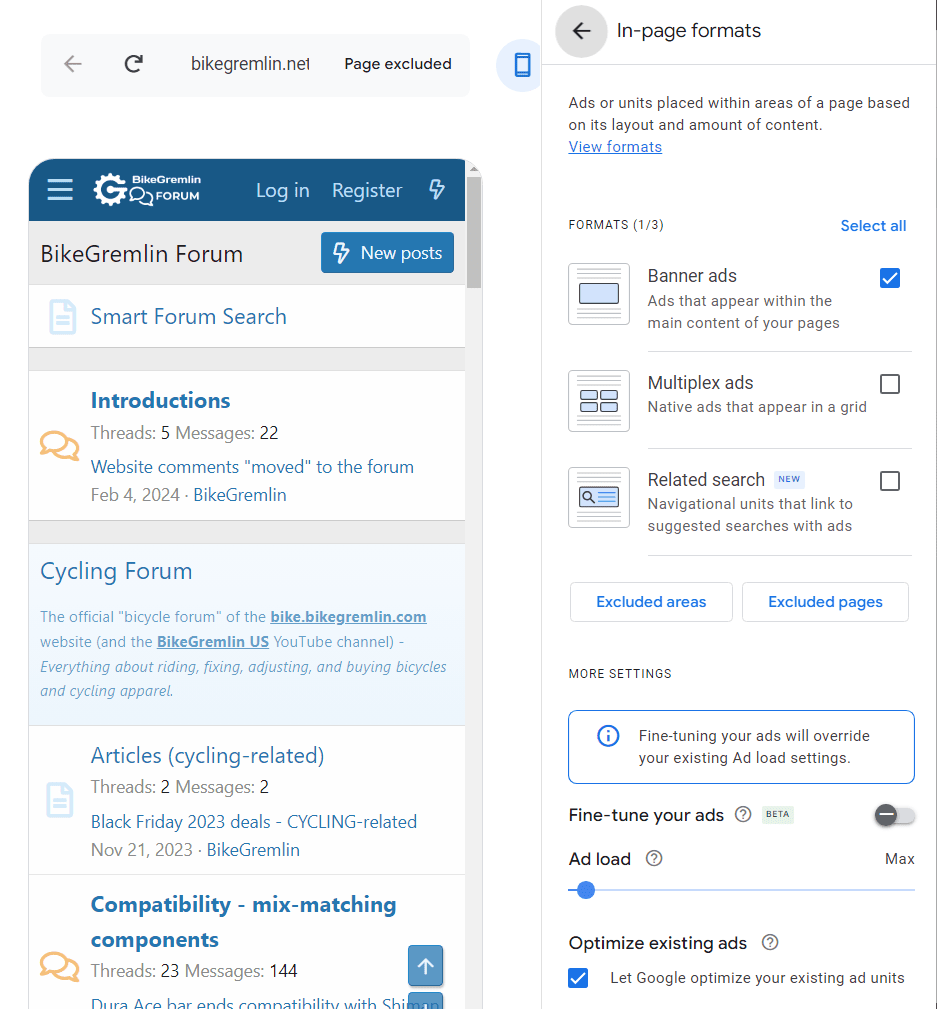
The solution described below is a hit-and-miss. Works for some posts, but not for all. So, I have decided to disable all in-content ad formats, including the “Banner ads” (the last picture in this chapter shows the in-page ad options settings).
Based on my experience, on desktop, AdSense will try to insert adverts into posts where URLs are embedded. That is: where users didn’t manually click on the URL adding option in the editor, but just copy/pasted a link (or just wrote a link).
To fix that, you must disable the “Multiplex ads” (apparently, they are as bad as the cinema/theatre design with the same name 🙂 ).
The option to disable this is in:
Your ad settings -> In-page formats.
So, click on the edit pencil in your AdSense “Ads” menu:
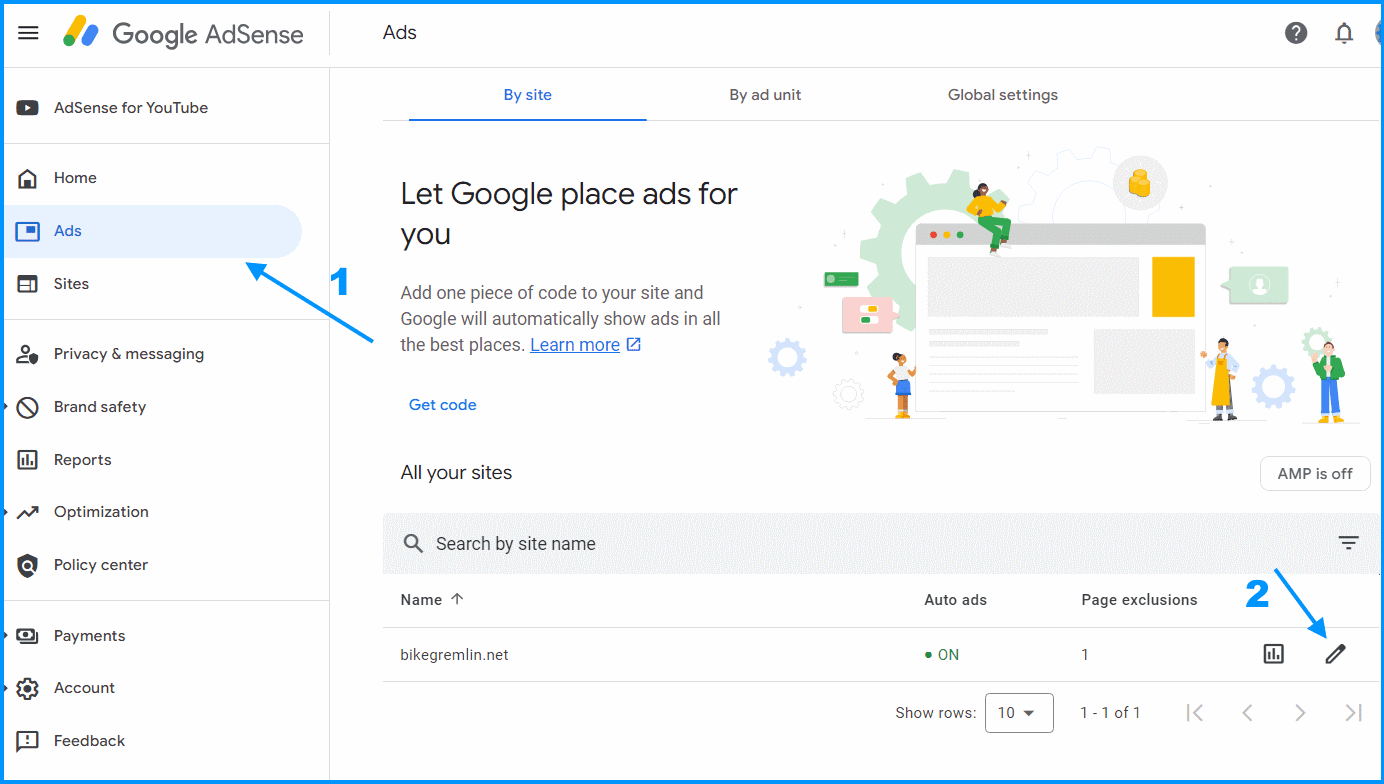
Click on the “In-page formats” option:
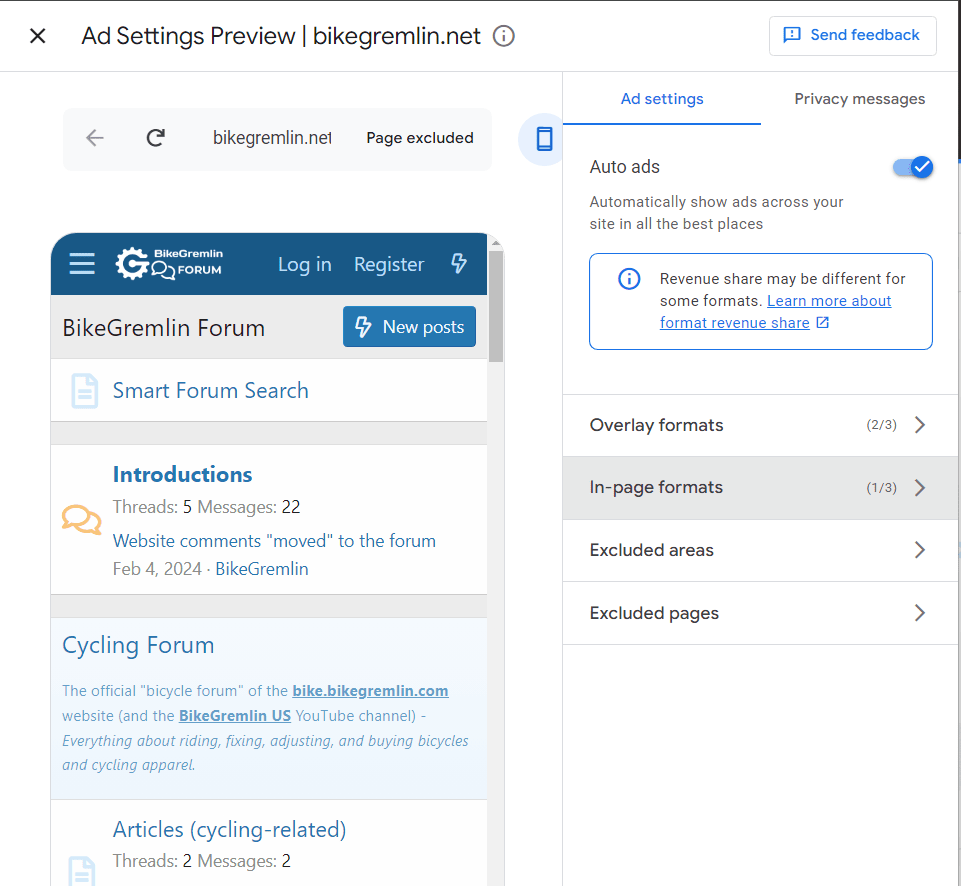
Uncheck the “Multiplex ads” checkbox:
8.1.2. Anchor ads on desktop problem
Another problem with XenForo and AdSense on desktop computers: the anchor ads (those pinned to the bottom of the screen) cover the navigation arrows, so they aren’t visible (nor clickable).
To fix this, you can disable the anchor ads on desktop:
Ad settings -> Overlay formats ->
uncheck the “Turn off anchor ads on screens wider than 1000px, like desktop” checkbox.
8.1.3. AdSense & XenForo problems conclusion
Both Google and XenForo are making money from people who run forums with AdSense. However, for any troubleshooting, you are on your own.
It’s practically impossible to talk to a human from Google’s support (does that really even exist for us mere mortals?). As far as XenForo is concerned, AdSense is a third party software so “all works on our end” (they didn’t say those words, but that’s what it boils down to).
This is the typcial “Catch 22” problem. You can’t really blame any of the companies (it certainly won’t help you – LOL), but you’re still on your own and basically fucked (well, not completely – as I’ve explained, you can disable the ads… and your revenue). 🙂
9. Updating XenForo
Compared to most other forum software I’ve played with, XenForo update I did was very easy.
I got a notice in my admin dashboard that a newer version is out – with a button to click and update it. Here’s what I did, step-by-step:
- Made a staging forum install with the same setup, and did the update on staging first, to confirm it’s all good (then just repeated the process on the production forum install).
– Had that from the start for testing other customizations. - Checked to see that the forum is running the latest recommended PHP version for the current forum version (not for the update).
– In this case, it was PHP 8.0 for the XenForo 2.2.14 version. - Setup -> Options -> Board active -> de-checked the “Board is active” checkbox.
– Visitors can’t read or write, they just see the notice I set there. - Click on the update button and wait for the update to finish.
Now, before I could re-check the “Board is active” checkbox, I had some custom code to fix:
Appearance -> Outdated templates
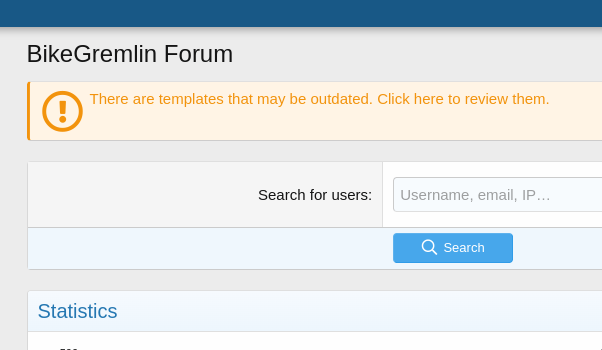
There, I could click on my old template to “merge” it with the new template version.
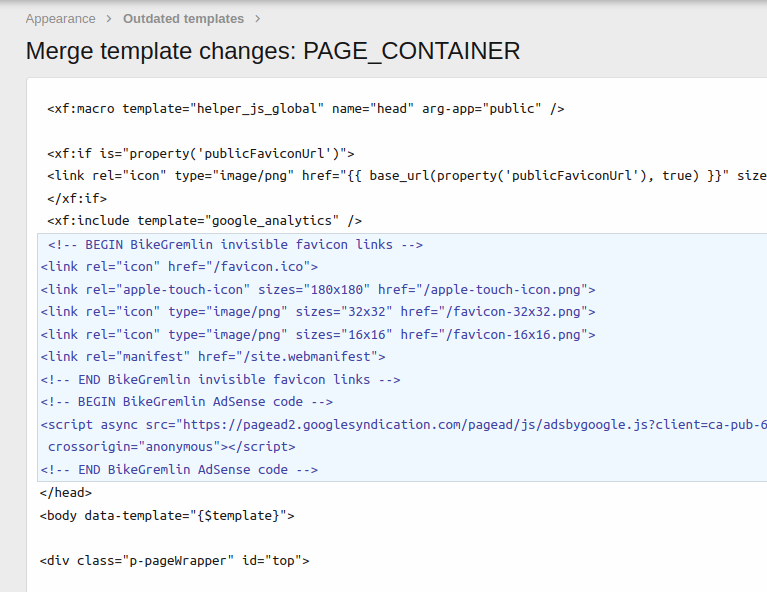
The picture above shows the difference (the custom code I had added) between the old and the new template. I could just click the merge button to let XenForo add the code to the new template.
- Then, I set the PHP version to the latest recommended for the new XenForo version.
– PHP 8.2 for the XenForo 2.2.15 version. - Finally, I checked the forum admin area and the hosting server for any error logs.
All that was left to do was to re-check the “Board is active” checkbox and confirm it’s all good (then, repeat the process I did on staging in the production version).
July 2024 update:
Last updated:
Originally published: