In this post I’ll explain what is MXroute email service and how it is set up and used. Read these instructions from the start to the end – to get an idea of what needs to be done. Then, on the “second go”, follow the instructions step by step, without skipping. It is important in order to avoid any problems.
Note:
See the video in chapter 9 for all the details and peculiarities of the current, Direct Admin MXroute setup (basics are the same, but a lot of stuff in this article covers the cPanel setup).
Table Of Contents (T.O.C.):
- What is MXroute mail service?
- Starting with MXroute
- Adding (your) domain
- Adding an email address
- DNS setup – IMPORTANT
…5.1. DKIM DNS setup - Testing – DON’T SKIP THIS
- Spam filter and catch-all email setup
- IMPORTANT: setup with website hosting control panel
- VIDEO demonstration of MXroute configuration
1. What is MXroute mail service?
Simply put: it is a post-box. Enabling you to send emails from your domain addresses so they arrive to their destination (recipients) and to have all the emails sent to you reach your inbox. That is, instead of using [email protected], you can set up [email protected]. This looks a lot more professional with business communication and it is also cool to have an email address with your domain. 🙂
Note: email delivery is not the most reliable thing in the world, because of the protocol used for it. It is based on technology from the end of the previous century. In fact, because of the enormous amount of spam, I’d say it’s even more complicated and less reliable now. Hence, based on my knowledge and experience, anyone claiming they can 100% guarantee email delivery is either consciously lying, or just not experienced enough. Good quality mail services still offer the largest possible probability of emails being successfully delivered. Nothing more and nothing less.
MXroute company started in 2013 with a goal to offer reliable and affordable domain email delivery and exchange. Its founders are Jarland Donnell and Ryan Arp.
Other similar services are MS Exchange (Microsoft) and G-suite (Google). More on them perhaps some other time. General explanation of the pros and cons of using a hosted email service.
Right at the start, here are deliverability tests (done using GLOCK APPS):
2. Starting with MXroute
After paying for the package you opt for, you’ll get an email with control panel login information, including the username and password.
- I suggest, just like with hosting services, that you sign up with an email that will not be used with MXroute (gmail, yahoo, or something third) – so you have a means of communication in case of any problems.
- Also change the login password – just in case.
Password is changed after logging in to the given control panel address (cPanel is used, with a switch to a new panel being considered since the cPanel price rise):
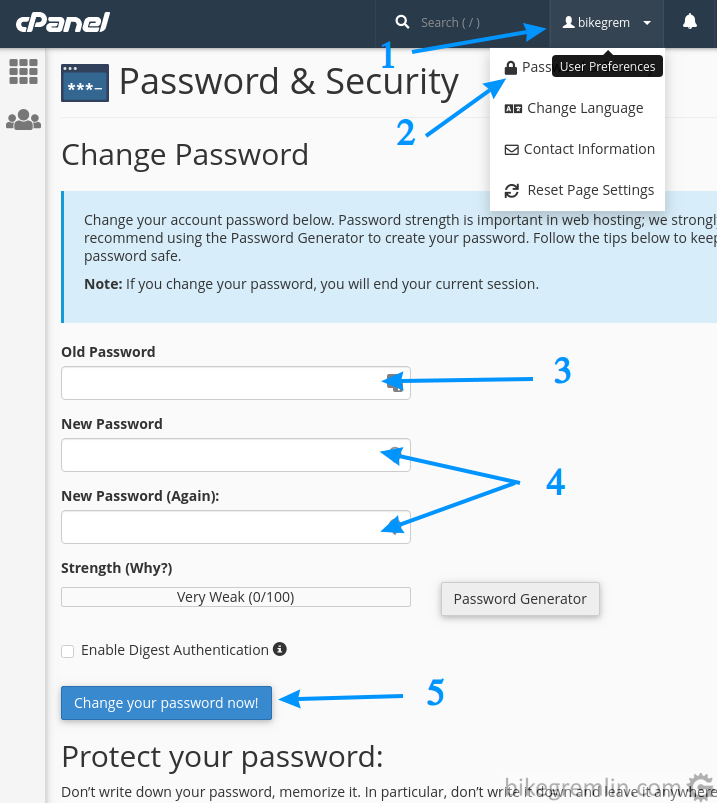
Picture 1
3. Adding (your) domain
Domain you chose when registering will already have been created. It is possible to add an unlimited number of additional domains. Current user interface insists on creating a sub-domain, along with a domain. I don’t know why.
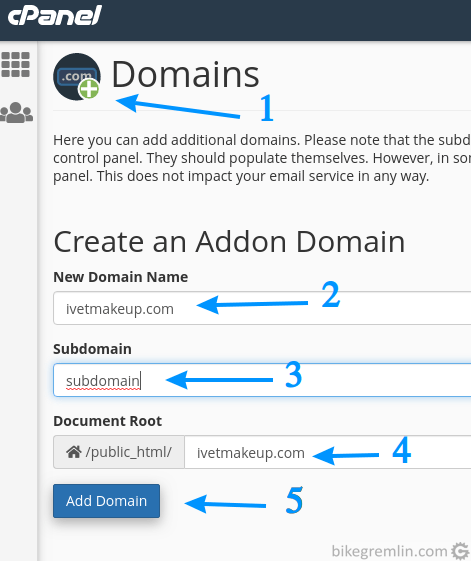
Subdomain has to be added, whether you need it, or not
Picture 2
4. Adding an email address
After you have created a domain for the address, now you can create an address. This was explained in the post about cPanel email setup, but here I’ll give a short overview, without going in details of why is it done that way.
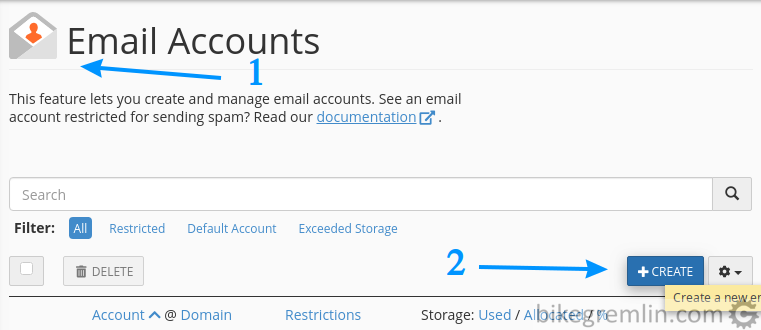
then click “+CREATE” (2)
Picture 3

Choose address and password (2 and 3)
Limit mailbox size (4)
I prefer to check settings from the cPanel, so this is cleared (5)
Click “+CREATE” (6)
Picture 4
Now it’s time to write down all the mail info, so it can be connected with mail clients (Mozilla Thunderbird, Outlook, Gmail…).
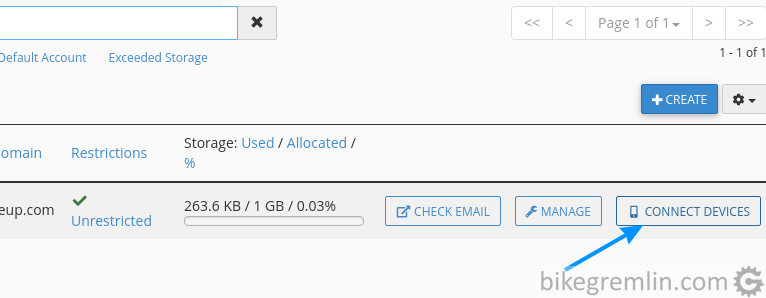
Picture 5
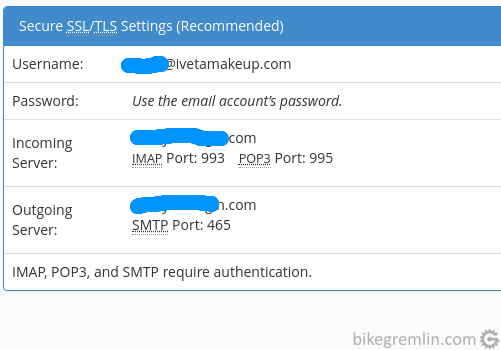
Picture 6
5. DNS setup – IMPORTANT
Instructions given here are of crucial importance for the proper email functioning.
Log into MXroute portal ( https://accounts.mxroute.com/ ).
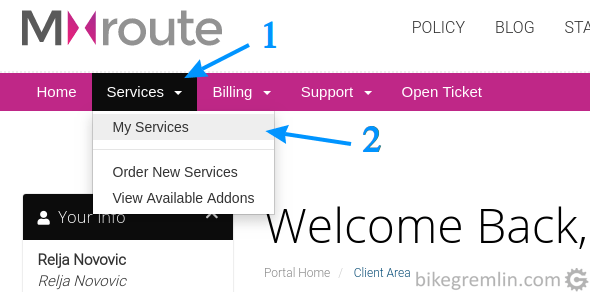
Picture 7
Then, in the services list, choose the one where the email you wish to configure was created in.
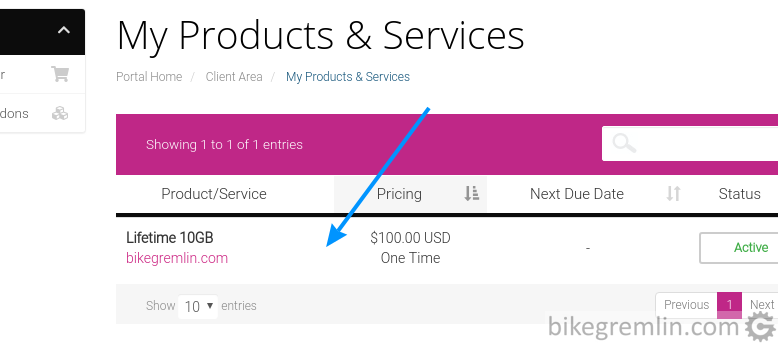
Picture 8
Picture 9
Now it’s time to enter the fields into the DNS. Either within cPanel (or another hosting control panel), or a separate DNS if you are using it. I’m using Cloudflare, so I’ll give instructions for it (general instructions for cPanel mail DNS setup).
In any way, you should log into your domain DNS settings (in this case Cloudflare’s DNS settings).

When done, click “Add Record” (4)
Picture 10
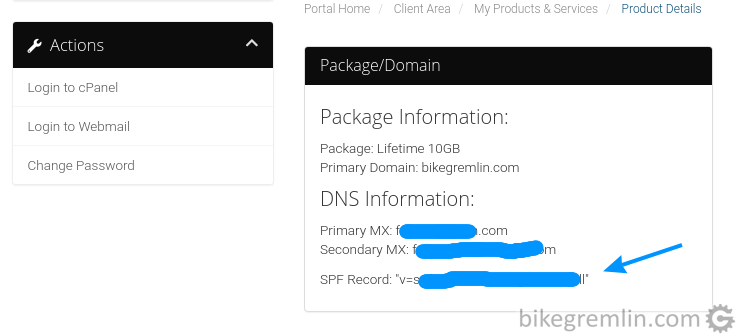
Now you should add Primary and Secondary MX records (from picture 9). When adding these, set priority to 10 for the Primary and 20 for the Secondary MX.
Procedure starts like in the picture 10, only now you should choose “MX” from menu (1), and finally “Add Record (4).
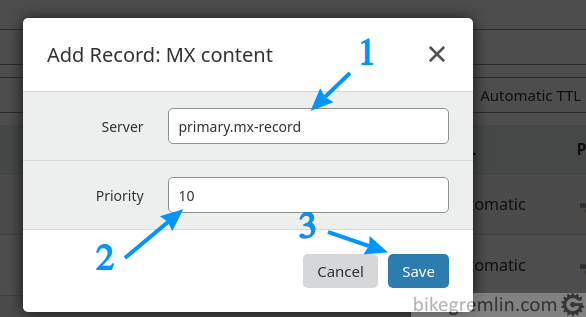
Picture 11
Repeat the procedure for the Secondary MX, with Priority set to 20, instead of 10.
5.1. DKIM DNS setup
If you wish, now you can setup DKIM records (if not using Cloudflare, give it from a few to 48 hours for DNS propagation to take place). Opinions on the DKIM records are divided: everyone thinks they are obsolete and needless, while I think they should be configured. 🙂
To activate this option, go to MXroute cPanel main menu, choose DKIM, then in the menu shown click “Enable”.
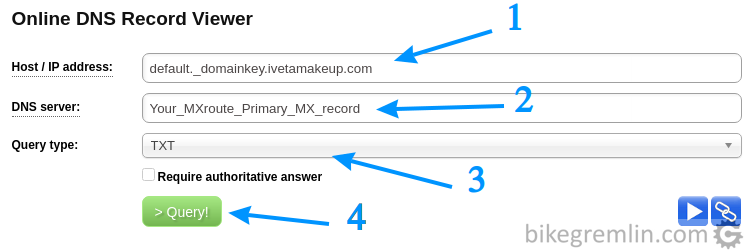
After that, go to: http://dns-record-viewer.online-domain-tools.com
Enter fields as shown in the picture. Host / IP address is: “default._domainkey.YOUR-DOMAIN”, while DNS server is your Primary MX record (picture 9).
Update 2023: for those using MXroute DirectAdmin servers (practically all the new customers), the TXT record should be “x._domainkey.YOUR-DOMAIN” instead of the here-shown “default._domainkey.YOUR-DOMAIN”. That’s nicely and clearly shown in the MXroute server control panel after you log in (see the video in chapter 9 for all the details step-by-step).
Picture 12
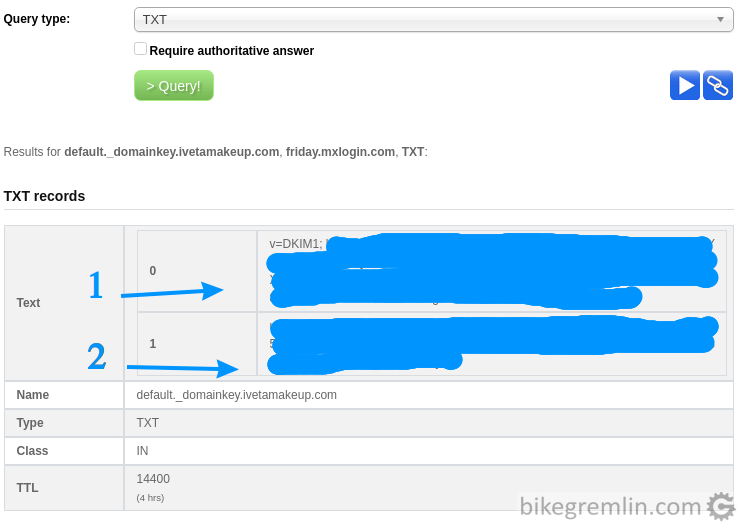
After this, you will get DKIM value in two parts. You should copy/paste both parts in a text editor, so they are “glued” – no adding extra spaces between them, before, or after. Such, merged”, value gives that email’s DKIM record value.
Picture 13
Now this should be added to the DNS as a TXT record.

Mind the full stop “.” after “default” and before “_”. Click “Add Record” (4)
Picture 14
6. Testing – DON’T SKIP THIS
Before testing, especially if you are not using Cloudflare DNS, for faster propagation of the new DNS records, it might help to flush Google DNS cache.
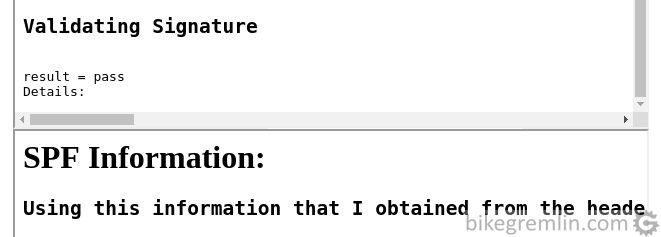
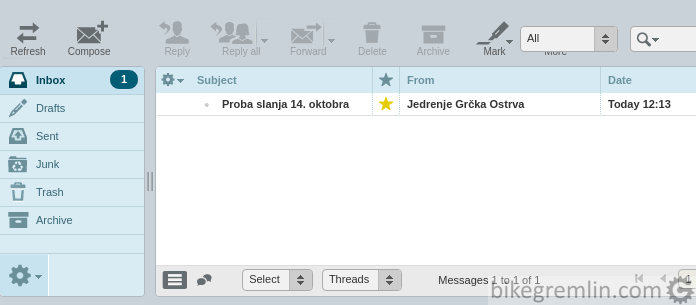
For a start go to https://dkimvalidator.com to confirm it’s all working.
There you will see an email address to which you should send an email to check if DKIM is setup properly. For sending the email you could use webmail from the cPanel, or set up your mail client for the MXroute (explanation how to set Gmail to use domain email address).

Picture 15
10 minutes after sending the email, click “View Results” (picture 15).
Picture 16
Test the email with other tools as well – instructions for email testing.
Mail tester suggested in the above linked post recommended using this DMARC DNS record: TXT “_dmarc” with the value “v=DMARC1; p=none”.
That’s it – you’ve solved most of your email receiving and delivery problems… for a while. 🙂
Don’t send spam, don’t forward emails to other addresses (use integration) and it will all be good.
Set up your website for the email (how to set up WordPress to send emails using SMTP).
7. Spam filter and catch-all email setup
If you want to be sure all the emails received will be downloaded to your mail client (Thunderbird, Gmail etc.), so you can “manually” sort out the spam from the legit emails, spam filters can be disabled to a point. This might be useful for business-crucial applications, where it is better to take some spam, than risk missing a (potential, new) client email. For disabling spam filters, set the options as shown in the picture 17:
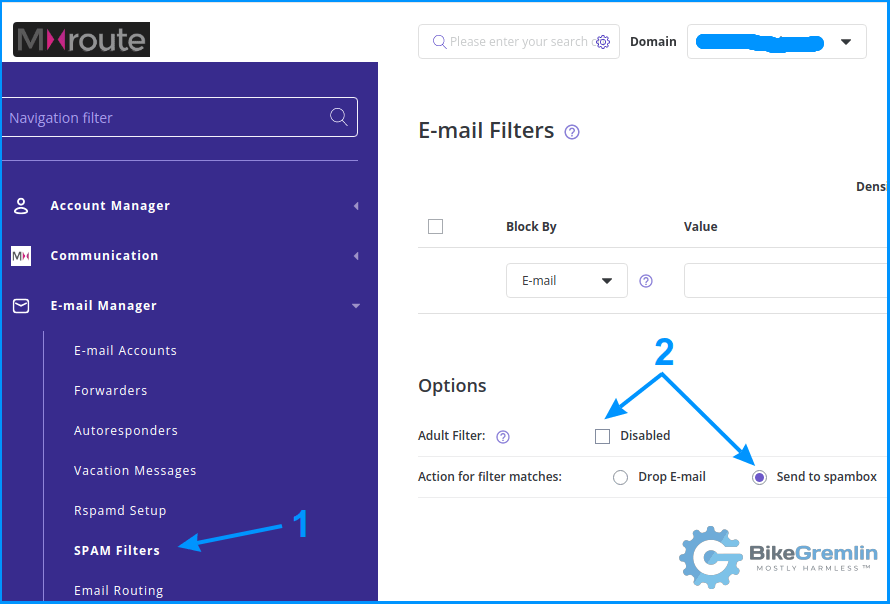
Picture 17
Finer adjustment of the Spamassasin filter is here:
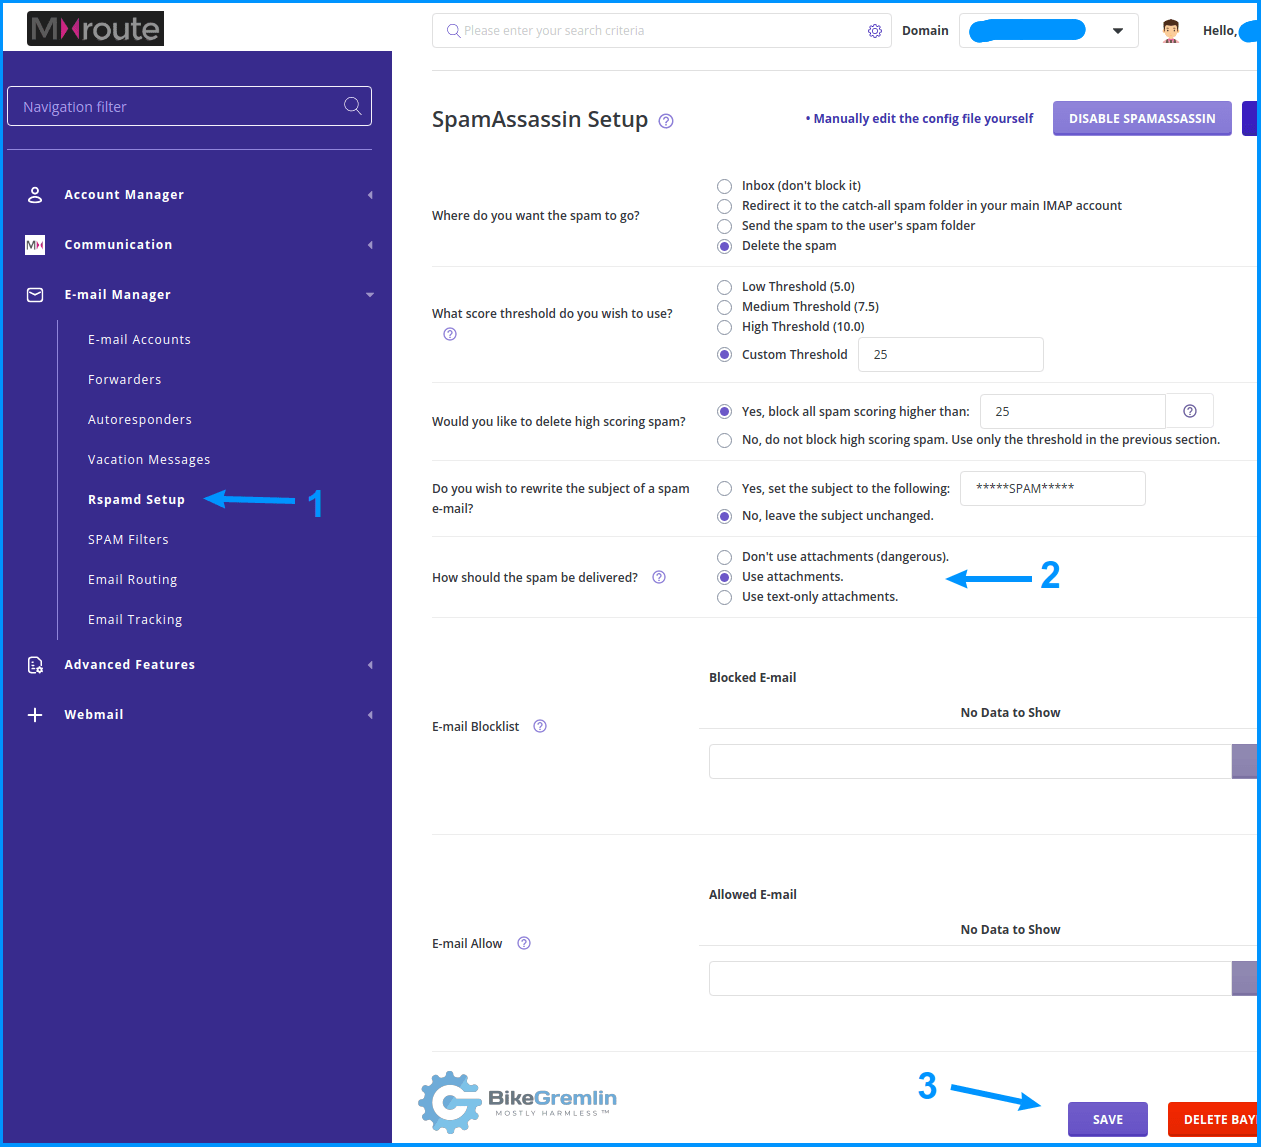
Set everything to your liking (2) and click “Save” (3)
The depicted setup is the default one that works well for me
Picture 17b
If you are using the old, cPanel MXroute control panel, the configuration looks like this:
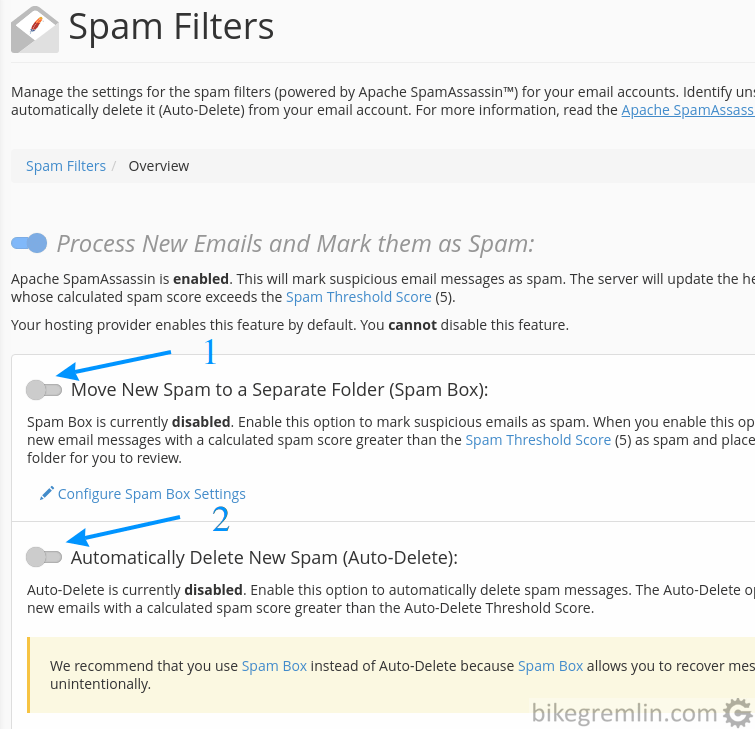
Picture 17c
This setup will be used for all the mail accounts on your MXroute account.
Catchall email setup is used for emails sent to your domain, but to a non-existent address. Like [email protected]. Catchall setup is configured on a per domain level and offer various options. An example of catchall setup is shown in the picture 18:
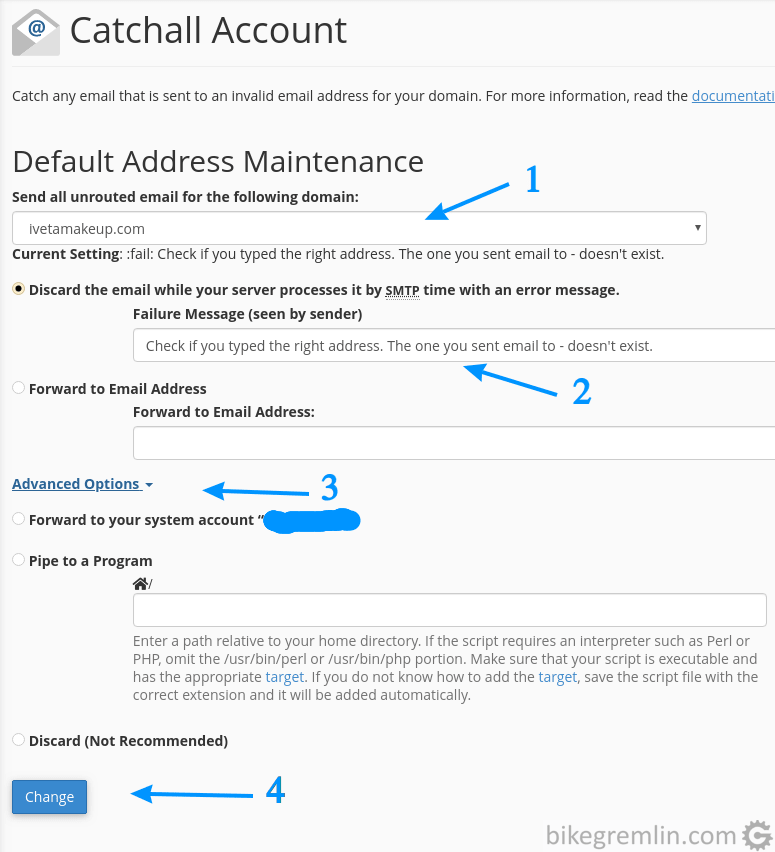
Choose options – I opted for a notification message (2)
You can also set Advanced Options (3)
Finally, click “Change” to save the setup (4)
Picture 18
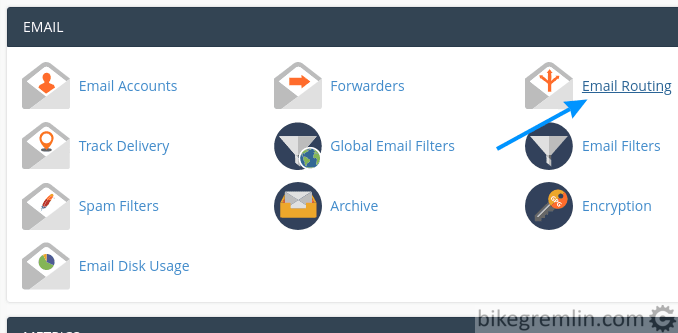
8. IMPORTANT: setup within website hosting control panel
After I’ve set it up all nicely, I noticed one problem: emails sent from websites hosted on the same hosting server were ending up on the local server’s email, not on MXroute. If the email account gets deleted from the hosting server, it’s even worse – emails don’t get delivered at all (bounce).
Picture 19
Louis from MXroute has the solution: setting up mail exchanger to remote. Within cPanel, it is done the following way:
Picture 20
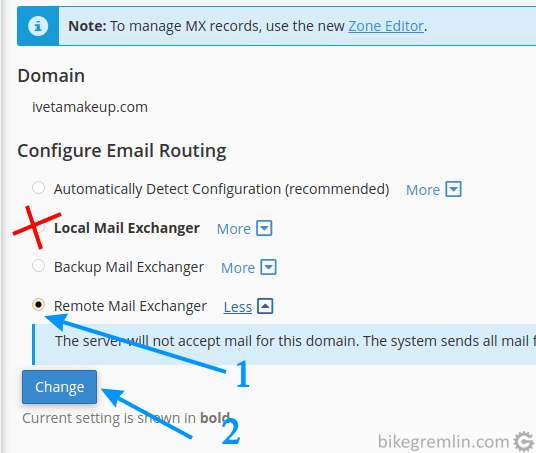
Picture 21
Only after this is a website properly set to use MXroute (or any other external email service – principle is the same).
DirectAdmin setup is a bit different than cPanel:
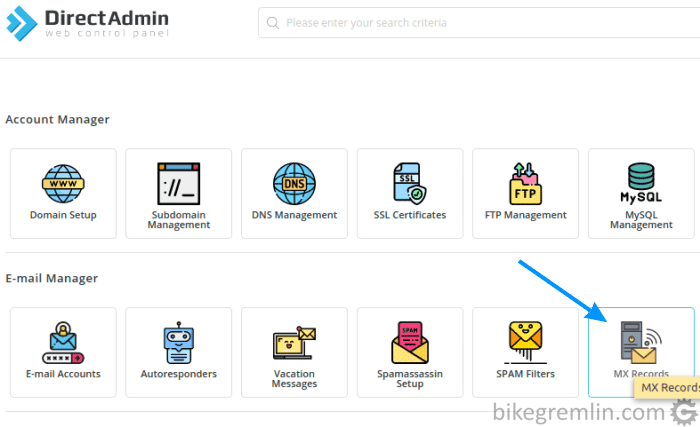
Picture 22
Then you need to change options, edit the MX record (if one exists) and add the second MXroute MX record:
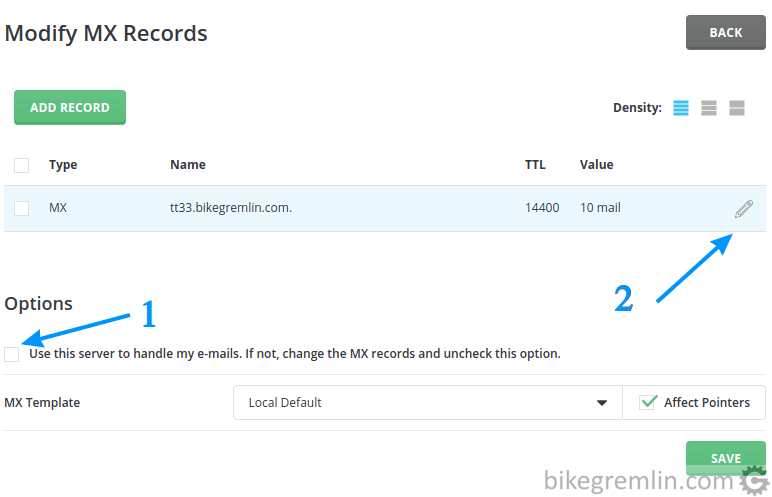
Picture 23
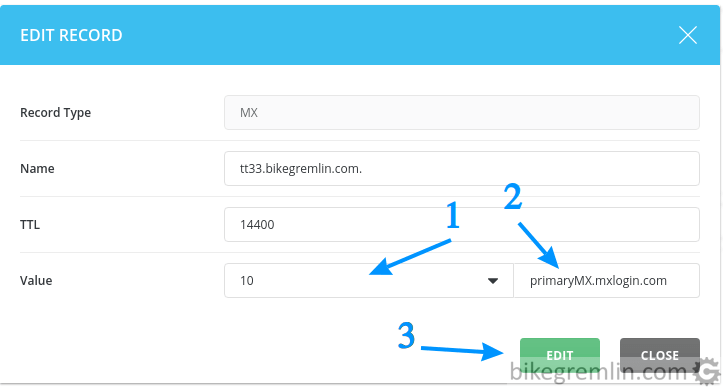
Picture 24
Add a dot (” . “) at the end of the mail server name (“primaryMX.mxlogin.com.” in this case). Otherwise, your domain might be appended to the mail server, resulting in a malfunction (like “fridayMX.mxlogin.com.tt33.bikegremlin.com”).
After this, click on “ADD RECORD” (shown in picture 23) and enter the values for secondary MX (its Value is 20).
9. VIDEO demonstration of MXroute configuration
I’ve made a video demonstration, showing how to buy and secure an MXroute account, how to configure all the relevant DNS records for your email to work properly, and how to prevent your email from being spoofed:

Hi there,
Terrific guide, thanks!
I got a question for you regrading the DKIM DNS setup.
In this guide the host to be used is “default._domainkey.YOUR-DOMAIN”,
however from the MXroute tutorials is “x._domainkey.YOUR-DOMAIN”
I don’t know if this could cause problems for some users?
Cheers,
Carlos
Hi Carlos,
That’s a good question and I should update the article.
The current MXroute infrastructure (i.e. all the newly-provisioned systems) uses DirectAdmin, and requires the use of the “x._domainkey.YOUR-DOMAIN” format. That’s now nicely shown in the MXroute control panel. Using the “default._domainkey.YOUR-DOMAIN” format will not work properly in that case (vice-versa goes for those using the cPanel infrastructure).
I’ve made a video (embedded in chapter 9 of this article) that shows the procedure using the DirectAdmin interface.
Relja