In this post I’ll explain what SendGrid service is and how to set it up to send emails from your domain. I’ll also write a few words about my experience with their free service.
Note:
Currently, I’m not using, nor do I recommend SendGrid. Nonetheless, the procedure explained in this tutorial is basically the same with most other similar mass-mailing services.
Contents:
- What is SendGrid?
- My experience with SendGrid
- Validating SendGrid to send emails from your domain
- Set up mail address for sending
- Sending mail using SendGrid
- Conclusion – final notes
1. What is SendGrid?
It is a service (SendGrid website) for email delivery. Made by the same company that created Authy (more on that in a separate post) – Twilio. In addition to allowing email delivery tracking, it is intended for making mailing lists and maintaining them. Maintenance basically boils down to automatically removing bouncing email addresses (the ones to which emails don’t get delivered, for any reason). This helps keep your domain (and IP address) off any spamer blacklists – for sending emails to addresses that don’t exist, or don’t want to receive (block) your emails.
If you have a huge mailing list, manually maintaining and updating it can be tedious.
A separate post explains (WordPress) mailing list creation.
2. My experience with SendGrid
I tested their free package. I’ll start with the bad:
- The free package uses a “shared” IP address with other SendGrid users and those addresses were on several black lists whenever I tested. Private IP address is available starting with the “Pro” package, that costs from 80 $ per month!
- Technical support (at least for the free package) is not of much use. For a particular question/problem, I had to contact MXroute tech. support (MXroute are budget email provider that state there is no classic tech. support, but it is mostly community driven, yet it works very well – at least from my experience – ironic isn’t it?).
- They are expensive. Free package is limited to 100 emails per day. Also, dedicated IP address (without which it’s practically pointless) costs from 80 $ per month, as mentioned.
- There is no option for creating double opt-in mailing lists using this tool (so that subscribers can confirm they control the subscribed email address and that it exists, as well as that they weren’t subscribed by someone else typing in their email – this saves you from entering spamer blacklists). For creating mailing lists, you’ll have to use another tool.
The good:
- From the users of the high tier packages I’ve hear only praises (take this with a grain of salt, until I personally test it, it’s still hear-say).
- Very good tools for tracking email deliverability.
- Automated mail list maintenance – removing bounced email addresses automatically, for example.
- Can be connected with other applications using SMTP settings, or an API key.
- Offers nicely structured statistics.
- It works well. Of course, if you use a shared IP address that is on black lists, emails will end up in spam folders, but it’s not “directly” SendGrid’s fault.
3. Validating SendGrid to send emails from your domain
I’ve already explained DNS settings for email. In this tutorial, I’ll go with the more complicated option: that you are already using another email service, while SendGrid is used for mailing lists alone.
First thing to do is to add sendgrid.net to the existing SPF record. Picture 1 shows an example:
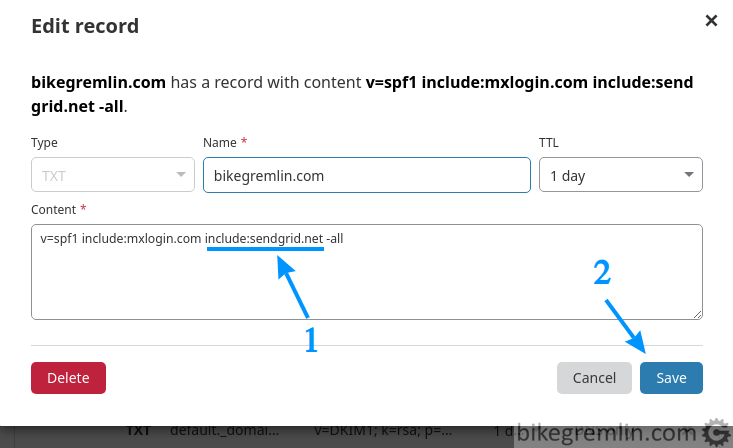
Picture 1
As you can see, I’m already using MXroute. If I weren’t, the record would be the same, but without the “include:mxlogin.com” part.
SPF record is TXT type. Format suitable for copy/paste:
v=spf1 include:existing-mail-service.com include:sendgrid.net -allNext step is authorizing SendGrid for your domain, so the recipients (spam filters) know it’s legit:
Log into your SendGrid dashboard and choose options from the main menu, as shown in picture 2:

Picture 2
Then choose your DNS host (1 in picture 3), or the last option “Other Host (Not Listed)” if that is the case. In this example, I’m using Cloudflare.
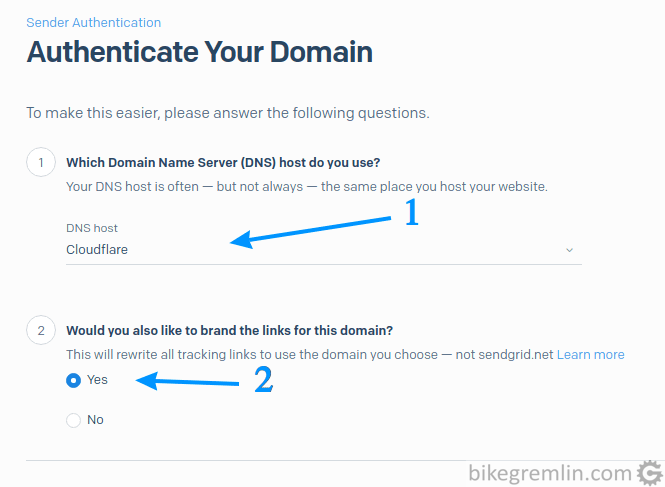
Picture 3
Next step is entering your domain name and the method for DKIM validation. Since I am using MXroute mail service, with a set DKIM, I chose the fourth option – otherwise you could choose the first listed checkbox:
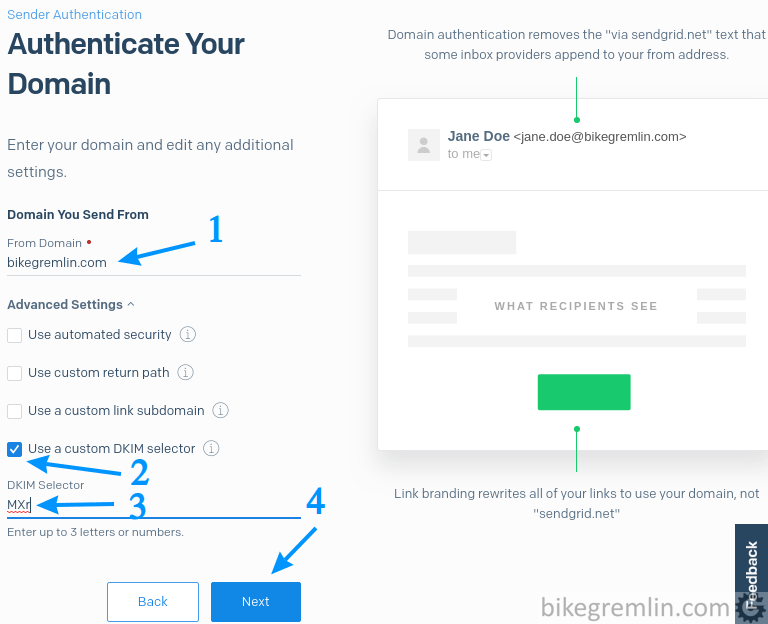
Choose DKIM validation (2)
Name the DKIM selector (3)
Click “Next” (4)
Picture 4
Finally, you’ll get a list of MX, TXT and CNAME records to add in your DNS:
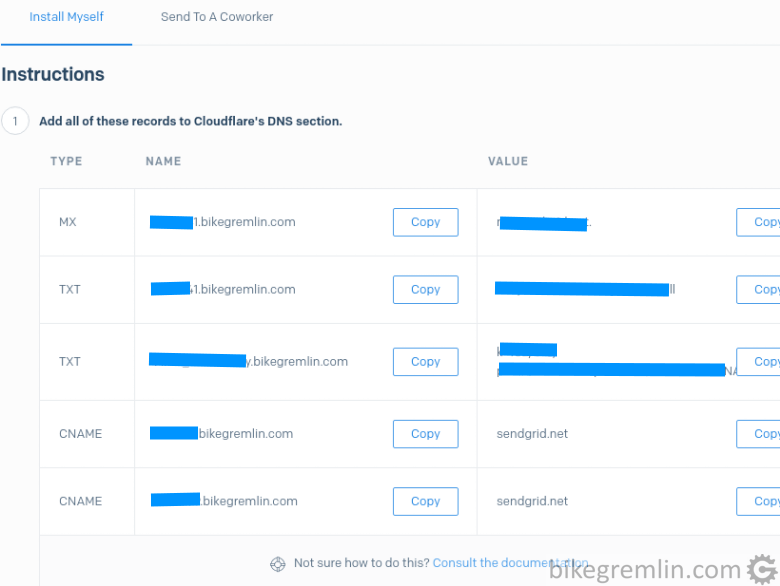
Picture 5
After you’ve added all the records, tick “I’ve added these records” and click on “Verify”, in the bottom right corner. Just make sure to put “grey cloud” for the SendGrid CNAME records if using Cloudflare, so they aren’t behind Cloudflare’s firewall.
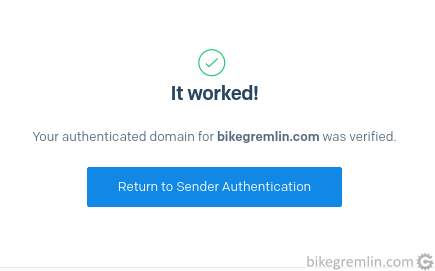
Picture 6
And that’s it. Your domain is ready for sending emails using SendGrid.
4. Set up mail address for sending
Now it would make sense to create an email address for sending. This is done the following way:
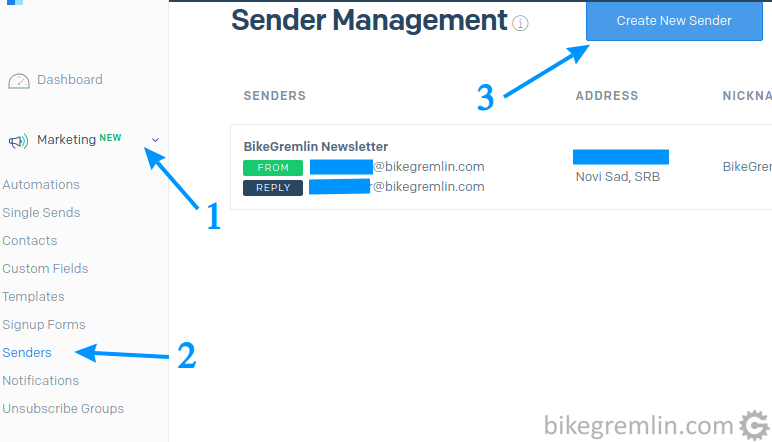
Picture 7
Next step is creating a sender. For example, we’ll make a test I/O Gremlin account:
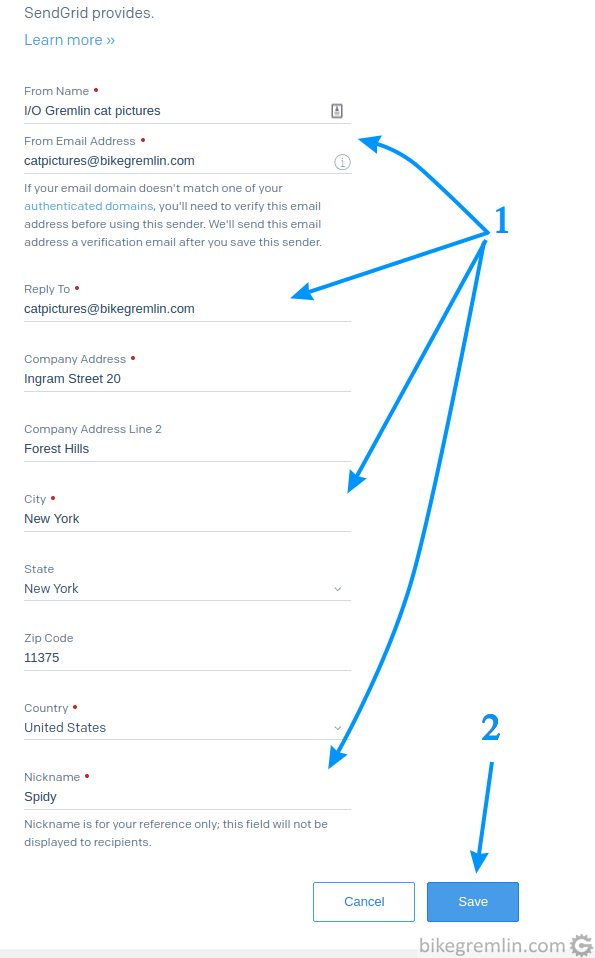
Picture 8
It is advisory to use an existing email address by which people can contact you.
5. Sending mail using SendGrid
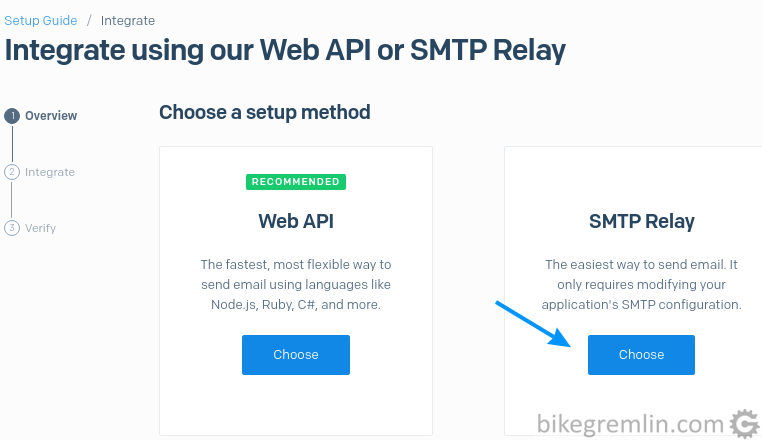
SendGrid offers good integration with applications and mail clients. It is integrated using the “Setup Guide”. For this example, let’s create a SMTP integration (how to setup WordPress for SMTP mail sending).
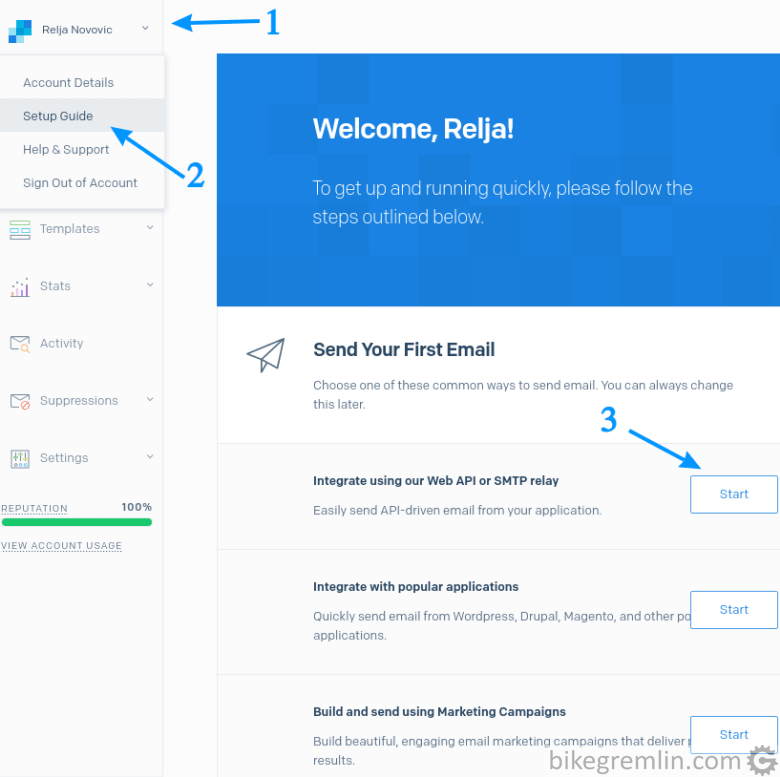
Picture 9
Picture 10
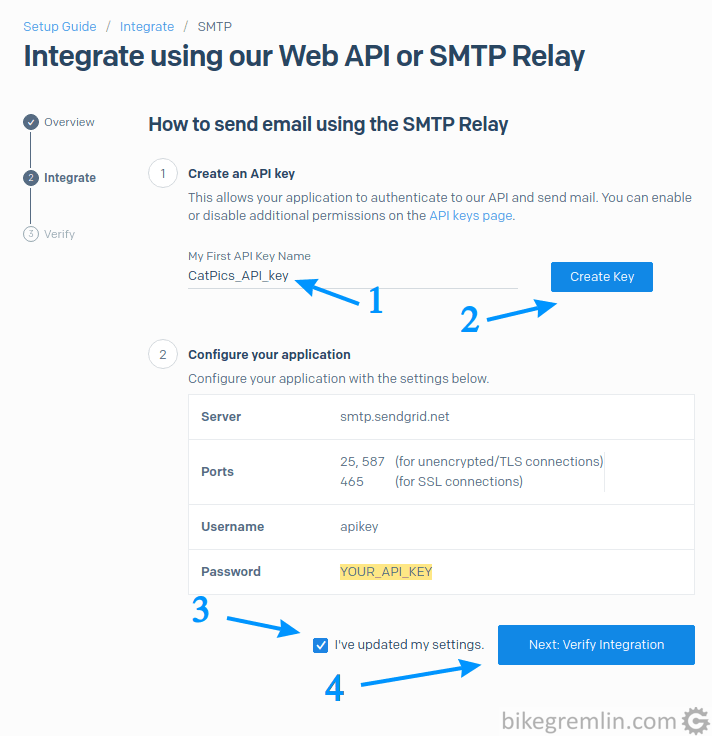
Click “Create Key” (2) – new key will be created and automatically entered in the “Password” field.
Check “I’ve updated my settings” (3) – don’t forget to set your mail client with the newly acquired data.
Finally click on “Next: Verify Integration” (4).
Picture 11
Write down the SMTP server info for future reference (Server, Ports, Username and Password).
Now you will get a new screen. After you successfully send an email with the new settings, click “Verify integration”. Best send to your existing email address and wait for the message to arrive.
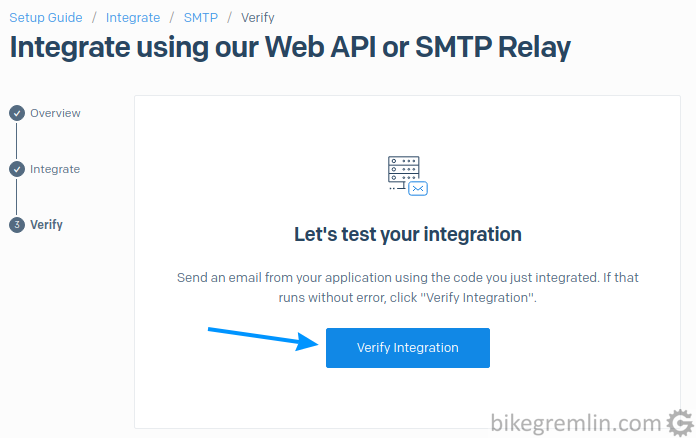
Picture 12
6. Conclusion – final notes
That’s it. Ready to send. However, for creating good quality mailing lists, you need a solution with a “double opt-in” subscription.
Personally, for sending email, I’m sticking with the tested and reliable (and cheap) MXroute, while considering SendGrid for what it’s intended – sending and maintaining (large) mailing lists.
