As a happy user and reseller of MXroute’s service for many years, I’m writing this both as my reminder/notes, and as a help for other resellers (MXroute company is free to re-publish this in its entirety or edited to their liking – it’s my way of contributing and thanking for the awesome service).
This is a work in progress. The last-updated date should be listed at the very top and bottom of this article, and I do try to keep all my articles correct. For any questions, additions or corrections, please use the bikegremlin.net forum (so everyone can see my blunders 🙂 – and the comments & replies).
0. Before you start
No one, including me, was born knowing this, so it’s worth mentioning:
get a good password manager (KeePassXC is pretty good).
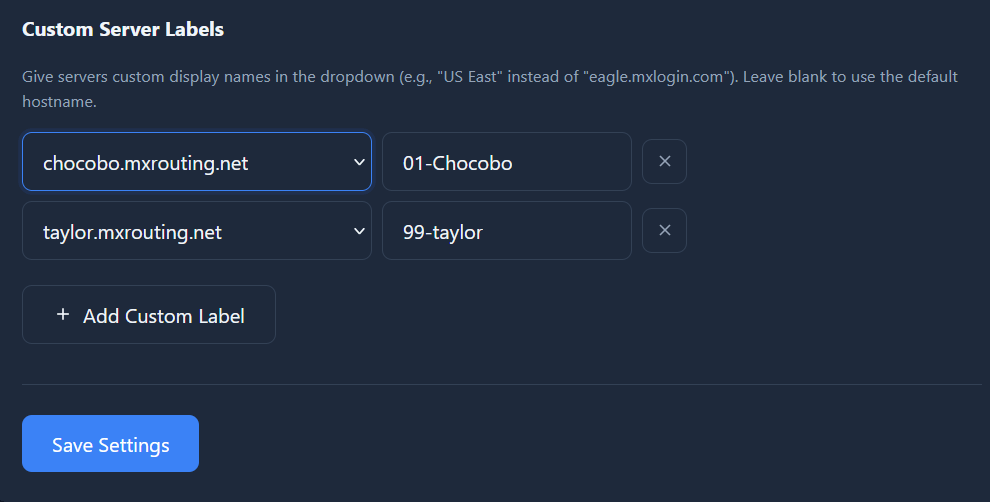
My application stack – security section.
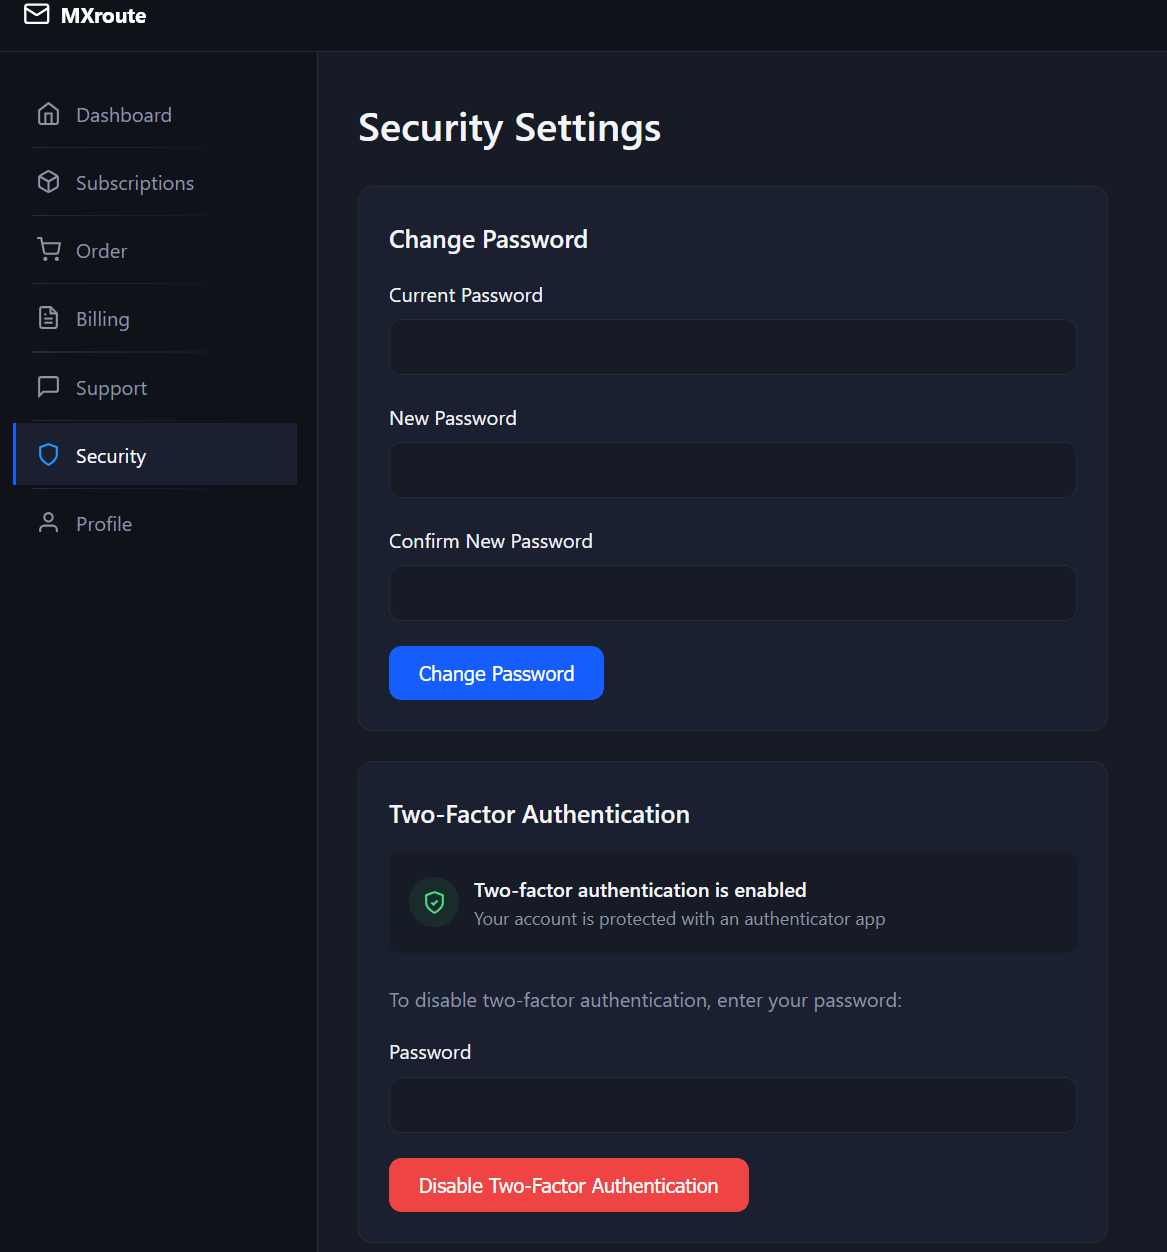
This should help you set long, uniquie and complex passwords. I would also recommend enabling 2FA for your main account(s) at least.
Can’t keep your customers secure if you aren’t secure to begin with!
You can edit the password and enable 2FA from the MXroute’s main control panel‘s “Security” section.
Picture 1
Click on the image to ENLARGE it
1. Starting – The main control panel
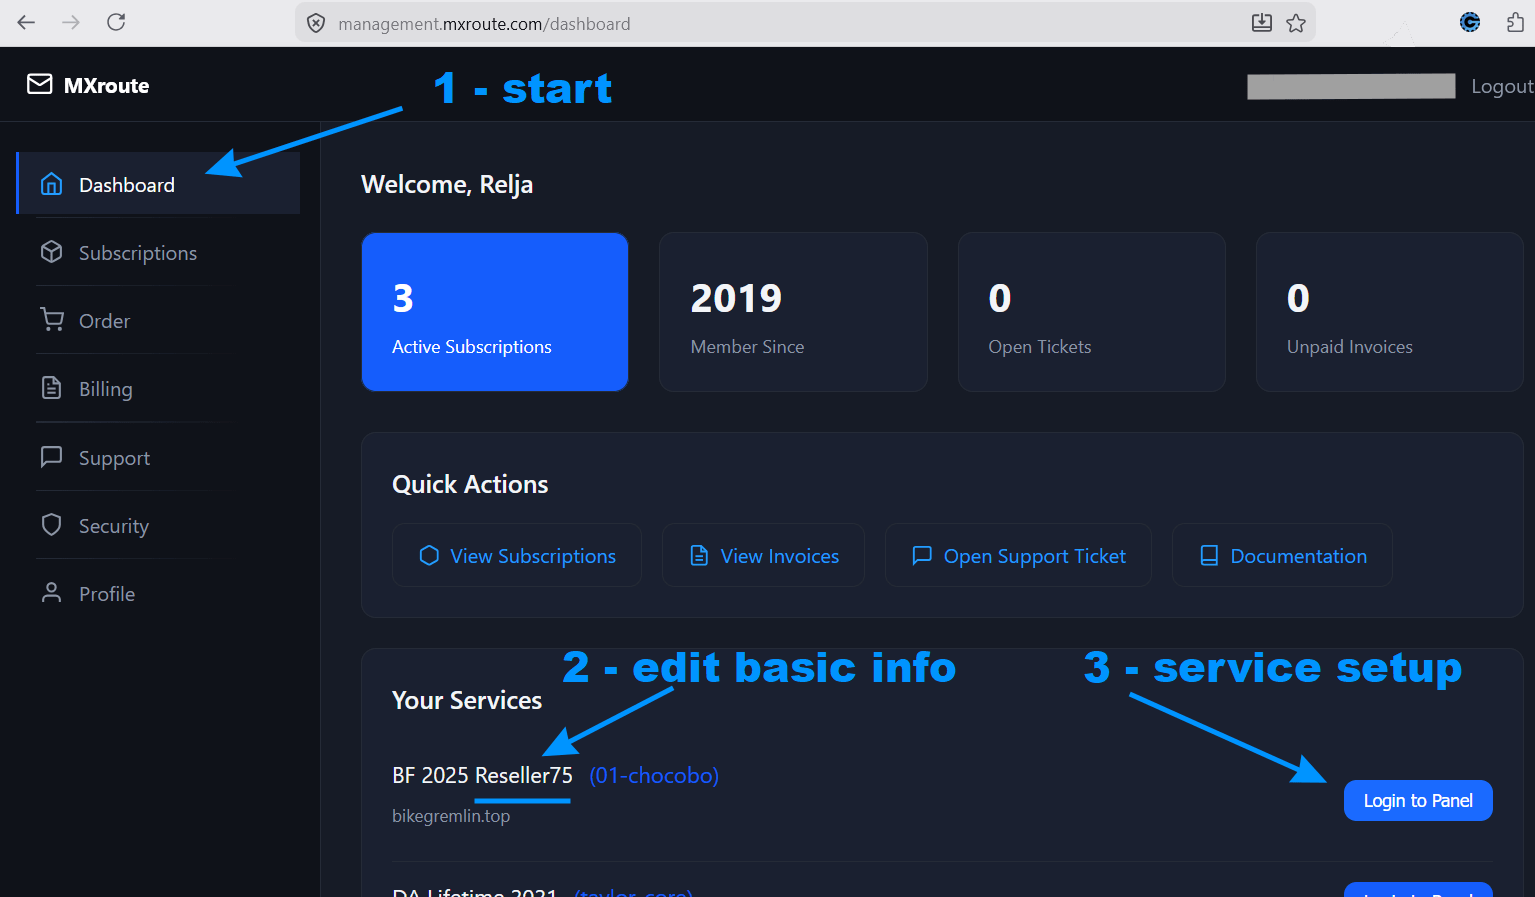
Main control panel’s Dashboard is where the setup starts:
management.mxroute.com/dashboard
Picture 2
Click on the image to ENLARGE it
Clicking on your reseller account (point 2 in picture 2 above) lets you edit its basic info:

Picture 3
Now you can click on the “Login to Panel” option (point 3 in picture 2) and configure your reseller service.
2. Reseller settings
Once you’ve logged into the panel, you’ll see two main menu items: “My Account” and “Reseller“.
2.1. “My Account” section
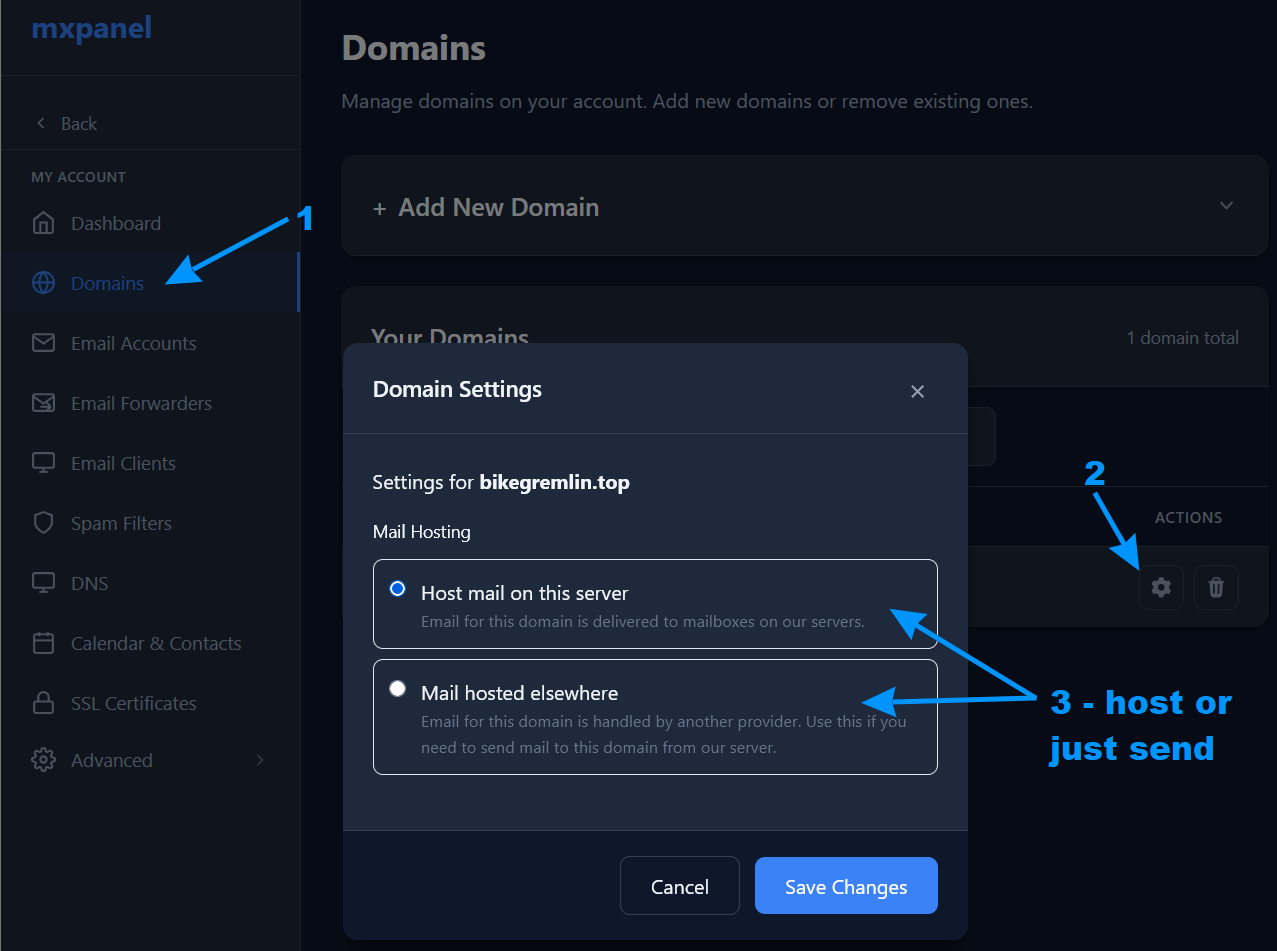
You can configure your domain and email account – but you don’t have to do this. I did it, and the screenshot below should give you the basic info.
It is quite intuitive – and does let you choose whether you wish emails to be delivered to your reseller server, or hosted elsewhere (enabling you to use this server just for sending):
Picture 4
I won’t go into details of how to create an email account – those are more fitting for a user-centred article (this one is primarily intended for resellers).
2.2. “Reseller” section
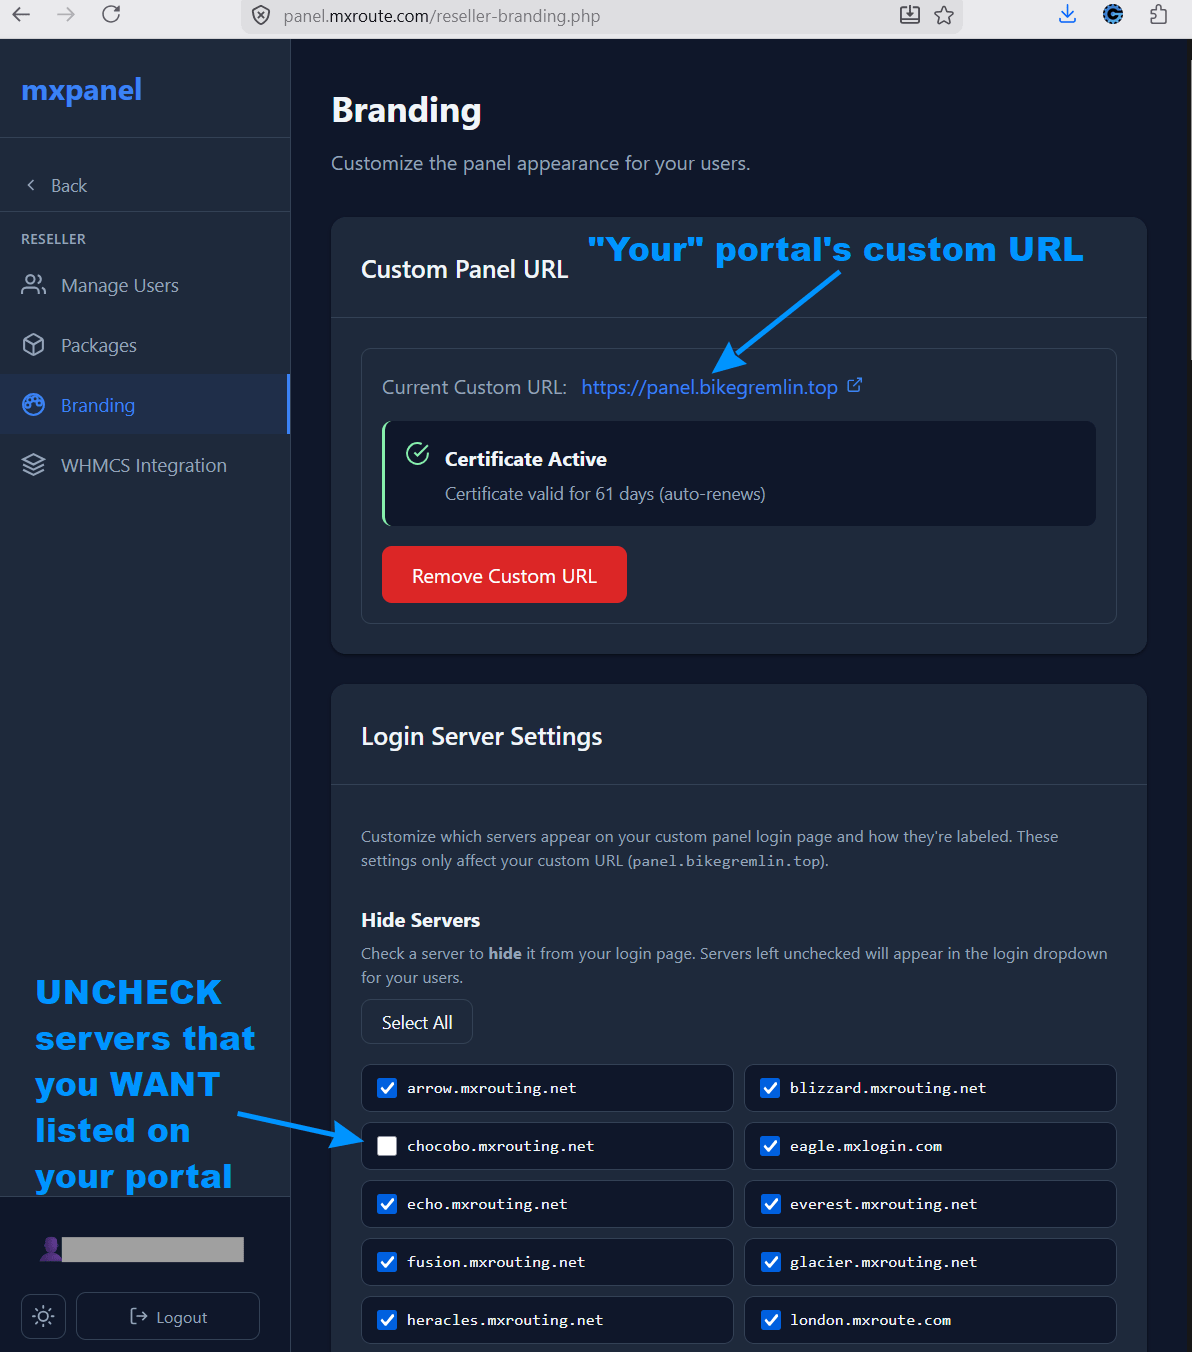
“Manage Users”, and “Packages” options are quite intuitive and I don’t think they need much explanation. I will focus on the “Branding” options.
For the below-shown branding options to work, I first had to set my DNS records (I use Cloudflare for DNS – disabling its proxy setting):

Picture 5
I chose panel.bikegremlin.top as my customer-facing panel address (and set “mail” and “webmail” for respective email options, but that is more relevant for emails, under the “My Account” section, not for reseller in particular).
Picture 6
Picture 7
Custom DNS options below this are what I did not touch – life is simpler that way. Panel branding, below these, is simple and intuitive – you pick a design that suits your brand.
Conclusion
I hope this helps – if you have any questions, post a question on the BikeGremlin.net forum (in its “Computers & IT” section of course 🙂 ).
Last updated:
Originally published: