
Articles in this series, by “logical” order:
- [01] GPS, GSM, WiFi, Bluetooth, FM, Internet
- [02] Mobile phone GPS navigation – basics
- [03] OruxMaps installation and initial setup
0. Introduction
OruxMaps is still a free application – but you can pay for it as well. There are two ways to install it:
- Using Google Play store. Which offers a simple installation, but you have to pay in that case.
- Directly downloading it from oruxmaps.com website. You need to install it manually, but this way you get a completely free version.
This, second, procedure is explained in this artcile, as initial OruxMaps application setup. Briefly:
1 Download apk installation file.
1b On some smartphones you will need to re-name the downloaded file to have the apk extension.
2 Start apk installation file and allow it to be installed within the smartphone options.
3 Configure smartphone so that OruxMaps application is not used in a battery saving mode.
1. Downloading apk OruxMaps installation file
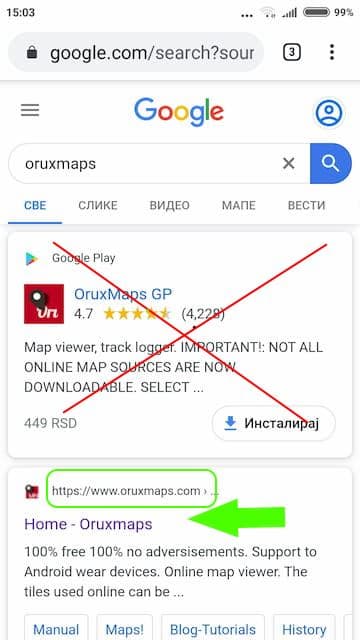
Application can be installed using Google Play store, but there is the version that is paid for.
If you do a Google search for “OruxMaps”, you will get the first result pointing to Google Play store, followed by a link to the OruxMaps authors website where you can download the apk installation file.
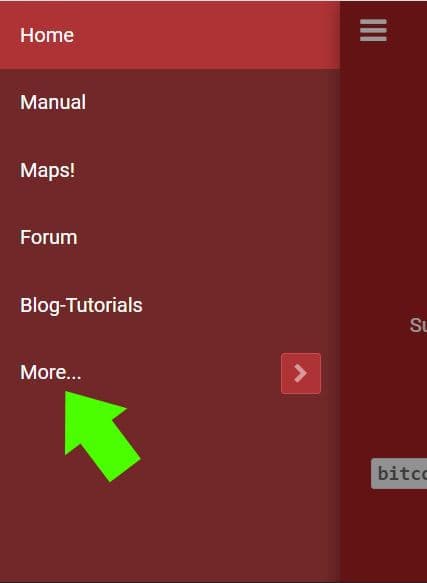
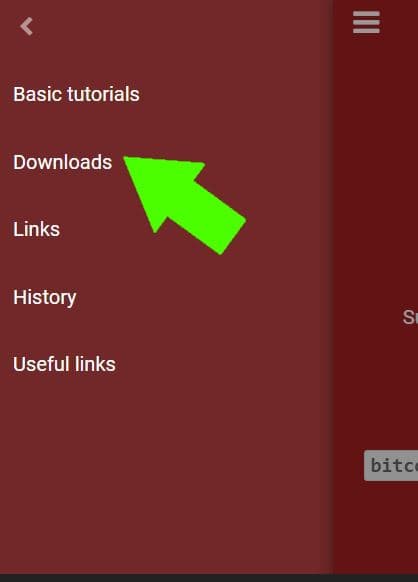
On oruxmaps.com website, click on “More”, then on “Downloads”.
Note: the website might ask you to turn off your browser’s AdBlocker, if it is enabled, because (like this website), it is financed using Google AdSense adverts (only I don’t like bothering people to turn off the AdBlocker, if they don’t want to 🙂 ).
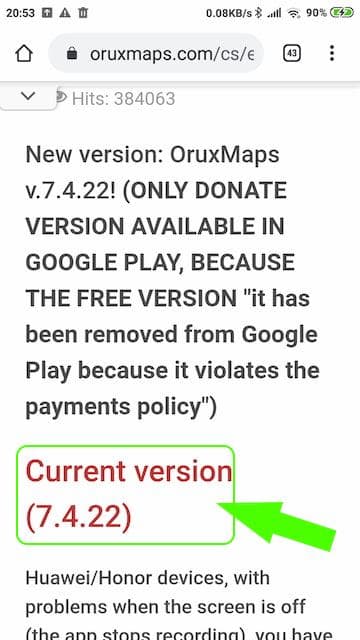
On the Downloads page, choose the current, up-to-date version:
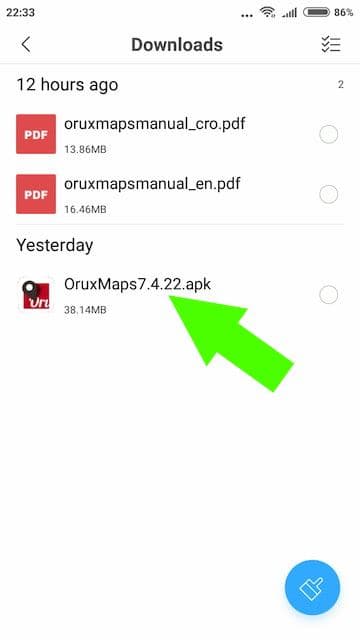
Everything downloaded to a smartphone this way is saved in the folder “Downloads”, where the just downloaded file can be seen. Picture below clearly shows the downloaded file named OruxMaps7.4.22.apk – and that file should be clicked on.
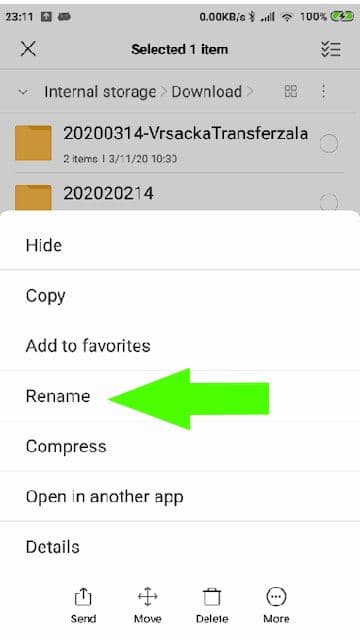
It can happen that the downloaded file is saved under a different name that doesn’t have the apk extension, which is the extension that lets the operating system know that it is an application installation file. If that happens, the file needs to be renamed. It doesn’t matter how you name it, as long as the extension is .apk
For example: “OruxTemporary.apk” is perfectly fine. After the installation, the file can be deleted anyway.
The screen options for renaming a file can differ from one phone model to the other. Either way, you need to run some kind of File Manager application (most phones have some) and choose the “Rename” option.
2. Installation
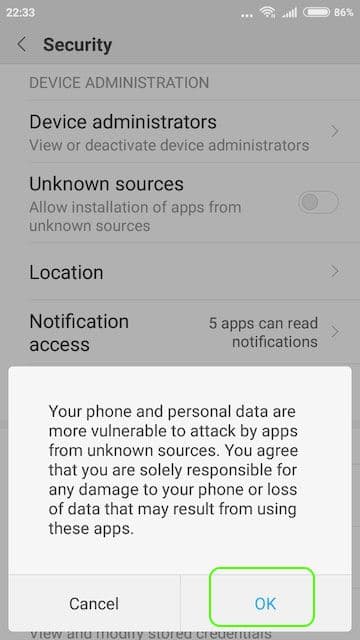
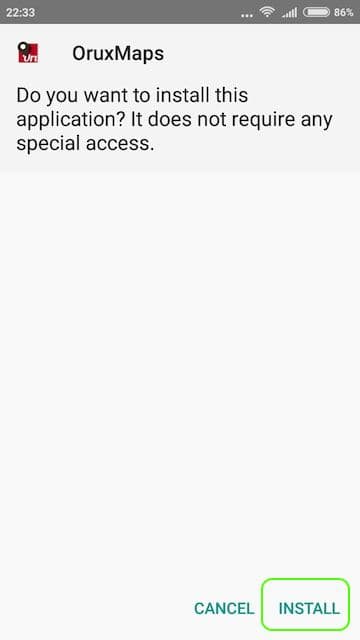
Phone’s operating system considers such manual application installation to be risky, by default (which generally speaking is correct, but in this particular case we know exactly what we are doing). So the operating system won’t let us install the application unless we allow that in the phone’s settings.
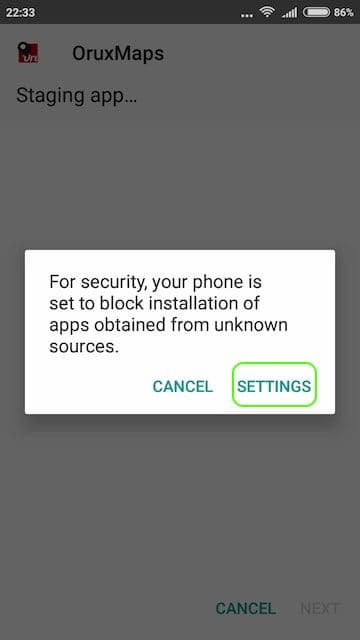
In Security options, we’ll allow the installation from “Unknown sources”. After the installation is finished, this option can be disabled, for security reasons.
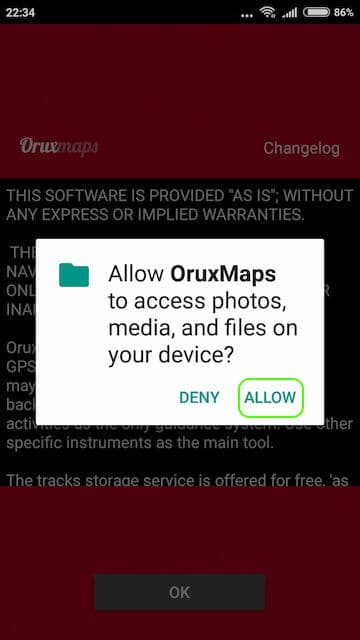
Next step in any application installation is allowing it the use of the resources it needs access to.
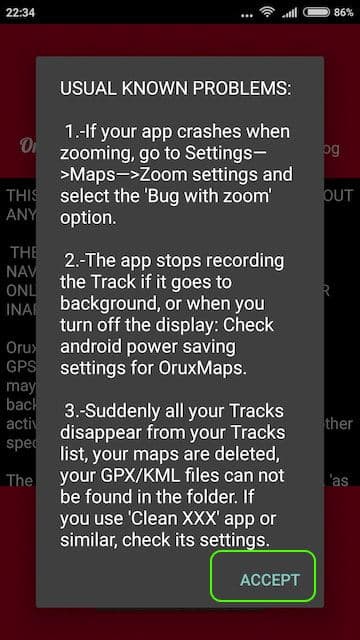
Initial OruxMaps application start gives a welcome screen, with warnings about some of the common problems. We will later pay a bit more attention to the item number 2.
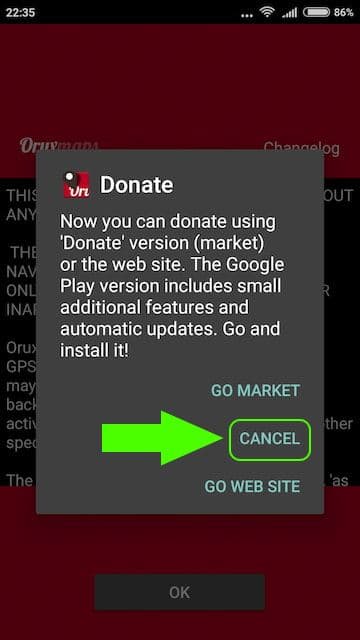
After that, we get to choose whether we will donate some money to the authors (we don’t have to), or use the application completely free.
3. Initial OruxMaps configuration
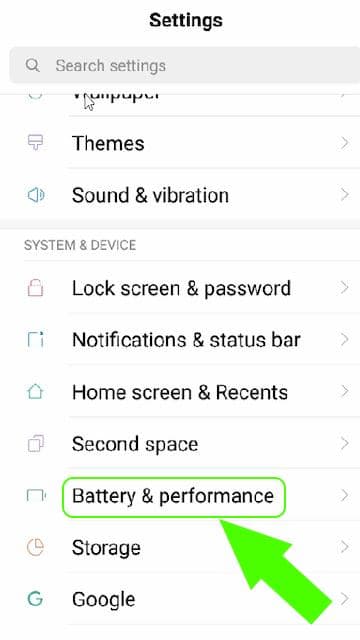
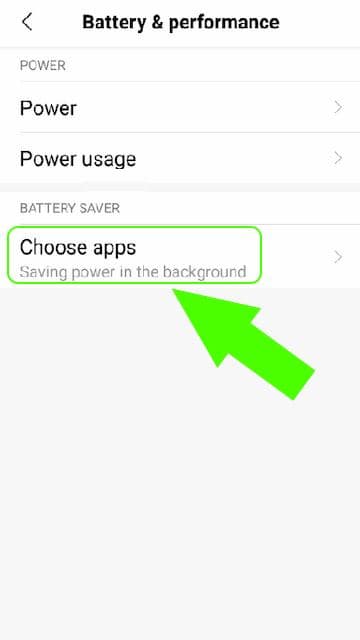
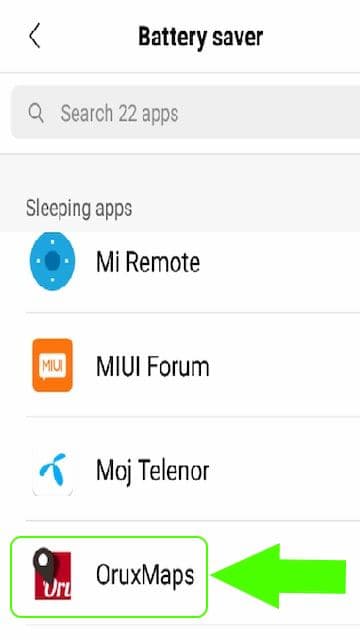
Right after OruxMaps installation, we got the warning note 2 that says to make sure Orux is excluded from the list of applications that use battery saving regime. What does this mean?
Phones have a battery saving option, that disables applications when they are in the background. For applications that need to record every (way)point of our journey, this means they have the information about the last point before they went to the “background”, and about the first point they can record after we “wake them up”, resulting in a straight line connecting the two points, with no recorded points in between. GPS receiver could have been working correctly all the time, but the application had no access to that information, because it was blocked by the operating system, in order to save battery power.
So we need to disable the battery saving option for the OruxMaps application.
(On the first occasion, we’ll ask for a million dollars from Telenor for this brilliant advert 🙂 )
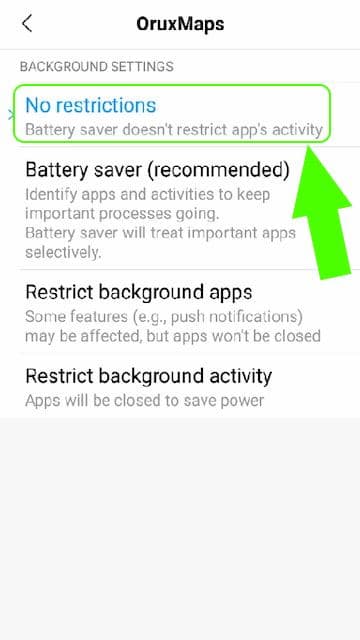
And that’s it – OruxMaps is installed and ready to go! 🙂